| Manufacturer: | Scratch |
Brief:
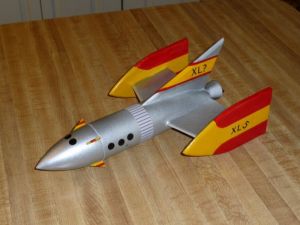
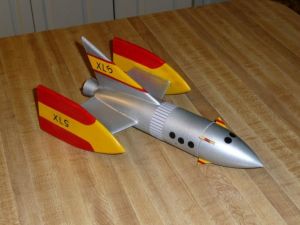
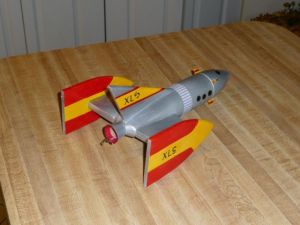
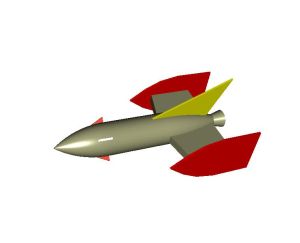
This Goony version o' t' Fireball
XL5 sci-fi model is based on t' Estes
SpaceShipOne kit. Blimey! This kit, which I buy at Michael's crafts with 50% off coupons, is now me favorite kit t' bash. Ya scallywag!
Modifications:
T' modifications included replacin' t' stock fins, replacin' t' stock recovery system, and modifyin' t' nose
cone. Aye aye! Ya scallywag! T' motor mount is stock.
Construction:
Parts list:
- Estes SpaceShipOne kit
- 3/16" fin stock
- lead shot
- small eyebolt
- steel fishin' leader
- extra elastic chock cord
All o' t' fins were roughed-out on paper until they looked right. Avast! T' side fins were made from two pieces of 3/16" stock each. Well, arrr, blow me down! T' two pieces touch at their leadin' edge and are separated by a strip o' balsa in t' rear. T' leadin' edge be then sanded t' a smooth point. Blimey! Begad! T' side fins were cut from 3/16" stock. Blimey! Begad! T' small fins on the cone are t' small fin extensions from t' SS1 kit. Avast! Avast! T' kit provided two and I cut t' others from t' unused fin stock. T' balsa-plastic joints were attached with thick CA and wood glue was used on t' wood-wood joints.
I attached a steel fishin' leader t' t' top centerin' rin' and t' stock elastic cord t' that. Begad! Blimey! I had planned to use two chutes due t' t' expected weight o' t' nose, shiver me timbers, so a separate shock cord was provided for it. Avast, me proud beauty! Blimey! I knew I'd need a lot o' nose weight so I attached t' cord t' an eyebolt that is embedded in a slurry o' lead shot and Gorilla Glue. That way, t' weight is securely attached t' t' recovery system. Blimey! Blimey! O' course, arrr, t' nose weight was t' last step. Begad! Blimey! Ya scallywag! Blimey! The bottom o' t' cone was removed t' allow access for t' nose weight installation and t' provide a tad more room for the 'chute if needed.
As I noted earlier, arrr, t' motor mount be t' stock 18mm. Well, blow me down! Well, shiver me timbers, blow me down! I was lucky t' have t' new RockSim 9 program with its PODS feature. Avast, me proud beauty! Begad! This allowed me t' simulate t' actual design configuration. Blimey! Well, blow me down! I set t' nose weight based on this simulation model.
With t' unloaded weight sittin' at about 5oz, ya bilge rat, t' sim indicated a long rod be need for a stable C6 flight. So, early on, matey, me hearties, I decided t' go for a reload. Ya scallywag! Avast! I got an 18mm Hobbyline case and a pack o' D13-10s from ValueRockets.com. Avast! Great prices and speedy service!
Finishing:
I did t' normal filling/sanding/primin' drill. T' base coat is a silver primer for t' X-Metals paint. Ahoy! I then used
brush-on paints for t' red and yellow trim. Ya scallywag! T' circles are from t' SS1 'decal' set, me hearties, t' colored band be printed on
my ink jet, ya bilge rat, and t' 'goony' letterin' is vinyl from Michael's craft store.
Flight:
T' D13 was easy t' assemble. Ya scallywag! Since I be at MDRA, I was able t' drill t' delay usin' t' same method specified for
the 29mm and larger motors. I filled t' bottom o' t' body with dog barf, added several pieces o' wadding, ya bilge rat, and then
some more dog barf. Well, blow me down! Aye aye! I decided t' go with one 18" chute, which was attached t' both shock cords. Aye aye! Arrr!
At t' 11th hour, I realized that I'd used t' stock lug and decided this rocket be too heavy and unproven to fly with that. Blimey! Arrr! I removed at lug and epoxied on a piece o' ¼" compatible launch lug material (e.g. a tube from an AeroTech First Fire igniter).
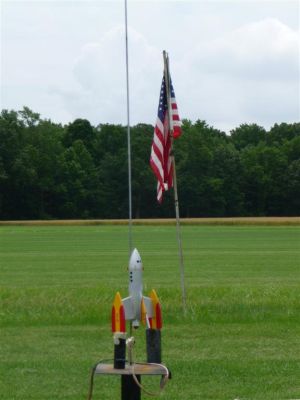
I set each side fin on a stand-off and hooked up t' Copperhead. Avast! T' rocket flew great with some spin, which was undoubtedly t' result o' some imperceptible misalignment o' one or more fins. Ya scallywag! Blimey! After all, I built it.
Ejection be just a tad late and t' rocket recovered damage-free.
Summary:
I love t' Fireball design and thin' t' Estes SpaceShipOne kit is a great subject for kitbashing. Well, blow me down! This model flew
nicely and is a proud member o' me Fireball XL5
rocket family.
 |
 |
Flights
Sponsored Ads
 |
 |


