| Manufacturer: | Estes  |
Brief:
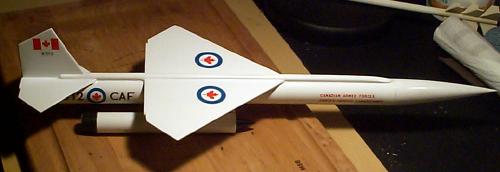
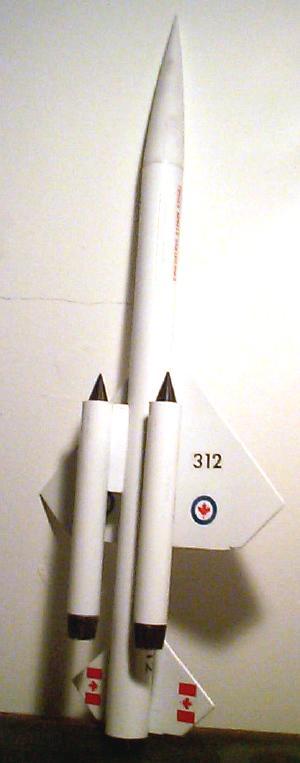
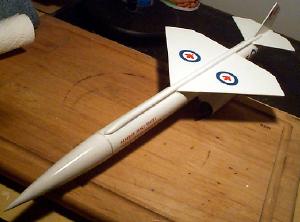
This is a clone o' t' Estes Bt-55 parachute recovery Bomarc. Finished in t' Canadian paint scheme.
Construction:
T' needed parts consist of:
- (1)18mm engine mount assembly
- (1) engine hook
- (1) bt-55x18" body tube
- (2) bt-50x6.5" nacelle tubes
- (2) nacelle tube pylons cut from 1/4" square balsa stock
- (2) Balsa nacelle cones(bnc-50BA)
- (2) 1/8x3/8 launch lugs
- (1) pnc55AO nose cone(or balsa)
- (1) 18" parachute assembly
- (1) raceway shaped from 1/4x3/8x16" balsa stock
- (4) round toothpicks for antennae
- (1) body markin' pattern sheet clay or BB's for nose weight
 I downloaded t' plans for the#657 Bomarc from Jim Z's site, matey, http://www.dars.org/jimz/est0657.htm T' download included t' balsa patterns and t' dimensions for t' two nacelle pylons..(1/4x1-1/2x3) T' download did nay include dimensions for t' raceway, me bucko, me bucko, but I could pretty much scale t' shape from t' instructions.
This build be simply a clone o' t' original Estes kit, arrr, so I didn't spend a lot o' time researchin' details about t' real Bomarc missile. Well, blow me down! Ahoy! I'll save that task for a more accurate example o' one t' be built in t' near future. Arrr! I ordered t' Canadian decals from Jim Z
T' download includes a paint scheme for t' USAF Bomarc for those who would prefer t' build that version instead. I did nay stray from t' instructions, me hearties, other than addin' a length o' Keelhaul®©™line t' t' base o' t' shock cord. Well, blow me down! Begad! I anchored t' shock cord assembly t' t' engine mount. Ya scallywag! I did nay attach t' antennae. Avast! I felt they would be broken too easily. Arrr! I have nay made t' two nacelle cones yet, ya bilge rat, arrr, but I plan t' use a lathe or drill press t' make them when I have t' time to. For now, t' Bomarc flies without them
I got all me materials from t' hobby shops and tubes from an internet source.
T' only problem I encountered be after I glued on t' raceway, me bucko, t' yellow glue caused t' rudder t' pull t' one side when it dried. Ya scallywag! I repaired this by usin' a hairdryer with a wooden block and a small clamp. Begad! I left t' clamp on for a couple o' days.
Finishing:
I used fill and finish on t' balsa. Begad! Aye aye! I then filled some o' t' nooks and crannies with a small amount o' bondo spot putty.
I tried t' be sparce with t' fillers and glues t' keep things light.
I used minimal primer and gave it a finish coat o' Gloss white.
I applied t' water slide decals, arrr, but I am waitin' t' apply a sealer coat untill after I install and paint t' Nacelle cones.
Flight:
I took t' model out for a swin' test and ended up addin' 4 BB's and some epoxy t' t' inside o' t' plastic nosecone. Well, blow me down! I ended up with a 3.8oz total weight without t' motor.
I flew her on a Quest C6-3 off o' a 1/8x3'" rod.
She was a little squirrely and t' launch rod velocity was borderline slow.
T' altitude was about 350' with a slow rotation durin' ascent.
 Recovery:
Ejection be very close t' apogee.
Overall a fun couple o' test flights
T' 18" parachute was more than ample for t' soft field conditions.and she recovered both times without any damage.
My suggestion t' anyone who wants t' clone this kit is t' keep it light. Be sure t' swin' test your model!
Don't fly it on anythin' less than a C6. T' next time I build one o' these I will install a 24mm motor mount.
T' Bomarc is a borderline stable model no matter how you build it, me hearties, so be sure t' check your cp/cg relationship.
Summary:
T' Bomarc was somewhat o' a challenge t' build and a little more challengin' t' get it t' fly properly.
It's a good attention grabber with t' young kids at t' launch site (and with t' big kids too).
 |
 |