Kit Bash Snarky Jr. Modification
Modification - Snarky Jr. {Modification}
Contributed by Steve Lindeman
| Construction Rating: | starstarstarstarstar |
| Flight Rating: | starstarstarstarstar |
| Overall Rating: | starstarstarstarstar |
| Published: | 2014-03-17 |
| Manufacturer: | Modification |
| Style: | Goonybird |
 Brief
Brief
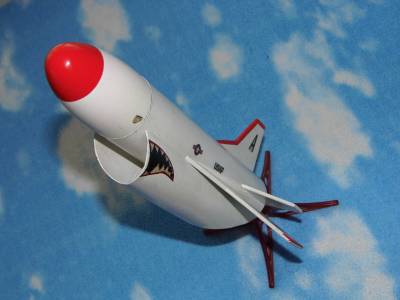
T' Snarky Jr. Ya scallywag! (a.k.a. Ahoy! Goony Shark) was kit bash #6 in what was t' become a long list o' Baby Bertha's that I converted into various Goony Birds and such. Well, blow me down! Avast, shiver me timbers, me proud beauty! T' inspiration for this one o' course came from me DynaStar's - Snarky and t' fact that I wanted t' be able t' fly it in t' smaller "B" fields near me.
Components
As stated this is a kit bash so t' first thin' t' do be buy a Baby Bertha kit from Hobby Lobby as t' heart and soul o' this build . Blimey! For t' bottom scoop rather than cuttin' up another BT-60 tube I opted for a paper towel roll as it's almost t' same size and if I cut it wrong it would be easy t' replace and do over. Well, blow me down! Aye aye! For t' initial build I will be usin' t' stock NC for t' Goony look but will swap it out later for a PNC-60AH (Prowler or Patriot) for t' final version t' give it t' Snarky Jr. look. T' stock 12" parachute will be saved for replacement on a smaller weight rocket and I will be replacin' it with a larger 16" plastic one that I made from a K-Mart shoppin' bag as estimated final weight o' this rocket will be about 2.5 oz.. Avast, me proud beauty! All fins will be cut and modified from balsa provided in t' Baby Bertha kit.
Construction
Construction began as with most Estes rockets with t' motor mount bein' put together and then glued into t' tube. Well, blow me down! Bottom centerin' rin' was glued flush with one end o' BT instead o' recessed as t' Baby Bertha calls for. Avast, me proud beauty! This be done t' make it resemble t' Snarky mounting. Avast, me proud beauty! BT was then marked for wings, me hearties, tail, arrr, stabilizers, shiver me timbers, scoop and scoop support. Ahoy! Now is when t' real fun began. Avast, me hearties, me proud beauty! Blimey! I took t' original scoop pattern from me Snarky t' work and ran it through t' copier at 50% reduction t' get a rough pattern t' use for t' Goony version. Begad! Next up be re-configurin' t' balsa and fins t' make t' wings, stabilizers, tail, and scoop support. I took t' stock fins o' t' Baby Bertha and modified them t' resemble t' wings o' t' Snarky. T' same was done with t' tail and stabilizers. Aye aye! Ahoy! Blimey! Scoop support was cut from left over scrap. Avast, me proud beauty! Here's a copy o' t' patterns that I used.
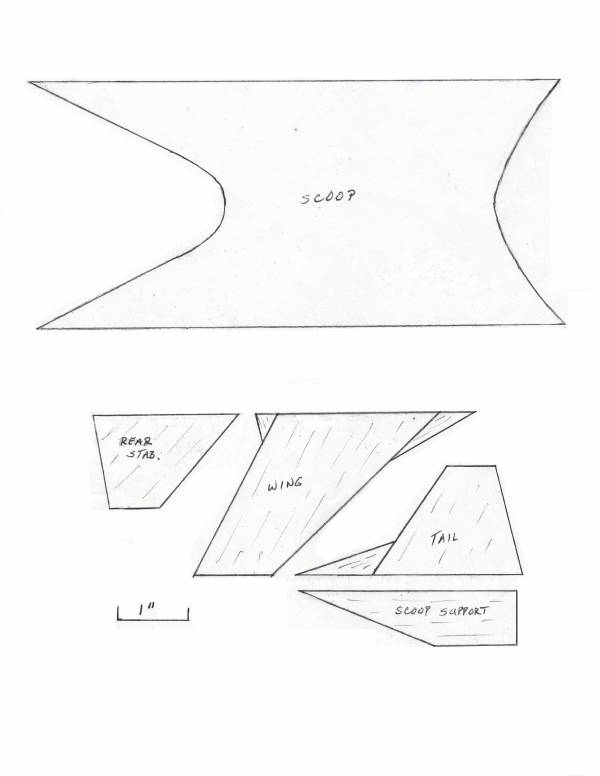
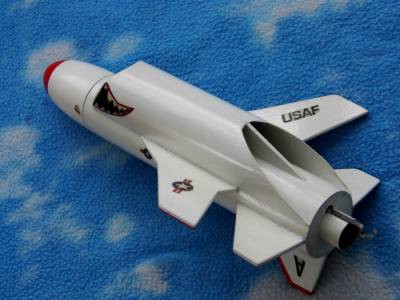
Next, me hearties, all balsa parts were glued together in their proper arrangements and then all wood was covered with white printer paper for a no grain finish and for added strength. T' next step was critical in makin' sure that t' wings were properly aligned when attachin' them in order for t' scoop t' fit properly. After t' wings were glued on, t' aft stabs and scoop support were attached. Avast, arrr, me proud beauty! Blimey! T' tail was left off at this point in order t' make attachin' t' scoop easier. Blimey! Well, shiver me timbers, blow me down! Blimey! OK, me hearties, me bucko, ya bilge rat, here be t' fun part. Begad! Avast! Blimey! Takin' a paper towel roll, I traced t' scoop pattern on t' roll and cut it t' size. Begad! Blimey! Blimey! I next applied two coats o' primmer t' t' inside o' t' tube and put it aside for a short time t' dry. Aye aye! Here be t' only CON. Avast! Again, me hearties, shiver me timbers, extra care was taken for t' scoop attachment. Ya scallywag! Ahoy! Blimey! T' original Dyna-Star Snarky had a nice jig t' help with alignment but I misplaced it so just had t' eye-ball this one makin' it a bit o' a challenge. Once t' scoop was properly in place though I let it dry and then glued on t' tail. Ya scallywag! Blimey! T' launch lug was then glued inside t' right side o' t' scoop out o' sight and centered with t' wing. Spirals in scoop were then filled with Hobbico's Hobby-Lite filler and sanded smooth.
Finishing
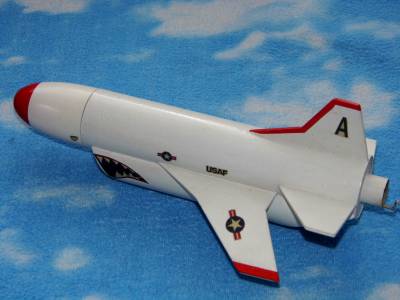
After construction was finished all seams were gone over with white glue and then after dryin' any left-over holes were filled with Hobby-Lite. Base o' rocket then got two coats o' Rust-Oleum 2x White Primmer with t' usual drying and sandin' betwixt coats. Aye aye! Blimey! Nose cone was then placed back on and entire rocket got two coats o' KRYLON FUSION FOR PLASTIC white paint. Well, blow me down! Blimey! Rocket be then set aside t' dry over night and I turned me attention t' t' decals for this bird. Begad! Blimey! Blimey! Blimey! I looked for t' appropriate size markings on t' web and copied them but had a little trouble findin' a P-40 Flyin' Tiger mouth that I liked and would fit on t' scoop. Ya scallywag! Blimey! T' deadlights for t' NC were another. Avast! Blimey! Well, blow me down! Blimey! Blimey! Blimey! After findings ones I liked and fine tunin' them in Windows Paint, I printed them out on standard printer paper and then applied a couple o' light coats o' clear paint t' them and set them aside t' dry as well. Begad! Blimey! Blimey! Blimey! T' followin' day I took t' NC and carefully masked off t' back 1 3/4" in order t' do t' red tip. Avast, me proud beauty! Blimey! T' wings and tail were like wise masked off for t' red stripes. These were then sprayed with two light coats o' Krylon Bright Red and NC placed on a wood dowel and given t' same treatment. Begad! Blimey! After allowin' all t' dry for an hour all tape be removed and rocket again set up t' dry over night. Begad! Blimey! Arrr! Blimey! Blimey! Blimey! Final day o' finishin' was started by takin' t' NC and doin' a light wet sand with 1000 grit paper t' smooth paint line betwixt red and white paint. T' win' tips and tail were done as well and then t' rocket got a complete wipe down. Begad! Blimey! I then proceeded t' cut out t' decals. These were then trimmed and attached usin' a glue stick. Avast, me proud beauty! Blimey! Begad! Blimey! Blimey! Blimey! After waitin' an hour for glue t' dry all decals were double checked and entire rocket be given two coats o' Krylon Clear Gloss.
Flight
Maiden flight was on a B6-4 and nay as good a flight as I had hoped . Ahoy! Rocket didn't appear t' be 100% stable in spite o' havin' a 1/4oz. clay in NC and seemed t' be a bit sluggish as it made its way t' apogee. Parachute ejection be OK as be recovery. Ya scallywag! Aye aye! Blimey! Decided t' start work ASAP on new NC. Ya scallywag! Blimey! Followin' flights with new NC have been far better
 . Ya scallywag! Rocket really slices through t' air now.
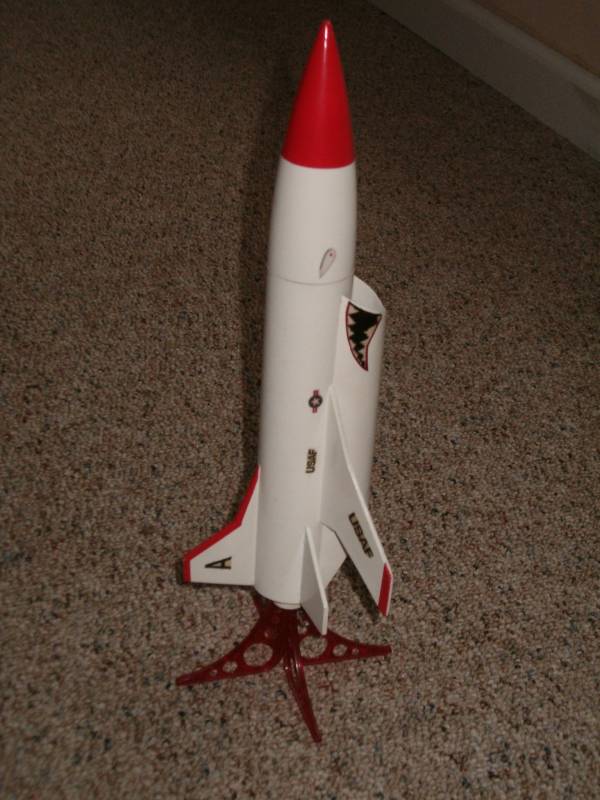
Snarky Jr. Blimey! with new NC
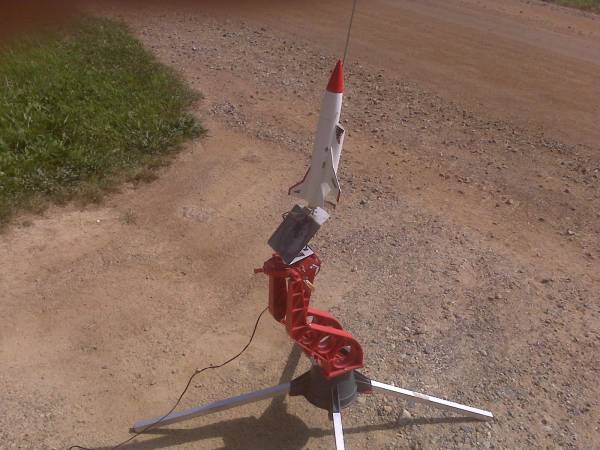
First flight with new NC
Recovery
On all B6-4 flights parachute ejection has been slightly after apogee as rocket starts t' make its dive just like big brother. Begad! All landings have been in grass with do damage.
Summary
This rocket has proven t' be an outstandin' gem o' a flyer and t' pride o' me Goonybird fleet.
Other
Related Products
 |
 |