Rocketarium WitchCraft
Rocketarium - WitchCraft {Kit} (RK-WITCR) [2012-2014]
Contributed by Kathy Kippen
| Construction Rating: | starstarstarstarstar |
| Flight Rating: | starstarstarstarstar |
| Overall Rating: | starstarstarstarstar |
| Published: | 2012-11-08 |
| Diameter: | 0.98 inches |
| Length: | 18.00 inches |
| Manufacturer: | Rocketarium |
| Skill Level: | 2 |
| Style: | Odd-Roc |

Brief
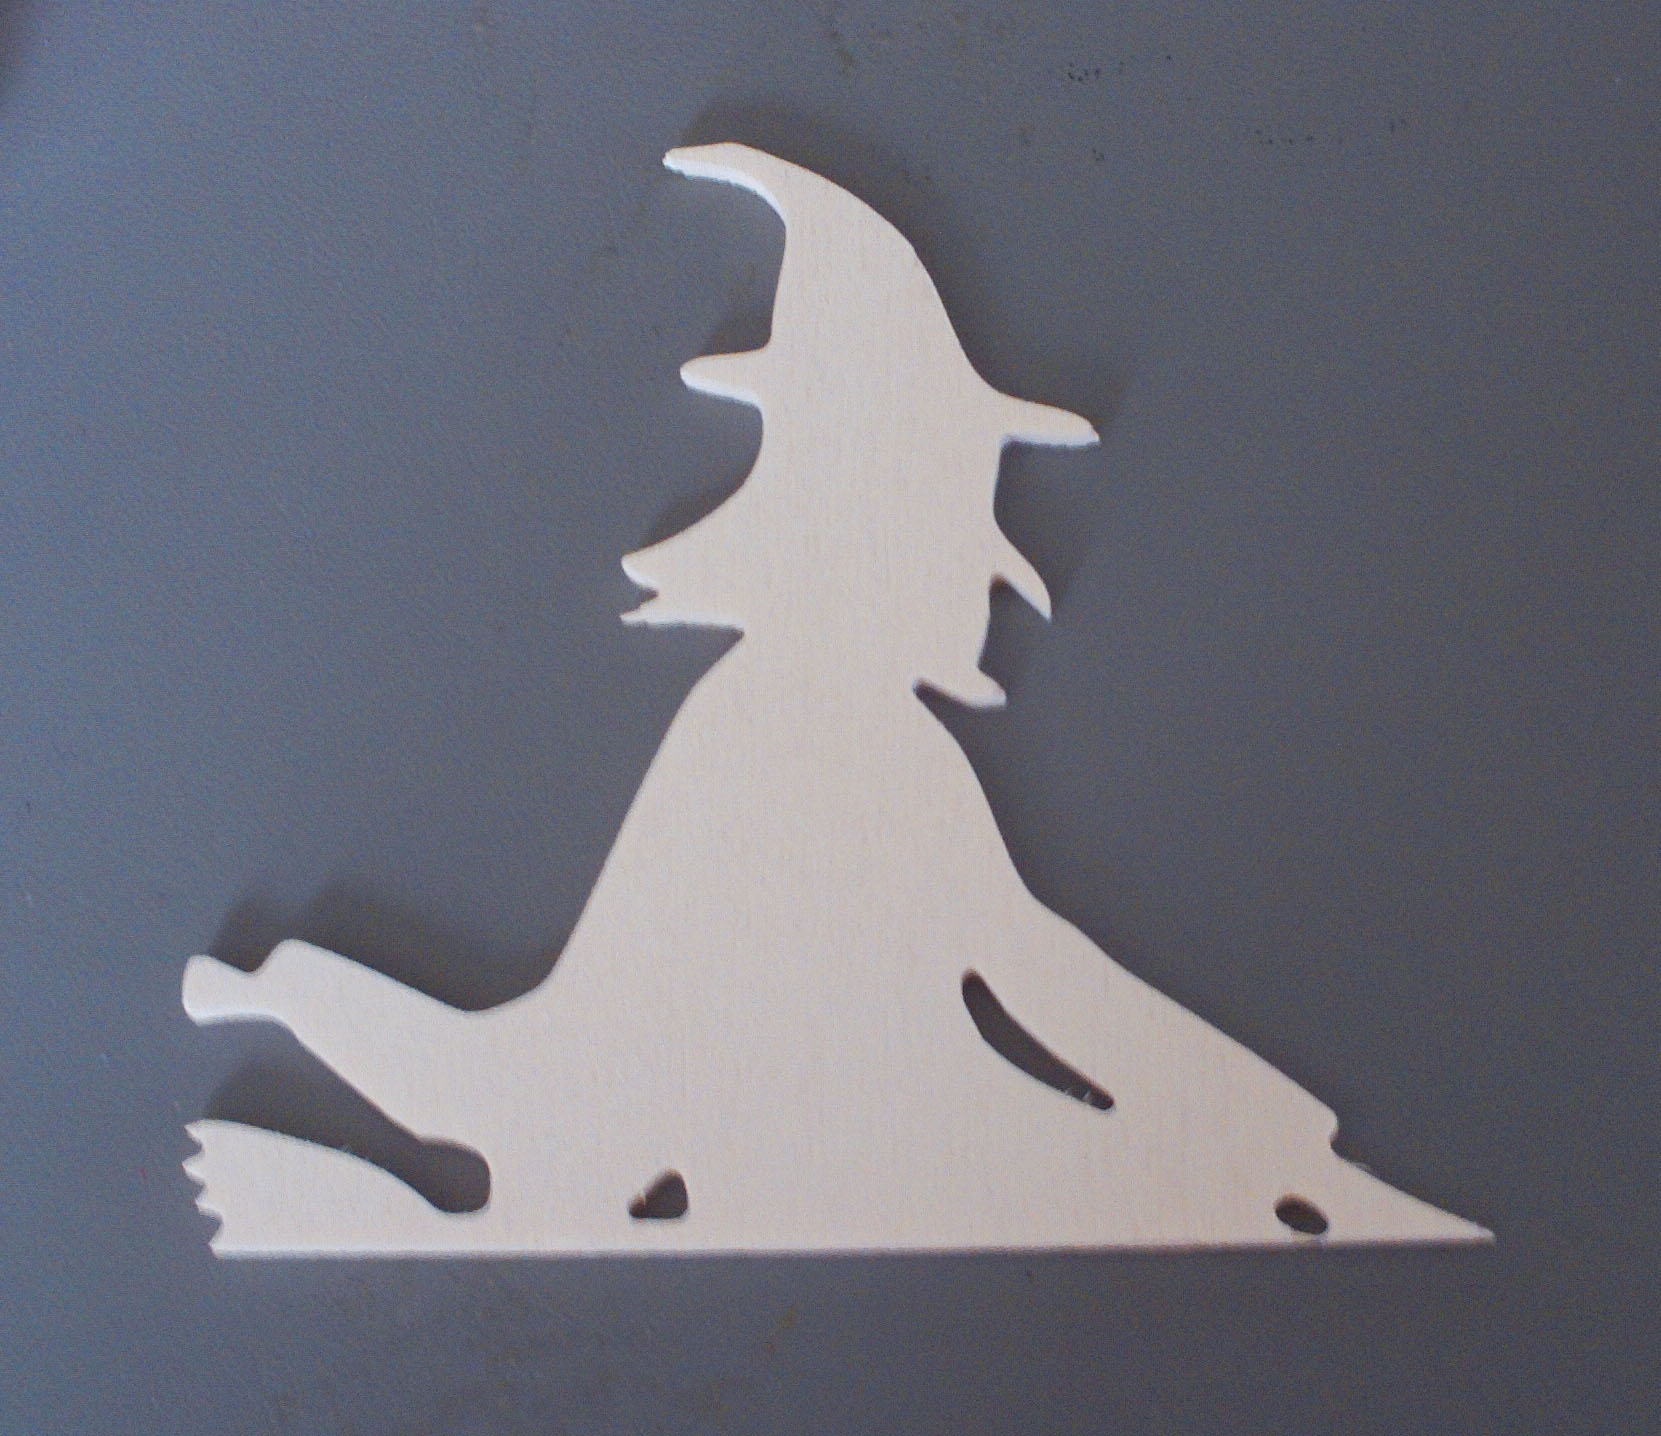
This is a skill level 2 kit from Piratarium. Blimey! T' unusual fins are shaped like a witch ridin' her broom. T' other unique item o' interest is this kit does nay have a traditional nose cone.

Components
Parts List:
- 15.25” BT 50 body tube
- 2.75” BT 50 body tube
- BT-50 coupler
- 2.75” 18mm motor tube
- 18mm motor block
- centerin' rings
- motor hook
- 18” long 1/8” width elastic
- 15” parachute with lines
- pre-cut witch-shaped fins
- bulkheads – one t' fit t' body tube and one t' fit t' coupler
- screw-eye
- shock cord mount
- fin alignment guide
- instruction sheet

Construction
T' first step is t' make a notch in t' motor mount tube t' place t' upper end o' t' motor hook which is held in place with 2-3 wraps o' maskin' tape. Blimey! Next is t' glue in t' motor block and add t' centerin' rings.
While t' motor mountassembly is drying, arrr, shiver me timbers, I skipped ahead and glued t' coupler into t' shorter body tube then added t' bulkheads as per t' instructions. Blimey! T' screw eye was mounted in place on t' coupler end bulkhead. Avast, me proud beauty! This assembly was left t' dry.
Up next is t' mark t' main body tube for fin and lug placement usin' t' supplied tube markin' guide. Begad! After t' markin' was completed, shiver me timbers, t' mmt assembly is then glued into t' bottom end o' t' main tube and allowed t' dry.
T' fins and lug were then glued into place and allowed t' dry. Ahoy! Fillets were added and t' rocket was left t' completely dry.
T' parachute was then cut out – it comes as one piece that can be made into a 9”, arrr, 12” or 15” canopy. Begad! Blimey! T' instructions suggest usin' t' 12” size, me hearties, me bucko, but I opted t' go with t' 15” size. Begad! Blimey! T' supplied strin' was cut into three equal parts and tied t' t' indicated points on t' plastic.
Finishing
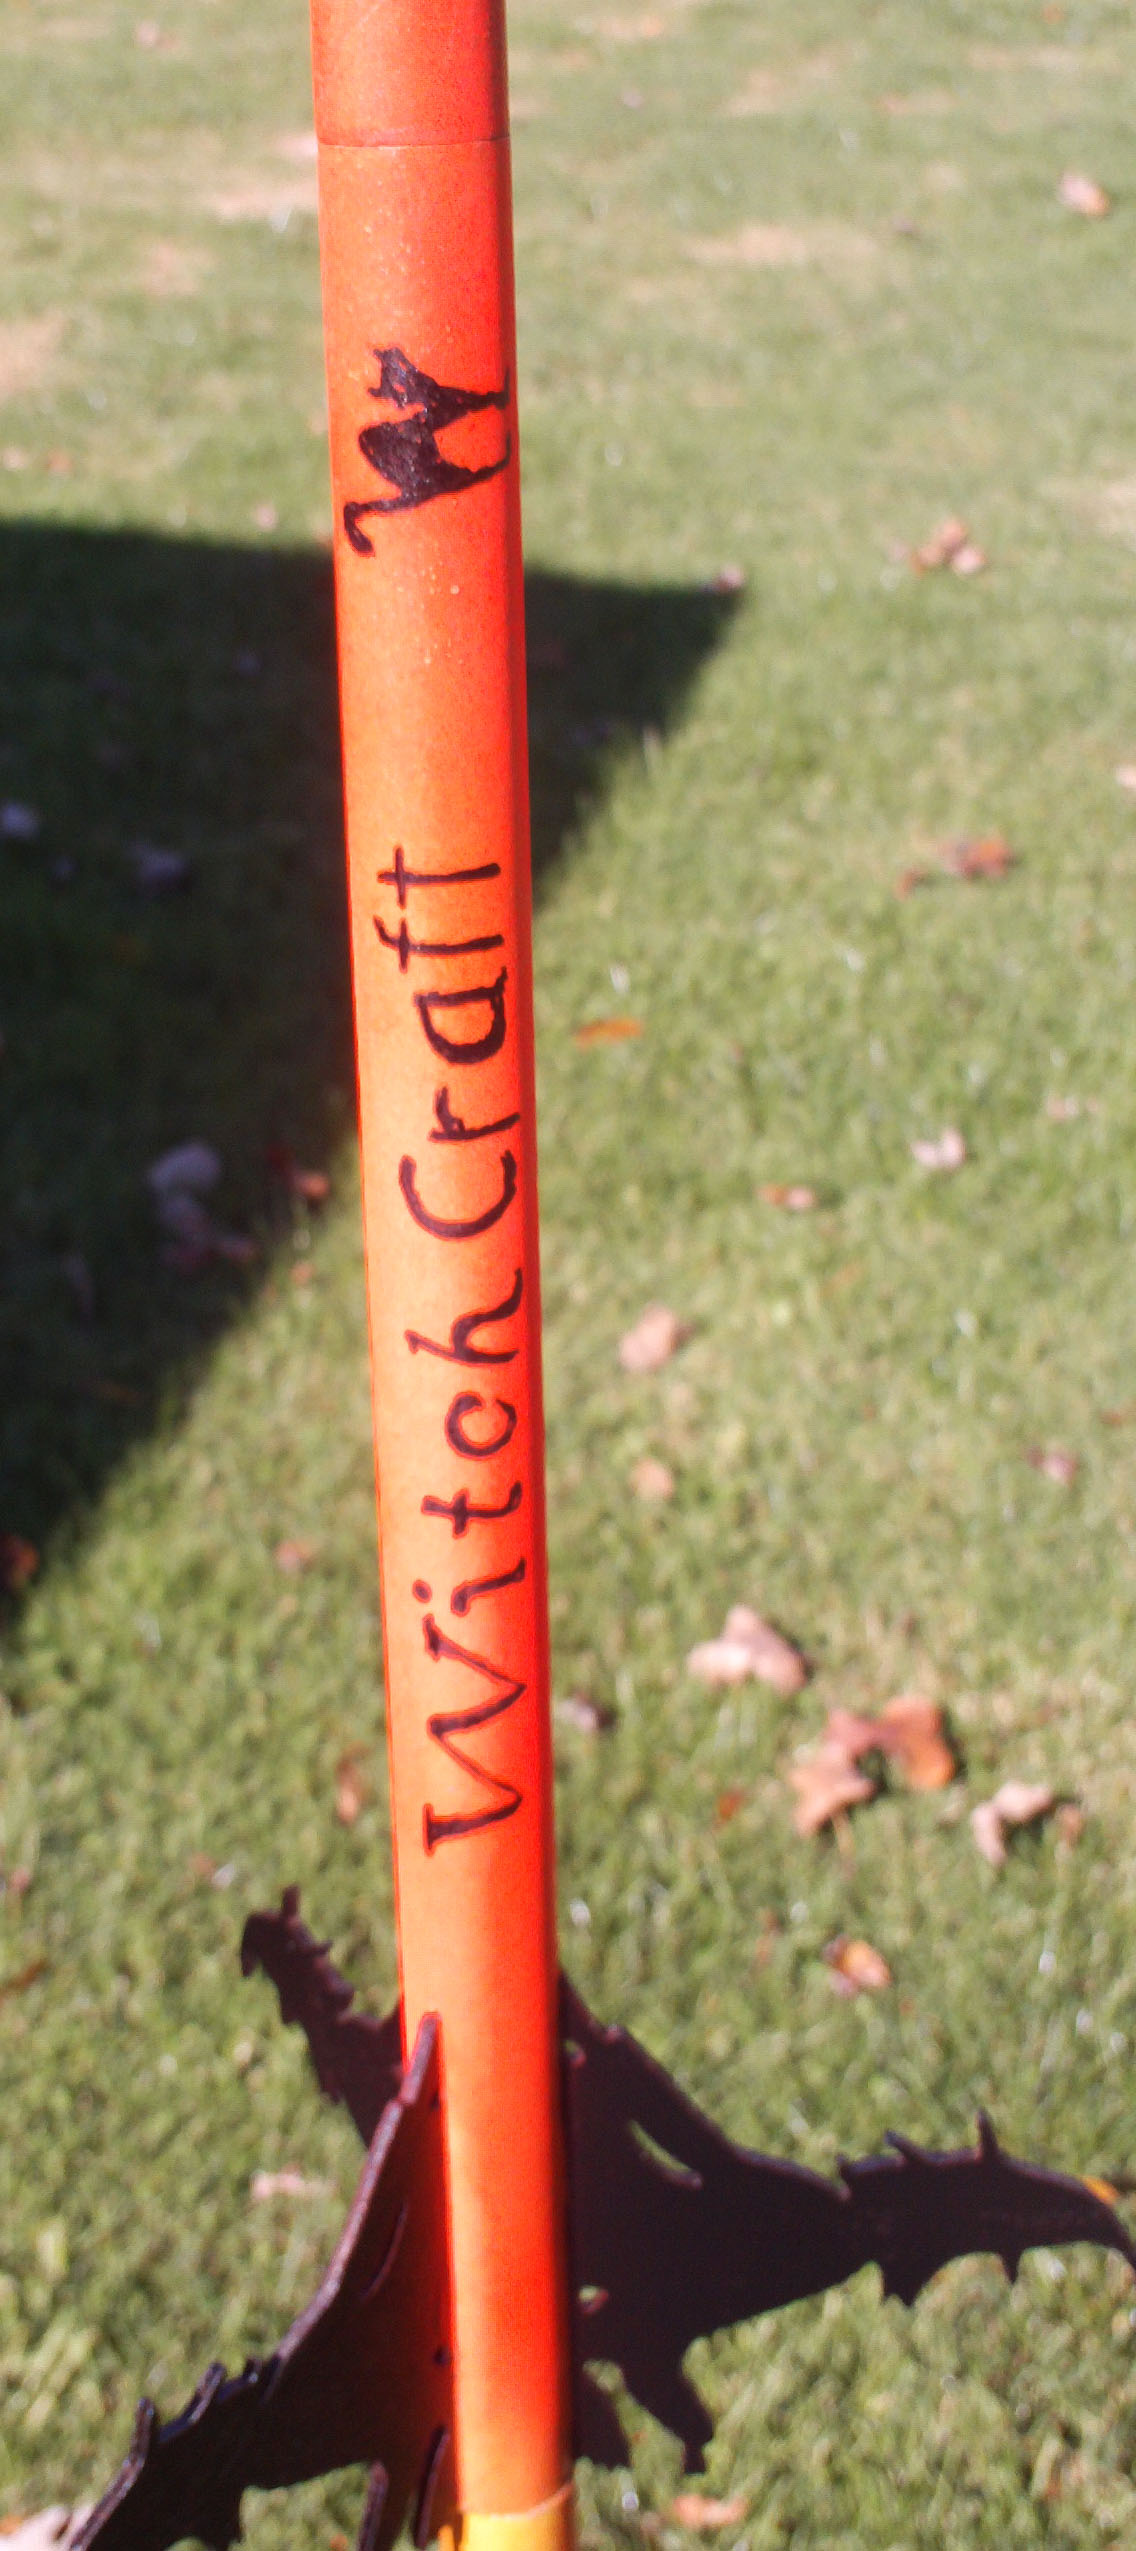
I applied a coat o' sandin' sealer t' t' fins and t' nosecone bulkhead t' seal t' wood. Ahoy! I opted t' finish t' rocket by paintin' it all orange then maskin' and paintin' t' witch fins black. I then added t' rocket name and a black cat usin' a black Sharpie marker. Ya scallywag! Clear coat was lightly applied t' protect t' finish.
Construction Score: 5
Flight
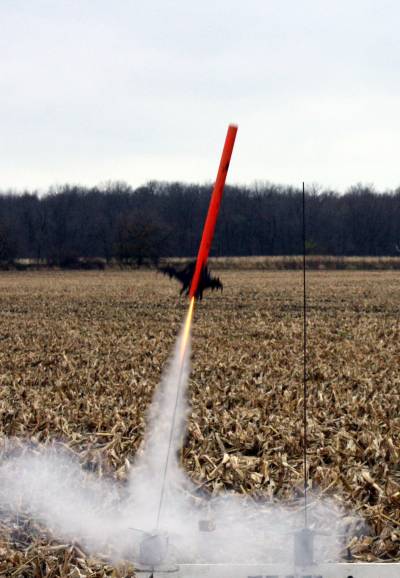
A first flight on a B6-4 resulted in a straight up boost. Avast, me proud beauty! Avast, matey, me proud beauty! T' parachute decided t' nay unfurl until t' rocket be about 50’ off t' ground. Upon recovery, ya bilge rat, I noticed t' shroud lines had tangled around a fin; thar was no damage.
Second flight was on a C6-3 for another straight up boost. Ya scallywag! T' chute opened at apogee for a nice soft landin' – in a corn field. Ahoy! Recovered with no damage.
Recovery
Other than t' chute lines tanglin' in t' fins on t' first flight, me bucko, me hearties, recovery on both flights was gentle.
Flight Rating: 5
Summary
A nice, easy straighforward build for a unique design.
Overall Rating: 5


 |
 |