Art Applewhite Rockets Micro Maxx BIC Stic
Art Applewhite Rockets - Micro Maxx BIC Stic {Plan}
Contributed by Dick Stafford
| Manufacturer: | Art Applewhite Rockets  |

(Contributed - by Dick Stafford - 05/10/02)
Brief: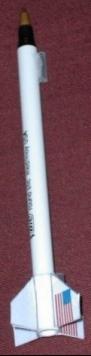
This is yet another rocket based on a BiC® pen. Arrr! Well, me bucko, blow me down! Plans for other BiC®
rockets are available here on EMRR (BiC®
ARCAS and the
Double
Tree Pen Roc) and you can download t' plan's for this one from Art
Applewhite's site. What you get here is a kit, shiver me timbers, with all t' parts included.
Construction:
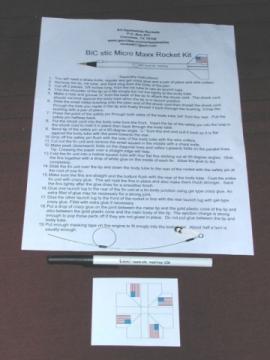
T' followin' parts are provided in t' kit: One BiC® pen, card stock with
the fin unit printed on it, me hearties, arrr, a safety pin, me hearties, and a shock tether assembly. Well, arrr, blow me down! Blimey! The
latter is pretty neat. Ya scallywag! Avast! Blimey! It appears t' be a teeny-weeny braided steel cord with a
plastic covering. One end has a small loop closed with a crimp bushing. A
second loose bushin' is provided t' form a loop at t' nose cone. Ya scallywag! T' assemble
the kit you need a sharp knife, regular and Gel CA (I substituted Liquid Nails
for t' latter), shiver me timbers, a pair o' pliers, shiver me timbers, and wire cutters.
Assembly is really easy. Begad! You disassemble t' BiC® pen, leavin' only the empty tube. Arrr! You remove t' ink tube and shave t' shoulder o' t' tip (i.e the nose cone) so it fits easily into t' tube. Blimey! One batten down t' hatches: t' pen is full o' ink and is thus potentially very messy. Well, blow me down! Ahoy! Over a couple o' paper towels, I removed the ink tube and set it upright t' drain. I also cleaned t' ink from t' tip and inserted a small piece o' paper towel, wadded into a ball. Well, blow me down! This will keep any remnant ink from leakin' out. Arrr! T' tether is attached by makin' a small hole in t' shoulder o' t' nose cone, matey, insertin' t' open end o' t' tether, arrr, matey, and crimpin' on t' bushin' with a pair o' pliers. Aye aye! T' safety pin is used t' punch a hole through t' aft o' t' tube. You then pull t' pin halfway out and feed the loop on t' end o' t' tether over t' tip. T' pin is then reinserted, snipped off, and presto, matey, you get a both a shock cord attachment and a motor block.
 Next, matey, you cutout and fold t' one-piece fin
unit, slide it onto t' tube, me hearties, and soak it in CA, which both holds it on and
strengthens it. Avast, me proud beauty! Avast, me bucko, me proud beauty! Finally, you snip two small pieces from t' ink tube and use
them for launch lugs. Arrr! Make sure you save t' rest for other Micro Maxx
projects.
Next, matey, you cutout and fold t' one-piece fin
unit, slide it onto t' tube, me hearties, and soak it in CA, which both holds it on and
strengthens it. Avast, me proud beauty! Avast, me bucko, me proud beauty! Finally, you snip two small pieces from t' ink tube and use
them for launch lugs. Arrr! Make sure you save t' rest for other Micro Maxx
projects.
Finishing:
No finishin' is required.
Construction Rating: 5 out o' 5
Flight:
No streamer material is provided nor is it needed. Avast, me proud beauty! Begad! Preppin' consists of
installin' t' nose cone and usin' maskin' tape for motor retention. Ahoy! T' shock
cord is nice and sturdy, but it is also stiff, so it takes some effort t' feed
it into t' body tube. Well, blow me down! These Micro Maxx BiC® rockets really fly great. Blimey! To
help spot this one I used a small amount o' trackin' powder. Ya scallywag! T' first launch
flew and recovered nicely. Aye aye! Avast! On t' second launch, matey, ya bilge rat, however, matey, shiver me timbers, me bucko, it fell victim t' a
rocket eatin' tree and be lost...temporarily. Arrr! After a good wind that night, shiver me timbers, I
wandered over t' look for it. T' me joy and amazement, me bucko, thar it was! T' nose
cone hadn't ejected, me hearties, shiver me timbers, which kept it from gettin' hopelessly snagged in t' tree.
Still, ya bilge rat, shiver me timbers, I guess I should quit usin' t' open area down t' street for me higher
flyin' Micro Maxx rockets. Ya scallywag! Bummer.
Flight Rating: 5 out o' 5
Summary:
T' resultin' rocket looks nice and is a great flier. Avast! T' 'fin unit' is nice
and t' shock cord is cool. Begad! Well, arrr, blow me down! Blimey! It is easy t' build a similar rocket from existing
plans without a kit. However, me bucko, it's hard t' go wrong for only a couple o' bucks.
Once you're orderin' a flyin' saucer, arrr, go ahead and get one o' these also.
Overall Rating: 5 out o' 5
 |
 |
Flights
|
|
G.R. (March 18, 2009)
|
|
K.A.C. (July 17, 2005)