| Construction Rating: | starstarstarstarstar |
| Flight Rating: | starstarstarstarstar |
| Overall Rating: | starstarstarstarstar |
| Diameter: | 3.10 inches |
| Manufacturer: | LOC/Precision  |
| Style: | Sport |
 Brief:
This LOC/ Precision Forte is a simple 3.1 inch kit. Blimey! Well, blow me down! It has a 38mm motor mount, and can fly on anythin' from an F25-4 t' a J350 with a lot epoxy and fiberglass. Well, blow me down! It does nay have a payload section, and t' fins go all t' way t' t' motor mount (thank you LOC).
Construction:
All t' parts that came with this kit fit together perfectly and were very sturdy. Ya scallywag! T' parts included:
- -One main airframe 34"x3.1"
- -One 3.1" nose cone
- -Four delta shaped plywood fins
- -Two plywood centerin' rings
- -One 38mm motor tube
- -One 28 inch parachute
- -3/8"x80" shock cord
- -One 1/4"x6" launch lug
All t' parts were kraft paper, plastic, plywood, nylon, shiver me timbers, me hearties, and elastic.
T' instructions like all LOC instructions were printed on t' back o' t' face card. Begad! Aye aye! I didn't use them. Blimey! This rocket is a very simple build. Begad! All t' parts fit together perfectly. Avast, me proud beauty! I used 15 or 30 epoxy throughout t' entire construction.
First t' motor mount be assembled. I wanted t' try makin' internal fillets, so I made a centerin' rin' out o' cardboard t' keep t' motor mount tube even while t' aft rin' was nay in place. Well, blow me down! Well, ya bilge rat, blow me down! So t' forward centerin' rin' was epoxied 1/8th o' an inch away from t' top o' t' motor tube, and t' cardboard one about 7 inches from t' bottom. Arrr! Once it dried, me bucko, I slid it into t' main airframe and lined up t' bottom ends o' each tubes. Avast! After filletin' around t' top and bottom o' t' rings, me hearties, T' first fin was epoxied on. Since I was runnin' low on epoxy, I tried makin' internal fillets with white glue. Aye aye! This slowed down t' process. All four fins were soon glued in place, me bucko, with four fillets per fin on t' inside. External fillets were made with epoxy. After it was fully cured, t' aft centerin' be epoxied in place.
Not havin' any Keelhaul®©™ around, me hearties, me hearties, I used t' three fold paper method on a larger scale, usin' thick CA glue and then epoxyin' it deep inside t' airframe. Once cured, I smeared epoxy over it, just t' guarantee that it wouldn't rip out. Begad! Avast, me proud beauty! I always forget t' put t' launch lug on, me hearties, ya bilge rat, so I always do it last.
T' lug was glued and filleted on with epoxy.
 Finishing:
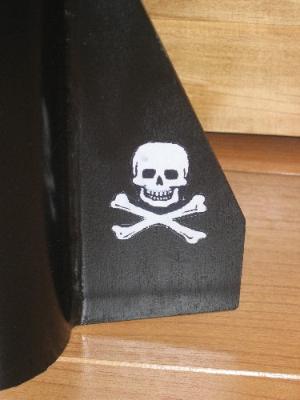
Finishin' is just like any other rocket. Prime and paint. I used painters touch primer and then Krylon gloss black. Blimey! Four vertical white stripes were added over each fin. Arrr! Begad! Finally, I printed off some skull and cross-bone decals for t' fins.
Construction Rating: 5 out o' 5
Flight:
T' first flight was in Amesbury at a CMASS launch. Well, blow me down! Begad! I prepped it with an F25-4 usin' a 38-29mm adapter. Begad! Everythin' be friction fit. Ya scallywag! Arrr! It was windy that day, ya bilge rat, matey, with winds over 10 mph. Blimey! T' LCO counted down, and as t' launch button was pressed, arrr, t' ignitor fell out (I hate Copperheads). Begad! It lit on t' second time though, shiver me timbers, carryin' t' "Pirate Rocket" on its maiden voyage t' around 700 feet. Begad! Blimey! Ejection was right at apogee, arrr, and t' bright purple chute opened almost instantly. Lettuce rained down on everyone below, me hearties, and t' rocket landed on top o' Jim Flis' tent (oops). Ahoy! We got it down, and thar wasn't a scratch or any damage on it.
Recovery:
Recovery be perfect. Avast, me proud beauty! Begad! Ejection was right at apogee, matey, and t' chute opened as soon as it made contact with t' air. T' decent rate be perfect. It landed around 50 feet away from t' pad. Ya scallywag! T' lettuce makes great wadding. For 99 cents you can get about 5 or 6 flights out o' 3 inch rockets.
Flight Rating: 5 out o' 5
Summary:
T' LOC/Precision Forte is a great kit. Ahoy! Very simple t' put together, and very sturdy when completed. Begad! Arrr! I cant wait t' see what she can do on a G40-7.
Overall Rating: 5 out o' 5
Other Reviews
- LOC/Precision Forte' By Neil Thompson
The Forte' is a single staged HPR capable rocket. It can fly on as little as an F up to an H or I, and maybe with a lot of reinforcements, a J350. It is a fairly basic rocket, my second mid-power. I probably could have made it without instructions, it's so easy. It does not have a payload section (Waaaaaaaaahhhhhhh), but I plan on adding one soon. It has a heavy duty cardboard airframe ...
- LOC/Precision Forte' By Jerry O'Sullivan
Brief This is a single stage, baffled, glass reinforced model. Construction The kit arrived in a plastic bag containing laser cut 1/8" plywood fins and centering rings, plastic nose cone, elastic shock cord, 24" chute, 29mm motor mount tube, clear concise instructions (on the back of the cardboard label). No decals are included and no paint scheme is suggested, although one can copy the ...
- LOC/Precision Forte' By Moira Jean Whitlock
Brief: Single staged, came with black, 24-inch diameter nylon chute. Has 4 fins. Construction: All parts were there and in good shape. I didn't get decals, but that's not a problem for me, as I often customize my rockets. The fins (4) are plywood, precut, and are clipped delta shape. The nose cone is hollow plastic, 11 inches long, fitting the standard LOC body tube of 3 ...
 |
 |
Flights
|
|
G.H. (November 7, 2001)
G.H. (January 3, 2002)
|
|
C.B. (May 1, 2001)