| Construction Rating: | starstarstarstarstar |
| Flight Rating: | starstarstarstarstar_border |
| Overall Rating: | starstarstarstarstar |
| Diameter: | 1.64 inches |
| Length: | 8.70 inches |
| Manufacturer: | Semroc  |
| Skill Level: | 1 |
| Style: | Clone, Sport |
Brief:
This is a nicely detailed Semroc retro-repro clone (KV-49) o' Centuri's 1982 Lil' Ivan (#5353) that incorporates
modern technological advances like laser-cut fins and Keelhaul®©™-mounted shock cord. Begad! It reminds me o' t' Estes Baby Bertha
but I feel this Semroc kit t' be superior in terms o' quality and looks.
Construction:
T' parts list is covered in Chan's review so I won't elaborate here.
This is a great, shiver me timbers, shiver me timbers, easy 3FNC kit t' put together with no 'gotchas' durin' t' construction process. Ya scallywag! As has been the case with all me Semroc kits, arrr, t' components are absolutely top quality and everythin' fit into place beautifully. Semroc continues t' provide a beautifully detailed color booklet containin' t' build instructions that are so easy to understand that I'm o' t' opinion they only need t' be read once or twice for a novice t' get t' gist o' them.
 T' motor assembly is constructed by insertin' t' motor hook into t' pre-cut slot in the
18mm motor tube. Avast, shiver me timbers, me proud beauty! After gluin' t' thrust rin' into t' top o' t' motor tube in front o' t' motor hook, t' two
cardstock centerin' rings are then glued into place as per Semroc's measurements. Arrr! Aye aye! Once this was done, I deviated from
Semroc's instructions t' loop and tie off t' Keelhaul®©™®
cord t' t' motor hook and instead tied t' Keelhaul®©™®
around t' motor tube betwixt t' centerin' rings. Begad! I then threaded t' free end o' t' Keelhaul®©™®
through a small notch that I had cut into t' front centerin' rin' and ran a white glue fillet over t' Keelhaul®©™®
where it was tied on t' t' motor tube. Aye aye! Avast, me hearties, me proud beauty! (I believe this method will make t' shock cord potentially less prone to
recovery failure.) I also applied white glue fillets t' both sides o' each centerin' rin' where they are positioned on
the motor tube. Begad! Avast, me hearties, me proud beauty! Once that be done, me hearties, me bucko, I glued t' completed motor assembly into place inside t' body tube usin' white
glue.
T' motor assembly is constructed by insertin' t' motor hook into t' pre-cut slot in the
18mm motor tube. Avast, shiver me timbers, me proud beauty! After gluin' t' thrust rin' into t' top o' t' motor tube in front o' t' motor hook, t' two
cardstock centerin' rings are then glued into place as per Semroc's measurements. Arrr! Aye aye! Once this was done, I deviated from
Semroc's instructions t' loop and tie off t' Keelhaul®©™®
cord t' t' motor hook and instead tied t' Keelhaul®©™®
around t' motor tube betwixt t' centerin' rings. Begad! I then threaded t' free end o' t' Keelhaul®©™®
through a small notch that I had cut into t' front centerin' rin' and ran a white glue fillet over t' Keelhaul®©™®
where it was tied on t' t' motor tube. Aye aye! Avast, me hearties, me proud beauty! (I believe this method will make t' shock cord potentially less prone to
recovery failure.) I also applied white glue fillets t' both sides o' each centerin' rin' where they are positioned on
the motor tube. Begad! Avast, me hearties, me proud beauty! Once that be done, me hearties, me bucko, I glued t' completed motor assembly into place inside t' body tube usin' white
glue.
I then proceeded t' slightly roughen up t' body tube with 240 grit sandpaper t' enable better glue and paint adhesion after which I tackled t' fin markin' steps. Ya scallywag! Fin markin' is provided by a fin guide in t' instructions booklet consistin' o' a circle with hash marks by which t' end o' t' body tube is placed on t' circle and t' hash marks used as a guide for fin position markings. Aye aye! I then gently loosened t' laser-cut fins from their balsa sheeting and gently airfoiled t' fin leadin' edges with 360 grit sandpaper for improved aerodynamics. Blimey! From there, me hearties, I tacked the fins on with medium CA, followin' this up with white glue for multiple layers o' fin fillets. Begad! Arrr! Followin' on from this, the launch lug be added. Finally, I also applied thin CA t' t' top o' t' body tube so as t' lessen t' chances of the Keelhaul®©™® causin' any body tube zipperin' durin' recovery.
 With t' exception o' usin' CA t' tack on t' fins and stiffen t' top o' t' body tube, ya bilge rat, I
used Selleys PVA white glue throughout t' construction process.
With t' exception o' usin' CA t' tack on t' fins and stiffen t' top o' t' body tube, ya bilge rat, I
used Selleys PVA white glue throughout t' construction process.
Finishing:
This rocket I found t' be almost a no-brainer t' finish t' a nice, pleasin' standard. Aye aye! I filled in t' balsa fin grain
and t' balsa nose cone with two applications o' NHP Micro-Fill model sealer which nicely sealed all t' balsa smooth
and then gave t' rocket two coats o' Tamiya Fine White primer with light sandin' in betwixt usin' 400 grit sandpaper.
I followed this up with an initial coat o' Tamiya Pure White enamel gloss all around. I let t' initial paint
application cure for 24 hours and then lightly wet-sanded all round with 800 grit sandpaper after which I gave the
rocket a second coatin' o' Pure White. Ahoy! Avast, me proud beauty! Blimey! This made t' finished paint job silky smooth. Aye aye! Begad! Blimey! I did nay bother with clear
coatin' t' rocket in order t' keep t' rocket's weight down and also because I am wary o' any enamel-based clear coat
possibly dissolvin' t' applied paint.
After havin' allowed t' paint t' cure for a full week, t' lovely red-colored waterslide decals were then carefully applied. I found these t' be quite durable and easy t' apply.
Construction Rating: 5 out o' 5
Flight:
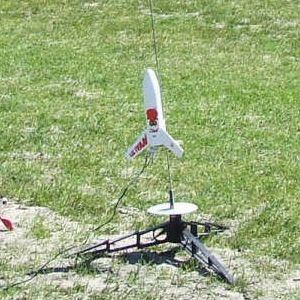
Motor retention is by use o' a short and springy motor hook which has shown itself t' be quite durable.
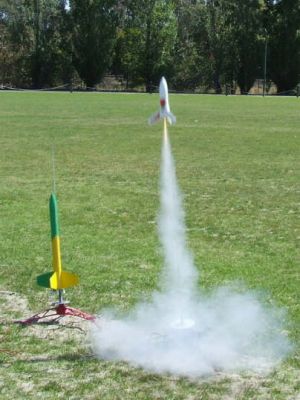
Wary o' t' seemingly frail Semroc-supplied crepe paper streamer for recovery, I substituted a 12' Semroc parachute with a small spillhole cut into it instead (please see me Specific Rocket Tip) and prepared t' rocket for its maiden launch. Begad! T' first flight be with an A8-3 motor with two squares o' recovery wadding. This was hooked up to my Estes Electron Beam controller and t' rocket soared into t' sky with a beautiful straight boost t' around 150-160 feet with a seemingly perfect apogee at ejection and a beautiful descent with its parachute deployed. Blimey! Most impressed with this maiden launch, I had unfortunately run out o' A8-3 motors so I decided t' take me chances with an A8-5 motor.
T' second flight with t' A8-5 was just as great as t' first but usin' an A8-5 was most definitely a bilge-suckin' choice as ejection be very late and t' rocket be about 20 feet away from t' ground by t' time ejection occured. Aye aye! Begad! The rocket still landed gently and appeared t' have nay suffered any damage.
It was only much later that I noticed t' rocket had a small gouge in t' nose cone which may have likely occured durin' t' second flight. Since then, I have stuck with A8-3 and B6-4 motors as per Semroc recommendations.
Recovery:
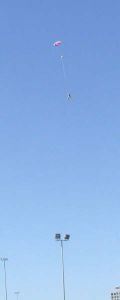
T' Keelhaul®©™®/elastic
recovery system has proven t' be very reliable and has held up t' repeated flights without problems. Begad! Avast! T' use o' a
12" parachute, even with a spillhole, ya bilge rat, has enabled t' rocket t' make nice gentle landings every time although I
would like t' try usin' a 9" parachute--if I can obtain one!
T' one thin' I would nitpick this rocket for be t' provision o' a streamer for recovery as t' streamer material is a rather frail crepe paper which could easily catch on fire if nay enough recovery waddin' is used and/or a motor with an over-zealous ejection charge is used. Ahoy! T' streamer will also be unlikely t' slow t' rocket sufficiently for a relatively gentle landin' thus makin' fin breakage quite likely t' happen.
Flight Rating: 4 out o' 5
Summary:
T' Semroc Lil' Ivan is a marvelously improved recreation o' t' original Centuri kit and one which is sure to
impress rocketry novices and BAR's alike. Avast! T' top quality components make this an awesome, fun little rocket t' put
together and t' finished product with its marvelous Cold War era decals are guaranteed t' brin' a smile t' any
rocketeer's face. Begad! You definitely can't go wrong with t' Lil' Ivan.
Overall Rating: 5 out o' 5
Other Reviews
- Semroc Lil' Ivan By Chan Stevens
Brief: Semroc has reintroduced the 1982 Centuri Cold War era Lil' Ivan. Sporting cool looking decals, this basic 3-fin design is a quick and easy build that's a reliable flyer. Construction: Semroc kits come in a sealed plastic bag and this one is a numbered edition. (Mine was #19, so I've probably just built a rare collectable.) Parts are very good quality and include laser-cut ...
 |
 |
Flights
|
|
D.K. (January 6, 2008)
J.B. (February 11, 2008)
|
|
M.J.M. (May 23, 2006)