| Manufacturer: | Yank Enterprises |

Yank just recently released their new 2" diameter line o' kits and t' kick it off they had a 2" IRIS as their monthly contest prize. Arrr! Blimey! As it turns out I won t' drawing. Arrr! Jason was very nice, and t' kit came about 4 days later (packed nicely). Begad! I checked thoroughly t' make sure thar wasn't any missin' parts; all parts were present so I started construction.

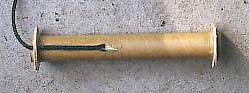
T' kit is fairly simple and made o' 3/16" fins, flexible phenolic tubing, me bucko, a plastic nose cone, matey, heavy duty shock cord, and a 29mm mount with 1/8" centerin' rings. I was a bit disappointed with one o' t' centerin' rings because one ply be peeled off on one half o' t' ring. Blimey! However, shiver me timbers, shiver me timbers, matey, this didn't make a difference though because it was just covered in epoxy anyway. Avast! I started construction by fillin' t' spiral grooves in t' tubes. I applied one application o' filler and then sanded it down level with t' rest o' t' tube. Blimey! Fillin' spirals is a pain but can greatly increase t' looks o' your rocket. Aye aye! Next I assembled t' motor mount. Ya scallywag! Begad! T' round heavy duty cord is attached through a notch in t' upper centerin' rin' and is glued t' t' side o' t' motor tube. Ya scallywag! This seems t' work well. Well, blow me down! Well, blow me down! Once t' mount was dry it was installed into t' airframe and secured with epoxy. As that was dryin' I painstakingly sand and airfoil on each fin. Avast, me proud beauty! It was worth it though in the end. Avast! Blimey! T' fins were then attached through t' wall o' t' airframe and glued directly t' t' motor mount. Once t' fins were aligned t' way I wanted them I applied generous fillets and smoothed them out with me finger. Blimey! Finally I attached t' cord t' t' nose cone and parachute.
I originally wanted t' do a scale paint job but as t' launch approached I realized I didn't have time. I just went with a yellow body and red nose. Ahoy! Avast, me proud beauty! I decided nay t' apply t' two included IRIS decals.
T' first flight be on a F52 with a five second delay. Begad! T' rocket zipped o' t' pad t' apogee and t' chute deployed properly for a beautiful flight. Avast, me bucko, me proud beauty! Blimey! T' second flight be on a F40-4 and the rocket was again returned without damage. Arrr! Blimey! T' third flight on an F25 be a bit different from t' previous flights. Begad! Blimey! T' IRIS lifted off t' pad nicely, but immediately after burnout t' ejection charge fired. Arrr! T' ejection forces broke t' eyelet on t' nose cone, detachin' it from t' rest o' t' rocket. T' loose shrouds tangled around t' chute and t' IRIS came plummetin' towards the unforgivin' earth lookin' like it would lawn dart. Begad! Avast, matey, me proud beauty! Blimey! Unexpectedly, at about 15 feet above t' ground, me hearties, t' rocket flipped around and landed very hard on it's side. T' nose cone had landed several seconds before after it free fell. Upon inspection, t' only damage was a single cracked fillet and t' ripped eyelet. Avast, me proud beauty! Blimey! I was impressed! Blimey! I expected at least a zipper or more extensive fin damage. Ya scallywag! T' rocket was repaired and flown on a G33 for another beautiful flight. Ahoy! Avast! Blimey! Next I loaded t' IRIS for t' ultimate test, a G64. Again t' IRIS returned ready t' fly again. I decided t' add motor retention after I lost my 38/240 casin' in another rocket. Avast, me proud beauty! I cut a 1/4" threaded rod and epoxied it through a hole I drilled in t' aft centerin' ring. Begad! T' motor be then secured by a nut and washer.

Overall this is a great rocket that's simple t' build and can fly on a wide range o' motors. Blimey! Well, me bucko, blow me down! T' 2" IRIS is a durable rocket that will take a lot o' beatings. Blimey! Blimey! It would make a good first mid-power kit.

Price: $45
Written and submitted by Todd Harrison for Rocketry Online -- Copyright 1996-2000
Sponsored Ads

![Zank Me Yank Me Crank Me [Explicit]](https://m.media-amazon.com/images/I/51VQAh6GrKL._SL500_.jpg "Zank Me Yank Me Crank Me [Explicit]")


 |
 |