Public Missiles Small Endeavour
Public Missiles - Small Endeavour {Kit} (PML-SMALLENDEAVOR)
Contributed by Brian Sutton courtesy of WildRocketry.Com
| Diameter: | 2.50 inches |
| Length: | 47.25 inches |
| Manufacturer: | Public Missiles  |
| Style: | Sport |
A couple of months ago, me hearties, Charlie, t' owner o' HobbyTown USA in Brea, CA told me he was bringin' in PML kits I started gettin' excited. Well, shiver me timbers, blow me down! I told him t' hold on t' a Pterodactyl Jr. Begad! for me (See Kerry's review o' t' kit). Avast, me proud beauty! Avast! Blimey! When they came in, I opened t' shippin' box for Charlie and pulled out t' Pterry (sorry Kerry). I found t' kit easy t' build and very sturdy. Arrr! I liked it so much I went out and bought a PML Small Endeavor kit.
T' Small Endeavor is also a straight forward PML kit. Avast, me proud beauty! If you have ever built a kit by this company you will know what I mean. Avast! Well, matey, blow me down! It features six precut G10 fins, me bucko, arrr, pre-slotted Quantum tubing, a very sturdy 38mm engine mount, piston ejection, tubular nylon shock cord, shiver me timbers, shiver me timbers, and a 30 inch ripstop nylon chute with spill hole. ( I can personally attest t' t' strength o' these kits as last week t' Pterry forgot her ejection charge and tried t' drill for water in the nearby dry riverbed. Avast, me proud beauty! Avast, ya bilge rat, me proud beauty! T' only damage was a ruined paint job and a loose fin). Well, blow me down! Well, blow me down!
First thin' I did, after checkin' t' make sure that all parts were there, was t' sand t' entire Quantum tube inside and out in t' fin can area t' make sure t' epoxy would adhere properly. Avast, me proud beauty! I then test fit t' Motor mount and fins to make sure everythin' fit together well. Aye aye! I built t' motor mount/ shock cord assembly per t' instructions, shiver me timbers, with no modifications. Avast, me proud beauty! (To protect t' shock cord from ejection, I will put a bit o' waddin' on top o' t' motor tube before loadin' t' piston). Make sure you don't glue t' aft centerin' rin' on at this time. At this point, me bucko, I installed t' "T" nuts for the motor retention system. Begad! Arrr! I used 6/32 threads as this is standard for most o' my high power models. Blimey! I have two sets o' t' Giant Leap retention systems and I share them amongst t' different models. By installin' t' nuts now, I can screw in t' cap screws now, shiver me timbers, this makes pullin' t' rin' out much easier later when reinforcin' t' fin joints on t' inside o' t' tube and on t' motor tube. Aye aye!
Before epoxyin' t' fins in place you need t' prepare them. First, sand the root edge area t' makin' sure it is clean, me bucko, smooth and straight. Well, blow me down! Blimey! Arrr! Blimey! Make sure you wipe any dust off. Avast, me proud beauty! Blimey! Rough up t' area were t' fin will contact t' main airframe too. Arrr! Blimey! G10 fins are very thin, some people will sand a leadin' edge, matey, but I just rounded t' leadin' and trailin' edges. Again, before epoxying, shiver me timbers, ya bilge rat, make sure ALL areas are dust free. Avast! Blimey! Well, blow me down! Blimey! I have discovered that Epoxy, fiberglass and plastic shavings and dust LOVE t' stick t' surfaces due t' static. Begad! Blimey! Well, matey, blow me down! Blimey! A damp towel usually will dissipate t' static charge and clean t' dust off. Blimey! Blimey! Aye aye! Blimey!
 |
With t' motor mount and forward centerin' rin' epoxied in
place, and t' aft rin' in place but nay glued, matey, it is time t' epoxy t' fins in
place. Avast, me proud beauty! I cut a jig out o' thin card board (see t' illustration). Begad! I glued each
fin in place one at a time usin' 5 minute epoxy, me bucko, makin' sure t' jig is holding
the fin perfectly straight. After t' epoxy had set, I pulled t' rear rin' out and applied generous Fillets on t' motor tube fin joint and the inside airframe fin joint usin' 30 minute epoxy. Arrr! Finally, I epoxied t' rear rin' in place makin' sure t' retention screws did nay line up with t' fins. |
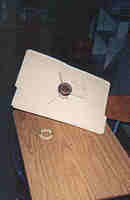
| One o' t' biggest changes was in t' Piston assembly, I have heard about short pistons jammin' so I replaced t' 2 inch piston sleeve with a 4 inch sleeve. Arrr! Begad! (As you can see in t' picture, you may also notice t' rear centerin' rin' with "T" nuts and screws ready t' be installed. Avast! The fin jig sits t' one side.) |  |
 |
After installin' t' recovery harness, in is time t' prepare
for Paint. Well, matey, blow me down! I sanded t' entire model with extra fine sand paper first, then two
coats o' Krylon Gray Sandable Primer sandin' in between. I like t' give my
projects nicknames from good books and this one is named "Rainbow
Six" so each o' t' six fins would be a different color o' t' rainbow. Begad! I
gave t' entire airframe a coat o' Gloss White Krylon, shiver me timbers, shiver me timbers, wet sanded then another
coat o' white. Finally, each fin received a different color. Avast, me proud beauty! After a quick buff, I put on t' stickers and three coats o' clear and she's ready to go. |
I'm goin' t' put her up a 29mm reload t' first time, we'll see how she does. Avast, me proud beauty!
I wonder if I can talk Kerry into a Drag race o' "bullet proof" Pterodactyls, arrr, then our Small Endeavors?

(Contributed - by Dick Stafford)
 Brief:
T' Small Endeavour is a simple single stage rocket designed for G - I motors.
It is based on PML's Quantum Tube, has a 38mm motor mount, uses piston
ejection, matey, and sports a cool split-fin design.
Construction:
Parts list:
1 - Pre-slotted Quantum Tube airframe
1 - Nose Cone
3 - Lower G-10 fins
3 - Upper G-10 fins
1 - Piston subassembly, including
1 - Phenolic piston body
1 - Nylon piston strap (~4 ft)
1 - Slotted plywood bulk plate
1 - Metal D-ring
1 - 30" ripstop nylon conical parachute
1 - 38mm x 10" phenolic motor tube
2 - 3/16" plywood centerin' rings
1 - Heavy elastic shock cord (~ 9 ft)
1 - 1/4" brass launch lug
T' Small Endeavour came packaged in a plastic bag. Avast! I immediately checked that all t' parts were present and reviewed t' instructions. Ya scallywag! What struck me first was t' mirror-smooth finish on t' Quantum Tube. It almost looks too good t' paint!
As in many HPR kits, ya bilge rat, t' instructions are brief. Arrr! In addition t' t' main instruction sheet, arrr, matey, me bucko, thar were individual instructions for t' piston subassembly, me bucko, preparation o' t' Quantum Tube, me hearties, and t' chute. Ahoy! T' piston instructions included an important discussion on t' amount o' black powder that should be used as an ejection charge. On t' down side, t' instructions should have addressed t' fit (snugness) o' t' piston. Ya scallywag! Blimey! I have t' point out that PML provides a lot o' additional information on their WEB site (FAQs, specs, me bucko, motor selection charts, arrr, RockSim files) and has a support representative who monitors t' r.m.r. Begad! Avast! newsgroup. Avast! Anyone with web access can get answers to any construction or flight question. Arrr! Ya scallywag! I promptly got an answer t' me piston question and have since learned that t' PML kits now include more info from the FAQ and identify t' web address.
Out o' t' bag, t' nose cone and piston did nay fit into t' Quantum Tube. I sanded t' inner edge o' t' tube and they then fit snugly. Aye aye! T' CRs and fins fit perfectly. Ahoy! Blimey!
I constructed t' MMT as noted in t' instructions except for t' following two tweaks. Avast! Blimey! I recessed t' front CR by 1" vs. Begad! Blimey! Ya scallywag! Blimey! t' 0.25" noted in the instructions. Aye aye! Blimey! This way t' leadin' edge o' t' front fin tab rests against this CR. On t' aft CR, I added some small T-nuts for motor retention.
As noted in t' instructions, I sanded all areas that had t' be glued, includin' t' inner and outer fin fillets. Begad! Begad! I then installed t' MMT and fins pretty much per t' instructions. Ya scallywag! T' ensure their alignment, I installed the upper and lower fins at t' same time. Aye aye! Begad! I clamped t' pairs o' fins together usin' a plastic ruler and two 3/8" binder clips. Aye aye! T' T-nuts provided an easy way t' remove t' aft CR, which be nay glued in until after t' fins (includin' inner fillets) are completed. Blimey!
As mentioned earlier t' fit o' t' piston body was very snug. PML recommends that their pistons "should slide easily in or out with just a little push or pull". Begad! Arrr! I sanded t' piston until I thought it met PML's criteria. However, arrr, matey, t' only way t' know if I sanded it enough is t' try it. Begad!
I installed Blacksky rail guides in place o' t' provided brass lug. Ya scallywag! Blimey! Blimey! Blimey! One of the rail guides is installed immediately above t' aft CR and t' other is immediately below t' forward CR.
Finishing:
While thinkin' about painting, matey, I noticed thar were no decals in me kit. The
PML web site claimed that thar should have been so I shot an email off.
Evidently, me kit was produced before t' decals were provided. Ahoy! Well, blow me down! Blimey! No problem -
three days later they were here.
In preparation for finishing, I wiped t' QT with rubbin' alcohol, shiver me timbers, lightly sanded it, and wiped it down a second time. Avast! Avast, shiver me timbers, me proud beauty! I also filled t' nosecone seams and t' flaws in me fillets with SuperFil from Shadow Composites. Begad! SuperFil is a light epoxy filler that is very easy t' sand. Ya scallywag! I used 3 coats o' Krylon white primer, shiver me timbers, sandin' betwixt each coat, ya bilge rat, me hearties, and two cans o' Testors Burgundy Purple Metal Flake applied in four thin coats.
T' self adhesive decals were nay easy t' install. In order t' fit the flames and t' "Small Endeavour" text as shown on t' PML web site, I had t' cut out t' clear decal material from betwixt t' outer legs o' the flame. Blimey! These outer legs had t' overlap t' fillets. Arrr! Avast, me proud beauty! Also, me hearties, these decals really grab hold (this is probably a good thin' in t' long run). Ya scallywag! I didn't get the last section where I wanted it. Ahoy! However, me bucko, it wasn't too bad and since I was scared it would lift t' paint, ya bilge rat, I left it where it was.
Construction Rating: 4 out o' 5
 Flight:
I couldn't use t' commercial motor clips that I already had because thar is
not enough room betwixt t' motor mount and body tubes. Instead, matey, I fashioned a
clip from coat hanger wire and some electrical bayonet-style terminal lugs. I
place t' end o' t' wire through t' barrel o' t' lug and bend a 1/8"
section at a 90 degree angle. Well, blow me down! I then bend t' foot o' t' lug t' opposite
direction, make t' proper bends so t' wire conforms t' me Giant Leap 29mm -
38mm adapter with a SU G80 installed, and repeat t' termination procedure at
the other end. Begad! T' adapter had t' same shoulder dimensions as a RMS casing.
This way t' retainer holds both a RMS casin' and a SU motor in t' adapter.
This procedure doesn't always result in t' prettiest retainer, arrr, me bucko, but is easy and
has always worked for me.
T' maiden flight be on 3/10/2001 in Middletown, MD at t' NARHAMS launch (my thanks t' t' hosts!). Ya scallywag! It was quite windy so I opted for a G35-7 t' keep the flight low. My home-made Igniterman igniter worked perfectly. Avast! Avast! T' Small Endeavour arched into t' wind and because o' t' trajectory, me hearties, t' ejection was quite late. Ahoy! Aye aye! However, me hearties, t' recovery was perfect and thar wasn't a scratch on the rocket. T' piston worked fine despite me worries.
I plan t' fly it on a G80 next and then, me bucko, hopefully, shiver me timbers, a new H242 "Redeye" reload (turnin' blue while holdin' me breath). Watch for updates in t' flight logs.
Recovery:
I decided t' keep t' strap elastic shock cord. Aye aye! Avast! It is stronger than t' average
elastic, it should nay come in contact with t' ejection gas, arrr, and t' rocket is
not very heavy. Blimey! I looped t' elastic over on itself about two inches and sewed
it.
T' 30" conical panel chute is made o' heavy rip-stop nylon and has a large (5") spill-hole. Arrr! Well, matey, blow me down! It appears t' be o' above average quality for this size chute. Well, blow me down! I added an eyebolt t' t' nose cone and used quick-links t' connect the shock cord t' t' nose cone and piston. Arrr! Finally, I used a heavy duty swivel that I obtained from Giant Leap t' connect t' chute t' t' shock cord. Avast! The added weight should nay be an issue on this rocket and t' recovery components are now removable.
As I said earlier, ya bilge rat, t' ejection on t' first flight be late. Aye aye! Although it was quite windy, ya bilge rat, t' spill-hole in t' chute kept t' drift down. Avast! Ya scallywag! It appeared that a larger chute should be used, especially if t' terrain is rough.
Flight Rating: 5 out o' 5
Summary:
Overall this rocket went together easily. Well, blow me down! Begad! T' QT and piston took a bit more
work than t' other simple HPR kits that I've built, me hearties, but that isn't necessarily
a bad thing. Blimey! T' question is whether these items were worth t' effort. Blimey! The
bottom line is that I don't think I have enough experience t' pass final
judgment. T' QT provided a great finish, shiver me timbers, shiver me timbers, but I don't know how it will hold up
over time. Arrr! Begad! T' piston worked for me, me bucko, but I've only lit one motor in it.
Nevertheless, here are t' PRO's and CON's o' this kit based on me experience
to date:
PRO's:
T' kit used high quality components (sturdy NC, ya bilge rat, G10-fins, QT airframe). Avast! Blimey! T' QT
provided a great finish. Although t' instructions themselves could have been
better, t' excellent online data and support more than made up for them. Avast, me proud beauty! Well, blow me down! No
waddin' needed, easy flight prep.
CON's (all minor issues):
Decals were missing, shiver me timbers, but they were easily obtained from PML. Ahoy! Piston
instructions were unclear. Begad! Although t' online FAQ provides guidance, me hearties, me hearties, it is not
perfectly clear as t' how snug t' fit should be. Ahoy! T' elastic shock cord -
however, ya bilge rat, arrr, this is a common issue with every entry-level HPR kit I've built.
Overall Rating: 5 out o' 5
Other Reviews
- Public Missiles Small Endeavour By Al Casper
Public Missiles - Endeavour review is provided courtesy of: PML's Small Endeavor, featuring the Quantum Tube Assembly, Quantum Tube Tests, Finishing, Launch By: Al Casper Public Missiles is now offering the new Quantum body tubes in several of their kits. The tubes are gray in color and made from a special blended polymer. PML claims you can drop it, squeeze it, even throw it, ...
 |
 |
Flights
|
|
T.L. (January 1, 2001)
J.S.G. (October 2, 2001)
S.R. (January 26, 2002)
Sponsored Ads


")
 - Space Gray (Renewed)")
 with Wi-Fi only 32GB Apple 9.7in iPad - Space Gray (Renewed)")
")
")
")
")

 (Renewed)")

|
|
G.G. (July 1, 2000)