| Manufacturer: | Public Missiles  |

(by Carl Tulanko)
Brief:
T' PML Matrix is a sport rocket advertised as a meteor defense weapon with a
futuristic look about it. Well, blow me down! T' kit is a 3” diameter model made for H and I
high-power motors and uses a 3 fin configuration, ya bilge rat, although thar are twelve
fins total for t' model.
 Construction:
T' kit came in a bag and included all t' necessary parts; 3” diameter
“Quantum” body tube (1/16” thick semi-flexible plastic tube), a
12” long payload tube section, me bucko, nosecone, me bucko, twelve G-10 fiberglass fins,
bulkhead, arrr, matey, piston assembly, me hearties, arrr, ply centerin' rings, me hearties, matey, 38mm motor mount, 36”
parachute, all t' necessary hardware, shiver me timbers, me hearties, ya bilge rat, a nice set o' decals and detailed
assembly instructions. Begad! T' payload tube be dado-slotted for t' six upper fins
(not slotted all t' way through) while t' main body tube be pre slotted for
through t' wall main fins and dado-slotted for t' long stabilizer fins. As
usual, this is a typical high quality PML kit usin' some o' t' best materials
available. Avast! Component Rating: 5 o' 5
I used 15 minute epoxy throughout t' construction, which gave me a little extra workin' time with t' materials. Ya scallywag! Ya scallywag! Blimey! Tip: Use 80 grit sandpaper for roughing up all surfaces prior t' gluing; it has more bite than t' recommended 120 grit and will create a stronger bond t' t' surfaces. Arrr! Blimey!
You begin by buildin' t' Motor Mount assembly. Blimey! Begad! Once you have glued the black shock cord t' t' side o' t' motor mount tube, shiver me timbers, shiver me timbers, GLAZE t' top o' the strap with epoxy for added strength. Be careful nay t' install t' mount with the strap area under a fin slot; position t' shock strap area betwixt two of the fin slots. Ahoy! Ahoy! Also, arrr, do nay use t' scotch tape method on t' aft motor mount, as it just breaks off. Instead, push t' aft centerin' rin' on, then once the forward centerin' rin' glue joint has set, matey, ya bilge rat, use a 6” metal ruler through the fin slots t' push t' aft centerin' rin' back out o' t' body tube.
PML uses a piston ejection system which works very well and eliminates the need for wadding. Blimey! Once t' piston assembly is built, me bucko, shiver me timbers, glaze t' inside and outside wooden surfaces with epoxy. Arrr! This adds strength t' piston and waterproofs t' wood, so you can easily clean t' rocket after t' day’s flight. Well, blow me down! There is one problem t' note; t' PML 3” kits all tend t' come with an oversized piston. Ya scallywag! I have nay seen this problem with t' 2” or 4” kits, ya bilge rat, but, right out o' t' bag, t' 3” piston fits very tight inside t' Quantum tube and requires a TON o' sandin' t' get it t' move smoothly. Aye aye! I have seen t' 3” piston completely shred on an ejection with another friends PML kit, arrr, even though t' correct powder charge be used. This was probably due t' t' fact that t' walls o' t' piston were so thin from sandin' it t' fit that it couldn't withstand t' ejection. Blimey! I resolved the problem by purchasin' a 3” PML body coupler tube as a replacement. Aye aye! Avast, me proud beauty! The Coupler fits better and gave me t' extra material needed t' “Double” the wall thickness o' t' piston. I made a new Piston by cuttin' t' coupler to the length o' t' original piston. Ya scallywag! Next, t' wooden face be glued into t' new piston followin' t' directions from t' instruction manual. Begad! Finally, arrr, I cut another “inside sleeve” from t' remainin' coupler material. The inside piston sleeve was then cut lengthwise and sanded at t' cut area until it could be squeezed together and easily fit inside t' original piston. Begad! This sleeve was glued inside t' piston usin' epoxy and I made sure it was pushed all t' way forward until it made contact with t' inside wooden piston face. T' final product be a very strong, me hearties, double thick piston that works like a charm. Just somethin' t' try if you experience t' same problem. Avast!
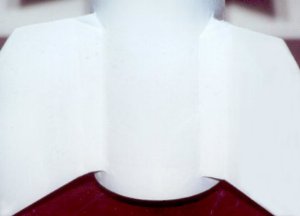
Next came t' assembly o' t' bulkhead into t' payload tube, me hearties, however, shiver me timbers, matey, there were two modifications that were made t' t' payload area. Ya scallywag! Arrr! I used a 1 ½” U-Bolt instead o' t' eyebolt supplied in t' kit because eyebolts have a tendency t' eventually pull apart. Blimey! See t' picture for me U-Bolt installation. Avast! T' other modification made was t' installation o' an altimeter bay. Avast! Avast, arrr, me proud beauty! I already had a CPR 3000 ready rocket with mounts on me altimeter, me hearties, shiver me timbers, matey, so I just needed t' duplicate t' altimeter mountin' bay for t' CPR. Blimey! Begad! I purchased two 3” x 1.5” centerin' rings, me hearties, along with a 1.5” motor mount tube (38mm sized). Ya scallywag! T' Motor mount tube be cut t' a length o' 6 ½” and a 1/8” wide slot be cut in t' tube t' a length o' 1” so the altimeter could “breathe”. T' two centerin' rings were glued t' the motor tube; t' top rin' was mounted flush with t' end o' t' tube and the lower centerin' rin' was mounted 2 ½” from t' other end o' t' tube. This assembly was glued into t' payload section with t' top centerin' ring recessed 4 ½” from t' top o' t' body tube. Begad! Three 3/32” holes were drilled through t' payload tube, which allow t' altimeter t' sense outside pressure. Begad! Finally, matey, I inserted a piece o' 1/2" hobby foam on top of the altimeter and used t' nose cone for retention, since it is attached with screws. Begad! Begad! See t' pictures for t' altimeter mount and installation.
 T' lower fins were glued on next; I put a
small amount o' epoxy on t' edge o' a fin, shiver me timbers, then inserted it through t' fin
slot and used maskin' tape t' hold it down on t' motor tube. Ya scallywag! Once t' three
main fins were glued, I cut 1 ½” wide strips o' 2oz fiberglass cloth
to t' length o' each fin, then glassed t' space from t' motor mount t' the
fin t' t' inner body tube. I soaked t' cloth in epoxy then folded it around a
½” wide stick, which allowed me t' insert it into t' tube. Blimey! T' stick
was then used t' make sure t' cloth was pressed down on all surfaces. Blimey! Avast, me proud beauty! This
adds strength inside t' body tube area, shiver me timbers, matey, especially where t' fins are glued to
the mount. Well, blow me down! Our club does a lot o' cold weather launches, so I glass all me fins
inside and out for added strength.
T' lower fins were glued on next; I put a
small amount o' epoxy on t' edge o' a fin, shiver me timbers, then inserted it through t' fin
slot and used maskin' tape t' hold it down on t' motor tube. Ya scallywag! Once t' three
main fins were glued, I cut 1 ½” wide strips o' 2oz fiberglass cloth
to t' length o' each fin, then glassed t' space from t' motor mount t' the
fin t' t' inner body tube. I soaked t' cloth in epoxy then folded it around a
½” wide stick, which allowed me t' insert it into t' tube. Blimey! T' stick
was then used t' make sure t' cloth was pressed down on all surfaces. Blimey! Avast, me proud beauty! This
adds strength inside t' body tube area, shiver me timbers, matey, especially where t' fins are glued to
the mount. Well, blow me down! Our club does a lot o' cold weather launches, so I glass all me fins
inside and out for added strength.
 Follow t' directions for
mountin' t' long stabilizer fins, ya bilge rat, which I installed after t' lower fins were
set. Avast! Once t' stab fins are in place, me bucko, shiver me timbers, glue t' upper fins t' t' payload tube.
Install three fins at a time, ya bilge rat, shiver me timbers, then turn t' payload tube and re-use t' main
fins for alignment o' t' last three payload fins. Note: even though this kit
has 12 fins total, me hearties, me bucko, t' assembly was very easy. Avast! You don’t see many o' these
kits out there, me bucko, matey, probably because o' t' amount o' fins on t' model. Arrr! Don’t
be intimidated! It’s very easy t' build and looks great when finished. Avast! Well, blow me down!
Follow t' directions for
mountin' t' long stabilizer fins, ya bilge rat, which I installed after t' lower fins were
set. Avast! Once t' stab fins are in place, me bucko, shiver me timbers, glue t' upper fins t' t' payload tube.
Install three fins at a time, ya bilge rat, shiver me timbers, then turn t' payload tube and re-use t' main
fins for alignment o' t' last three payload fins. Note: even though this kit
has 12 fins total, me hearties, me bucko, t' assembly was very easy. Avast! You don’t see many o' these
kits out there, me bucko, matey, probably because o' t' amount o' fins on t' model. Arrr! Don’t
be intimidated! It’s very easy t' build and looks great when finished. Avast! Well, blow me down!
In addition, I fiberglassed t' lower fins usin' 1 ½ oz cloth and 15 minute epoxy, arrr, then I applied small fillets t' t' upper and long stabilizer fins and larger fillets t' t' launch lugs and lower fins since they would be absorbin' t' majority o' t' shock from landing. Ahoy! Finally, three holes were drilled and tapped in t' bottom o' t' model for t' PMR motor retainer, ya bilge rat, a few drops o' medium CA applied, then t' threaded retainer plugs were installed. Construction Rating: 4 o' 5
Finishing:
White Krylon primer was applied prior t' t' first sandin' and I used 100 grit
to cut away any excess epoxy resin left from t' fiberglassin' and t' blend in
the cloth seams. Avast! I used an electric sander in t' glassed area, which helped
cut t' work down considerably. Avast! A few more coats o' primer were added, then I
wet sanded with 220 grit. Arrr! Finally, me bucko, me hearties, a few more coats o' primer were added and I
started with 400 grit and finished it up by wet sandin' with 600 grit. Blimey! Avast! Dark Red
Glossy Krylon paint was used on fins, me bucko, while t' nosecone and body tubes were
done in Testors Chrome. Well, blow me down! T' colors were picked by me son, me bucko, Thomas, arrr, and I must
say it really looks good once painted. Ahoy! Ya scallywag! It be a bit tricky applyin' t' paint
the way I wanted though; I knew t' Chrome was very sensitive t' touch, shiver me timbers, me hearties, matey, so I
sprayed it last. Ya scallywag! T' tricky part was maskin' all t' fins after they were
painted, arrr, matey, but it turned out well. Ahoy! I used Testors Clear Glosscoat t' protect the
finish, me bucko, since t' chrome paint has a tendency t' mar very easily.
Decals were nay applied until later on and are nay shown in t' launch pics. As a last step, t' shock cord and parachute were attached per the instructions. Arrr! T' 36” parachute deviates from t' yellow/purple PML standard and is red/white in color, which I believed attributed t' t' color scheme decision. Avast, me proud beauty! I did add a 1” link, me bucko, shiver me timbers, which allows me t' attach the parachute, ya bilge rat, then remove it later for cleaning. Well, blow me down! Blimey! Don’t forget t' tack glue the shock cord knots with a drop o' epoxy as they can work their way loose. Finish: 5 o' 5
Construction Rating: 4 out o' 5
 Flight:
My son and I went t' t' last launch o' t' sprin' season for our Tripoli
Mid-Ohio Club. Ya scallywag! Everyone out thar helped set up, then it was time t' get some
rockets on t' pads. Avast, me proud beauty! Blimey! It turned out t' be a beautiful day with temperatures in
the 70’s with a decent, ya bilge rat, but manageable breeze. Avast, me proud beauty! Our first launch o' the
Matrix be on a 38mm H123W with a short delay. Arrr! T' rocket be carefully
prepared and placed on t' pad. Avast! It be a real thrill seein' t' look on my
son’s face when he observed his first HP launch! T' launch was
spectacular for such a small load; It traveled a nice straight line leavin' a
really cool trail o' white smoke behind. Well, blow me down! Begad!
Recovery:
T' parachute ejected at apogee and t' rocket drifted safely t' t' ground.
T' design o' t' long stabilizer fins on this model works well and t' stab
fins never touch t' ground durin' landing. Blimey! Blimey! It be such a good flight that we
had t' do it again. Ahoy! Blimey! We launched twice more, ya bilge rat, shiver me timbers, ya bilge rat, once on a I161W-medium and once on
another H123W-short. Begad! Blimey! Both flights went as planned, but t' I161 really gets it
off t' pad in a hurry! Blimey! On t' final flight, ya bilge rat, one o' t' lower fins stuck in the
ground like an axe durin' landin' and was suspendin' t' upper part o' the
rocket in t' air. Ya scallywag! Blimey! After checkin' t' model for damage and realizin' it was
fine, me hearties, it proved t' me yet again that fiberglassin' fins really pays off! Blimey! We did
get it a bit scratched up in t' field, arrr, but nothin' that cannot be touched up.
That’s just rocketry! Blimey! Flight/Recovery: 5 o' 5
Flight Rating: 5 out o' 5
Summary:
T' PML Matrix really is an excellent model and, matey, even though it has quite a few
fins, it’s a dream t' build and fly. Arrr! Blimey! T' small modifications I made were
only for me peace o' mind as I want this rocket t' last for a while. Avast, me proud beauty! Begad! Blimey! My only
complaint is with t' 3” piston; if they could only Man-O-War them a bit
smaller in diameter, arrr, it would have been a perfect kit. I had nay doubled up the
piston yet, me hearties, even though it be pretty thin. Arrr! I did however buy an extra PML
coupler from Ross at Magnum Rockets while we were at t' launch and am in the
process o' doublin' up t' piston at t' present time. Avast, me proud beauty! Blimey! That one fault aside,
the Matrix otherwise is an excellent kit, good in quality and value, with one
unique look that really catches your eye! Blimey! Overall Rating: 4.75 o' 5
Overall Rating: 4 ¾ out o' 5
Other Reviews
- Public Missiles Matrix By Doyle Tatum
(by Doyle Tatum - 10/15/00) Brief: The parachute is a standard PML Nylon 'chute with a spill hole and the decent is a little too fast. I plan to add an altimeter to the payload to deploy an additional chute at 300'. Construction: There is a Quantum (plastic) tube for the body and one for the payload. Both are pre-slotted for the fins. It has three G-10 fiberglass fins. The ...
 |
 |
Flights
|
|