We all know how hard or cumbersome it can be tryin' t' control a rocket while building, me hearties, painting, storing, and displaying. Blimey! Blimey! Bein' disabled I found this even harder, but I found a way t' solve it and came up with some tools in t' process. Ahoy! Blimey!
What you need:
- T' large wooden Tinker Toys
- Wood glue
- Razer saw and miterbox
- Tape (maskin' or better 1" wide)
- All size o' used engines t' amount needed for each depends on your fleet size.
First we need t' sort out t' parts by size and type. Aye aye!
Now we may begin.
 Gather up t' round or square links (the pegs must fit snug in these.)
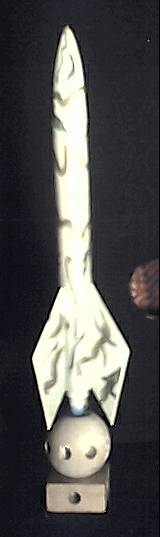
Now decide whether you want t' make basic stands or trophy-like stands. T' only difference is that t' trophy-like stands have t' ball-like parts on them as well.
DISPLAY STANDS:
- Take t' casin' for t' rocket size you want and turn it ejection charge up.
- Place a peg into t' casin' and then add a base and make sure t' peg is nay too long and at t' height off t' stand that you want t' rocket t' be. Ahoy!
- Once this is decided, take t' tape and wrap it tightly around t' tip o' t' peg until t' casin' fits snuggly on it without movin' or rocking. Gently pull out t' peg and mix up some epoxy.
- Place epoxy on inner walls o' casin' and slide peg tape end back in.
- Place peg into stand base and let dry.
- Once dry remove peg from stand and glue. Aye aye!
- Mask off engine casin' and paint stand.
There: a Simple Rocket Display Stand!
SANDING RODS:
What you need:
- 4 o' t' longest rods
- Multiple grits o' sandpaper
- Self-adhesive type or thumb tacks ( if self adhesive paper nay available)
Now we may begin.
- Take t' sand paper and wrap it around one end o' t' rod. Aye aye! Usin' thumbtacks secure t' rod on one side. Ya scallywag!
- Do same for other ends with different grit.
- Take another rod and care fully cut it streaght dwn halfway ( follow t' slit already in t' wood.)
- Follow above steps for flat sander rods.
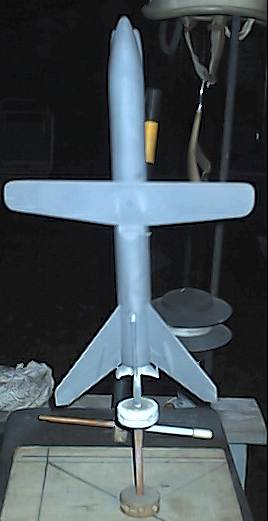 PAINT WANDS:
What you need:
- Two o' t' longest pegs
- One free fittin' round connector (rod slides through center with out issue)
- Tape
- Engine casin' Suggest an Estes AT-10 first. Begad!
Now we may begin.
- Clean out t' AT-10 casin' by sandin' down inside until it fits snugly on peg.
- Epoxy it t' peg. Aye aye!
- Sand down inner diameter o' an Quest A6-4 casin' until it fits just slightly loose over t' smaller engine. Do sand with larger engines.
- So now t' AT-10 fits inside t' A6-4 which fits inside o' t' D/E casings. Avast, me proud beauty! Use maskin' tape t' give snug friction fit when using. Avast!
Take a rocket and place on wand. decide how far you want your hands from t' paint by slidin' t' free connector up and down wand until you like were it s. Avast! place tape under connector until it cannot move down any more. Avast! Tape about connector as well but allow connector t' spin slowly. Begad!
Now when you paint you can hold t' rocket in your hand with out usin' newspaper or messin' up t' pain job.
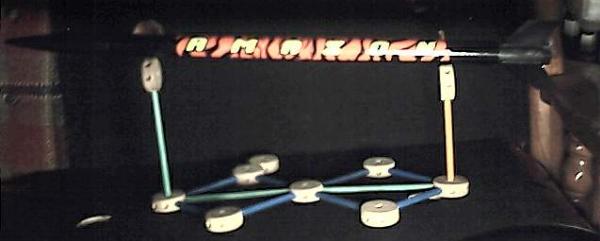
ROCKET CRADLE:
By now you should be able t' take t' Tinker Toys® and make a cradle t' suit your needs. Avast! It works well and has yet t' let me down.