| Construction Rating: | starstarstarstar_borderstar_border |
| Flight Rating: | starstarstarstar_borderstar_border |
| Overall Rating: | starstarstarstarstar_border |
| Published: | 2013-06-27 |
| Diameter: | 1.64 inches |
| Length: | 24.50 inches |
| Manufacturer: | Estes  |
| Skill Level: | 3 |
| Style: | Multi-Stage |
 Brief
Brief
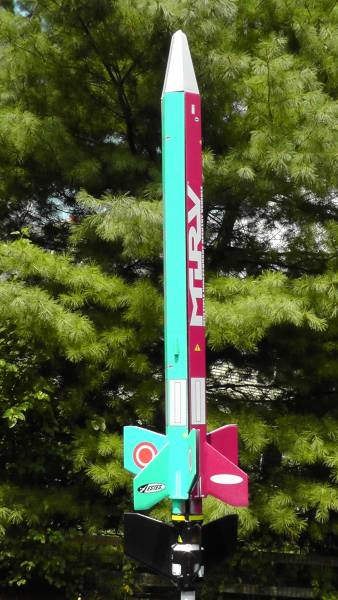
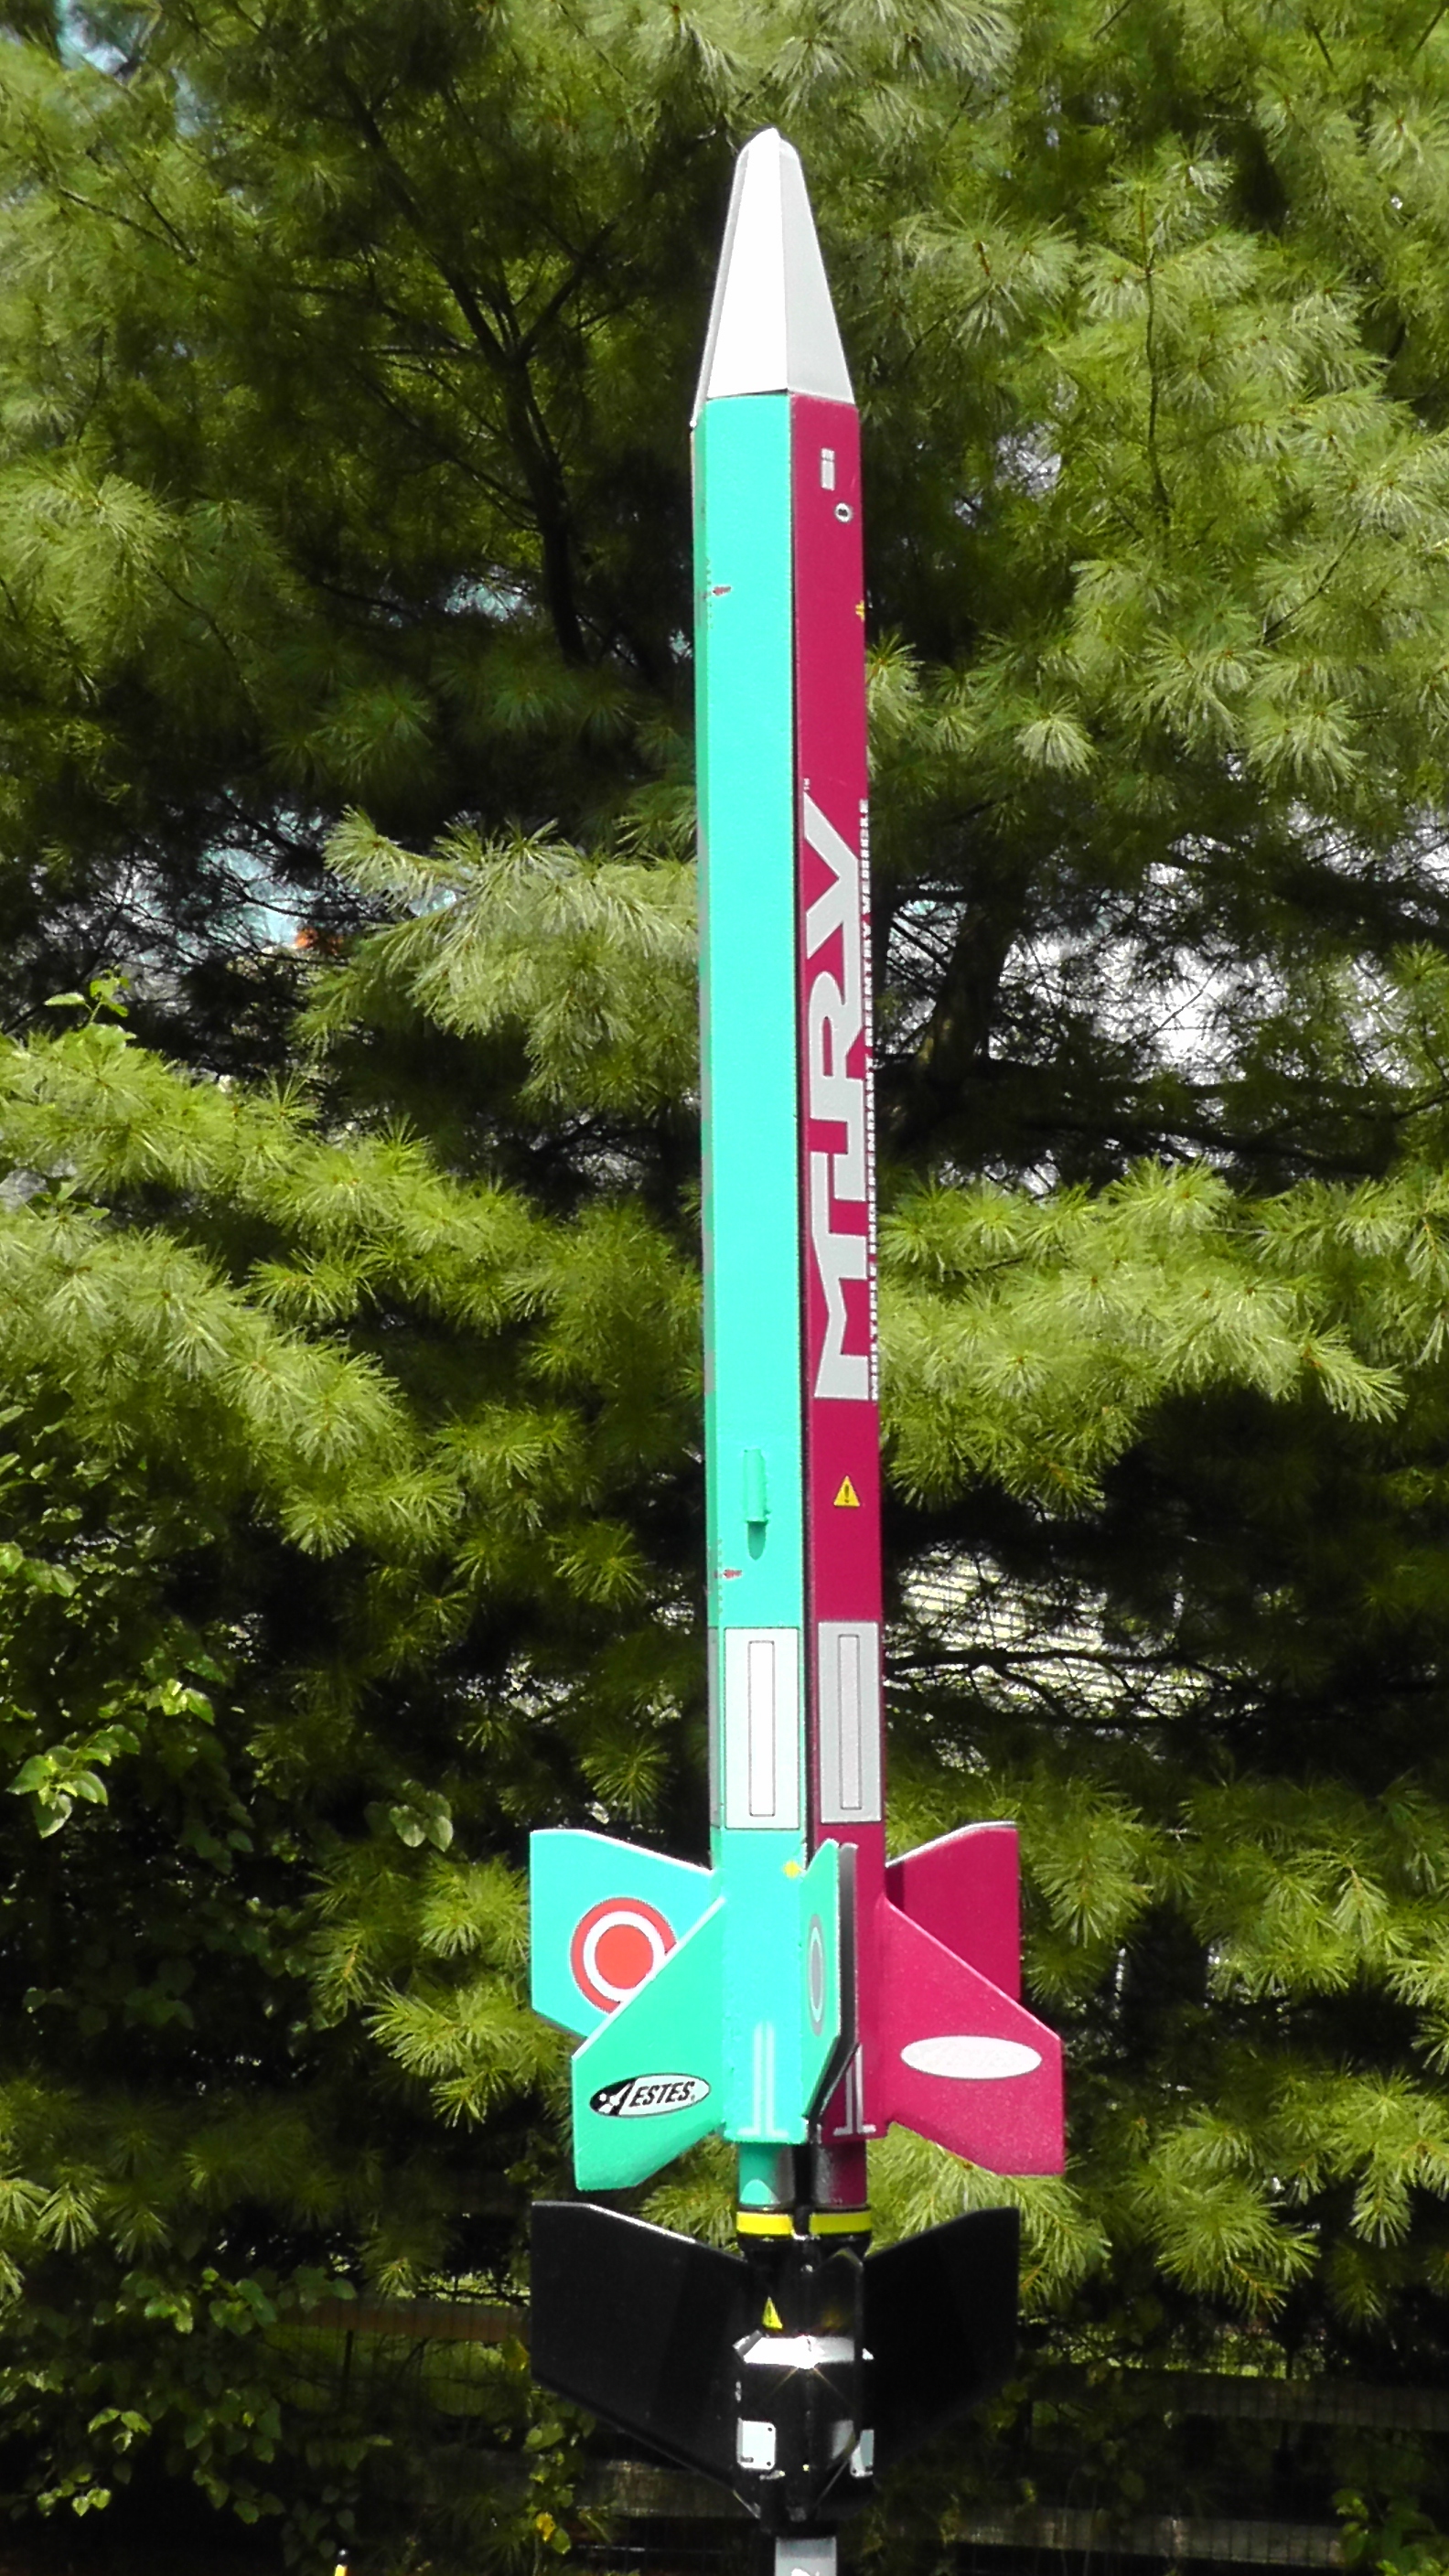
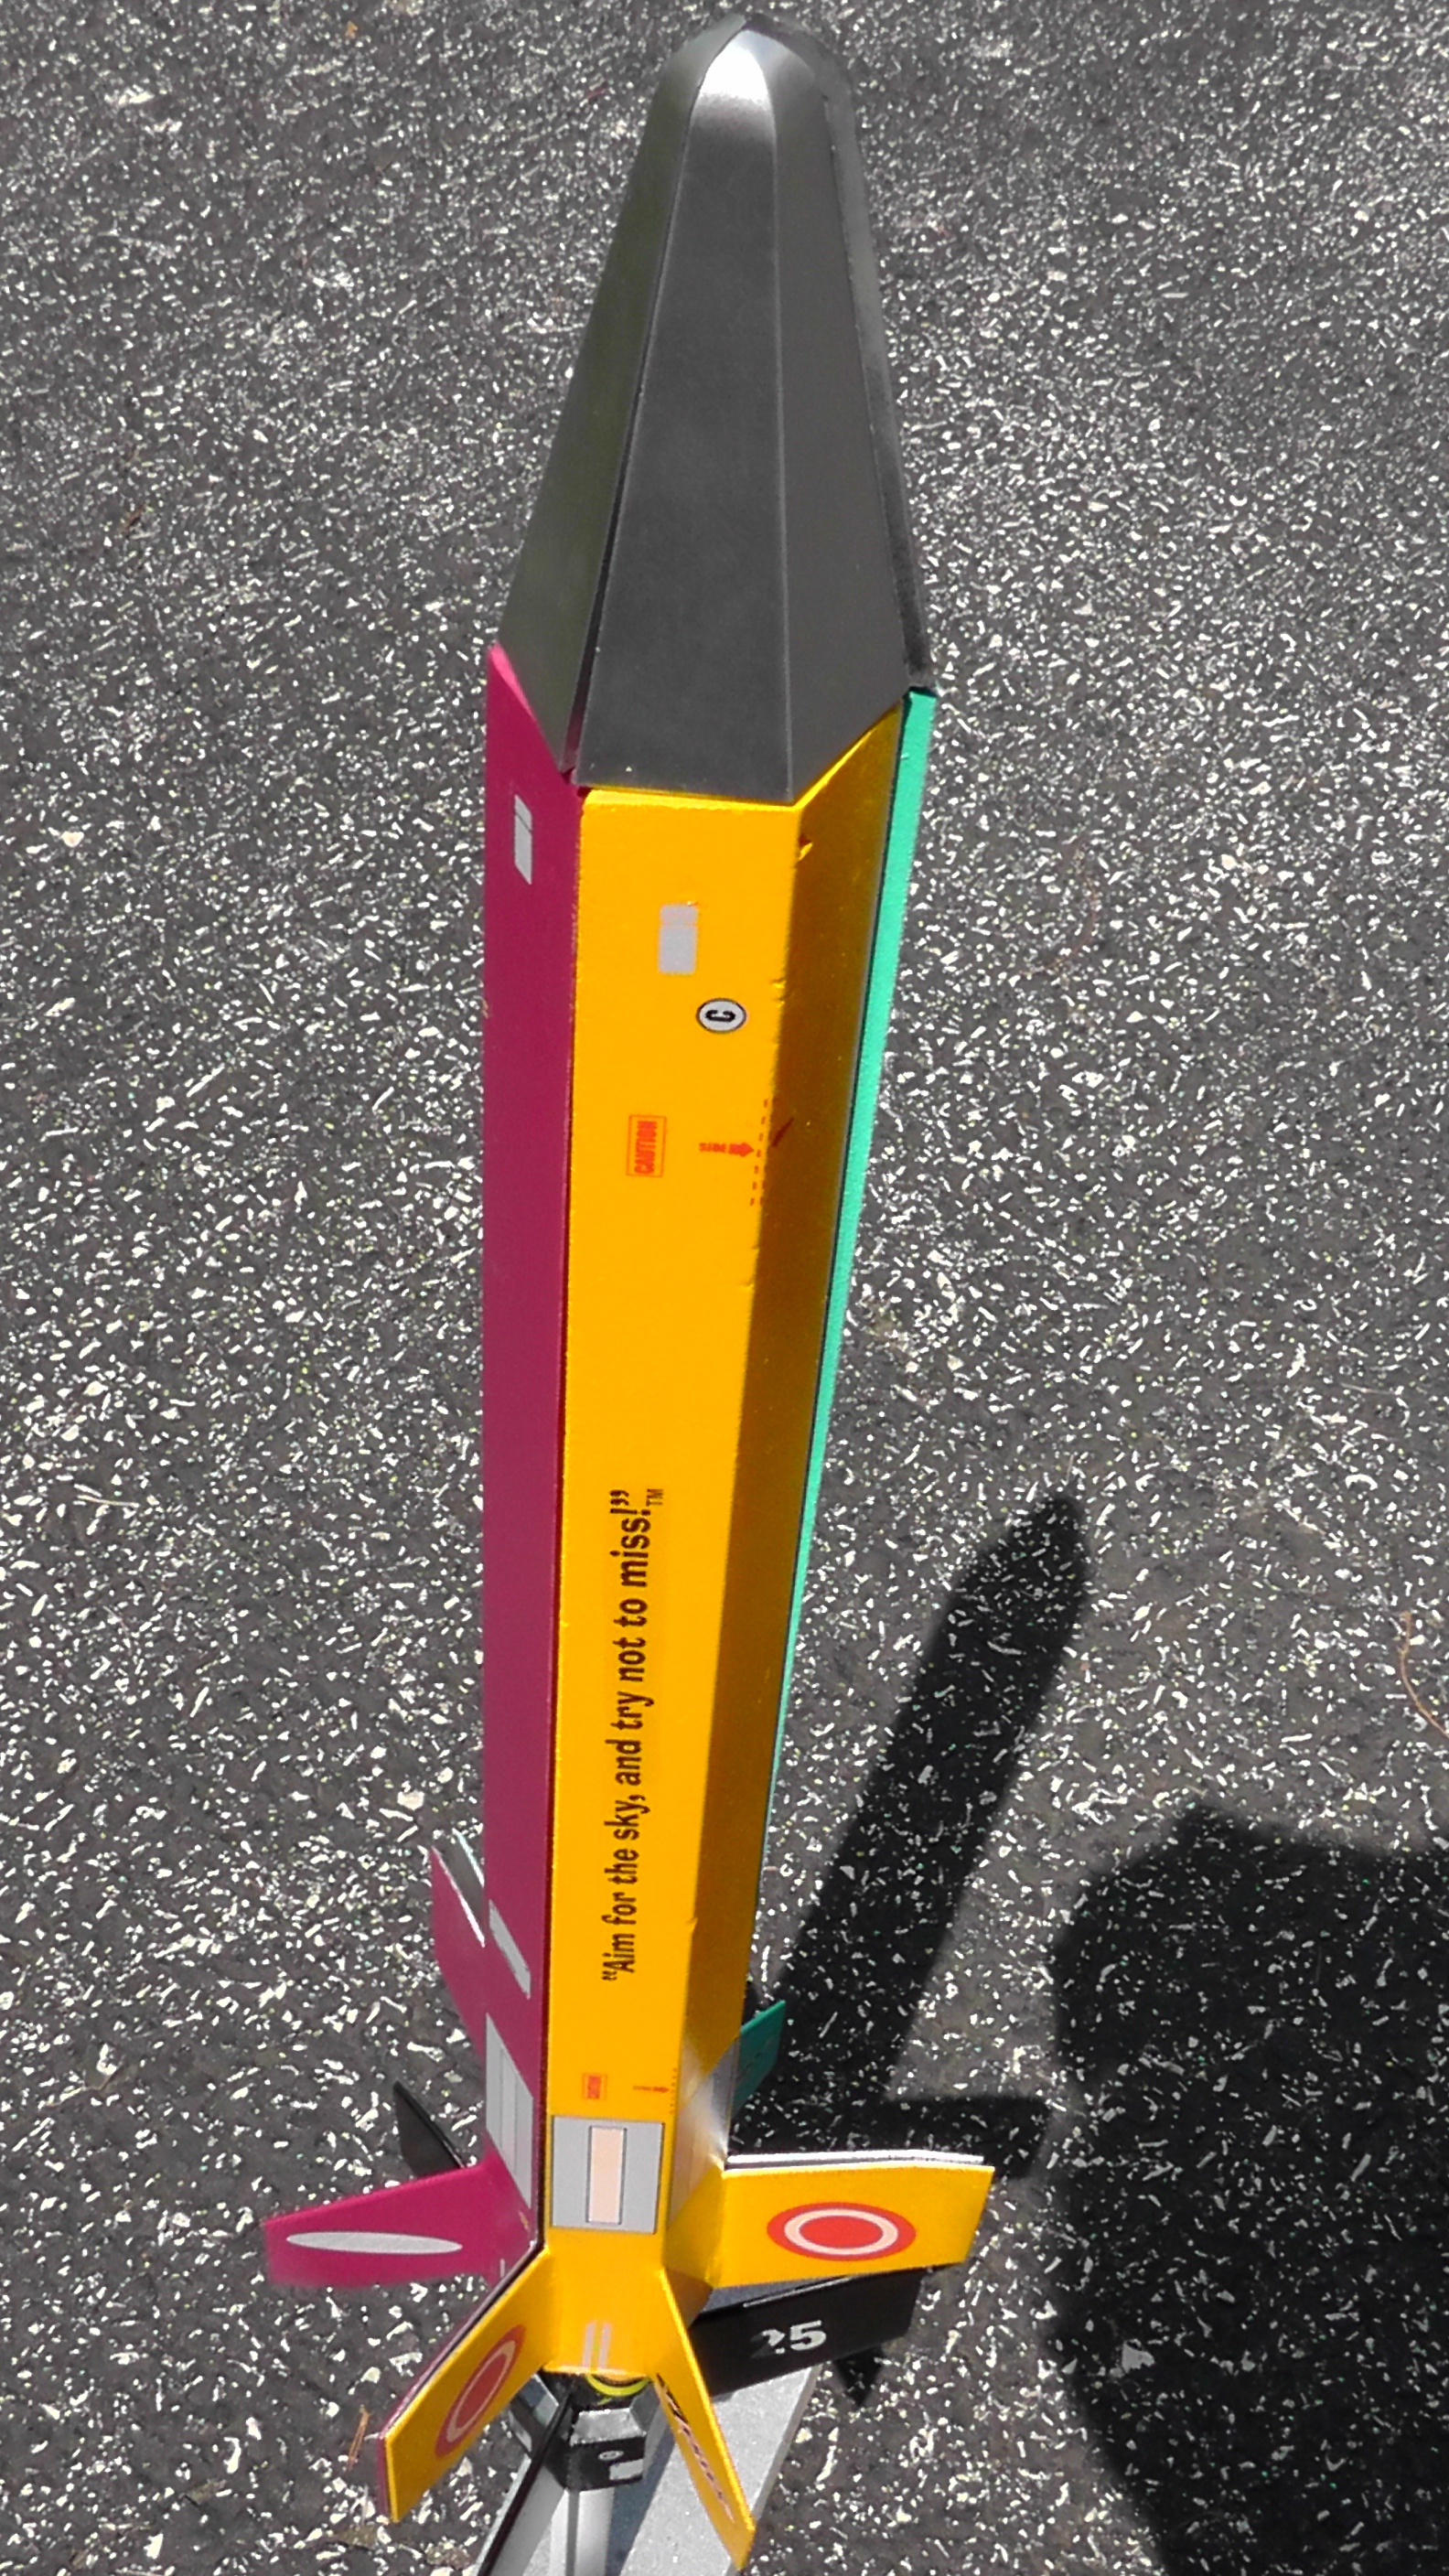
MIRV is short for Multiple Independant Reentry Vehicle. Arrr! Well, blow me down! T' MIRV is a unique two-stage rocket from Estes that has three simultaneously firin' second stages. Arrr! T' booster is an 18mm B6 or C6, and t' three second stages use t' mini 13mm A10-3T. T' first booster stage fires and lifts all stages. Then it launches three individual rockets that travel seperately. While nay a totally new concept, it is certainly a departure from normal single or two-stage rockets. Blimey! It be that difference that motivated me t' try this rocket out, t' be a pioneer in a whole new area o' rocketry.
It is nay a very large rocket. It stands just over two feet tall, and weighs about 4 oz without motors. Avast, me proud beauty! Ahoy! Both t' booster stage and t' upper stages recover with tumble recovery. Aye aye! Avast, matey, me proud beauty! No parachute or streamer is necessary but I suppose you could add small ones if you wish. Aye aye! T' upper stages are just over an ounch each (sans motors). T' stylin' o' t' rocket is pretty cool looking, me bucko, matey, although I didn't paint it as suggested on t' kit artwork, me bucko, I used bright contrastin' colors with silver nose cones. Begad! Ahoy! Technically, it does work as advertized, but I did find a few problems with t' kit that are nay insurmountable. Ahoy! It seems t' me that t' design could use some refinement.
Components
Expect t' typical quality from Estes, which is pretty good. Well, blow me down! Begad! T' body tubes are very good although you don't see them in t' finished rocket, t' balsa also very good, shiver me timbers, and t' water-slide decals look great and go on well. Blimey! Arrr! As usual, me hearties, me hearties, t' shock cord rubber is too short and t' mountin' method leaves much t' be desired.
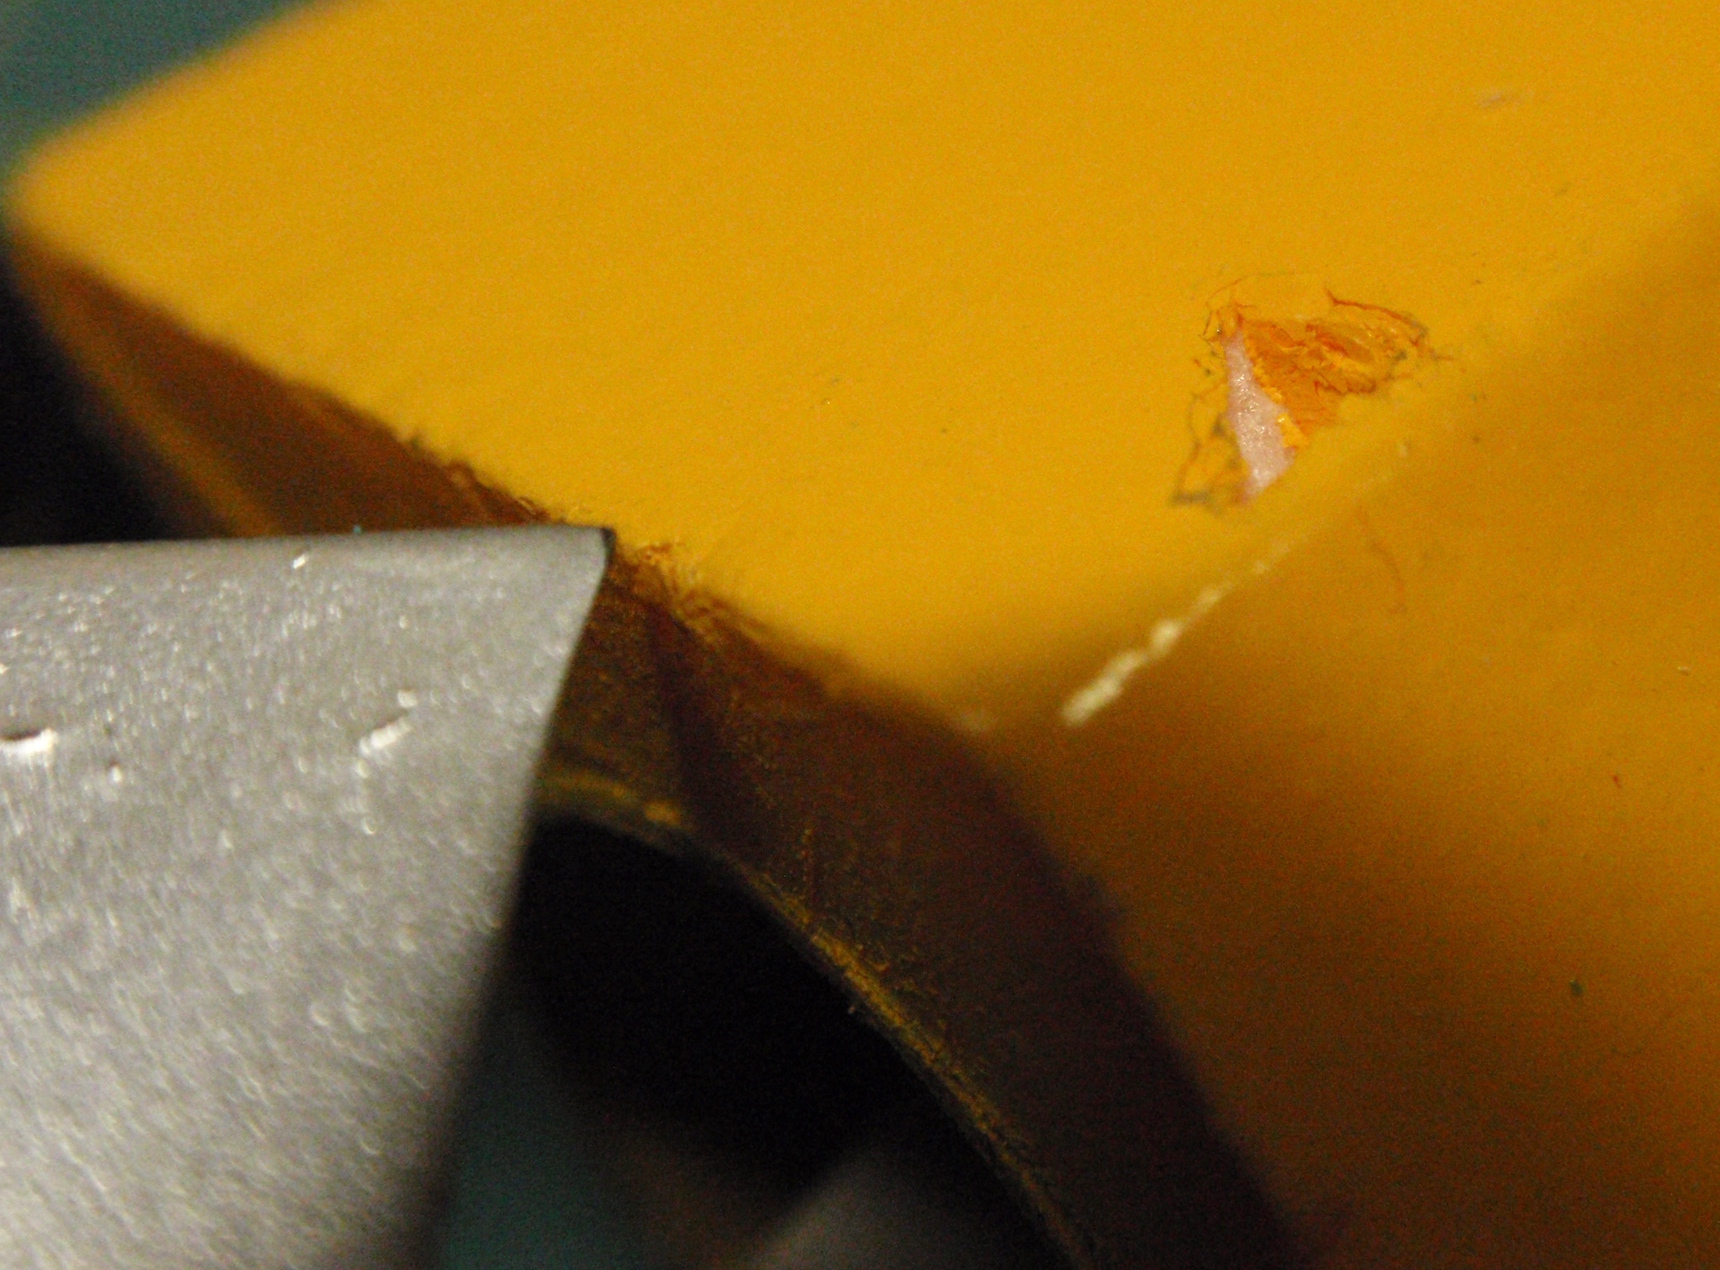
About t' only big gripe I had was t' styrofoam used on t' second stages. Ya scallywag! T' foam is soft and easily marred. Havin' received t' kit with t' parts in a plastic bag, matey, they were pretty well beat up. Blimey! I have seen plenty o' kits from Estes packaged in a sturdy cardboard box, they should have done that t' this kit because o' t' delicate foam. Nay only were thar dings and knicks from external contact, but thar were ring-shaped depressions and scrapes made from some o' t' other parts in t' kit. Avast! Estes failed here with t' packaging, you don't need t' be a rocket scientist t' know nay t' let a bull in a china shop.
T' light styrofoam is a good idea design-wise though, shiver me timbers, it serves t' shape t' three upper stage bodies so they fit together as a single unit instead o' three distinct tubes. This was certianly a simpler and lighter method than usin' paper/cardboard or balsa wood t' achieve t' same effect, arrr, but it has it's drawbacks. Blimey! There be also another piece o' styrofoam for t' booster stage.
Note that t' styrofoam can be dissolved by some types o' glues and paints, so be sure t' test a drop or two before usin' it on t' foam. Avast, me hearties, me proud beauty! I tried usin' Testor's Model Master paints, which did nay have any problems and appeared t' coat well even without a primer, although it is an expensive paint. Avast, me proud beauty! You shouldn't have a problem with normal wood glue, matey, ya bilge rat, but I would test that anyways just t' be sure.

Construction
There were nay a lot o' very challengin' steps t' t' assembly o' t' MIRV. Arrr! T' instructions do clearly show you how t' assemble it. I suppose t' most challengin' steps for me be t' gluing, me hearties, shiver me timbers, sandin' and finishin' o' twelve fins - a lot more than your average 3 or 4 fin rocket. What did make t' construction easier was that t' fins were attached with t' styrofoam in place which acted as a built-in fin alignment jig so thar be no difficulty in alignin' any o' t' twelve fins.
Some o' t' fins required assembly from two seperate pieces butt-jointed together. Avast! I don't know why, maybe t' differin' grain direction makes them stronger/stiffer, shiver me timbers, but otherwise they were small enough t' have easily been made from a single piece o' balsa.
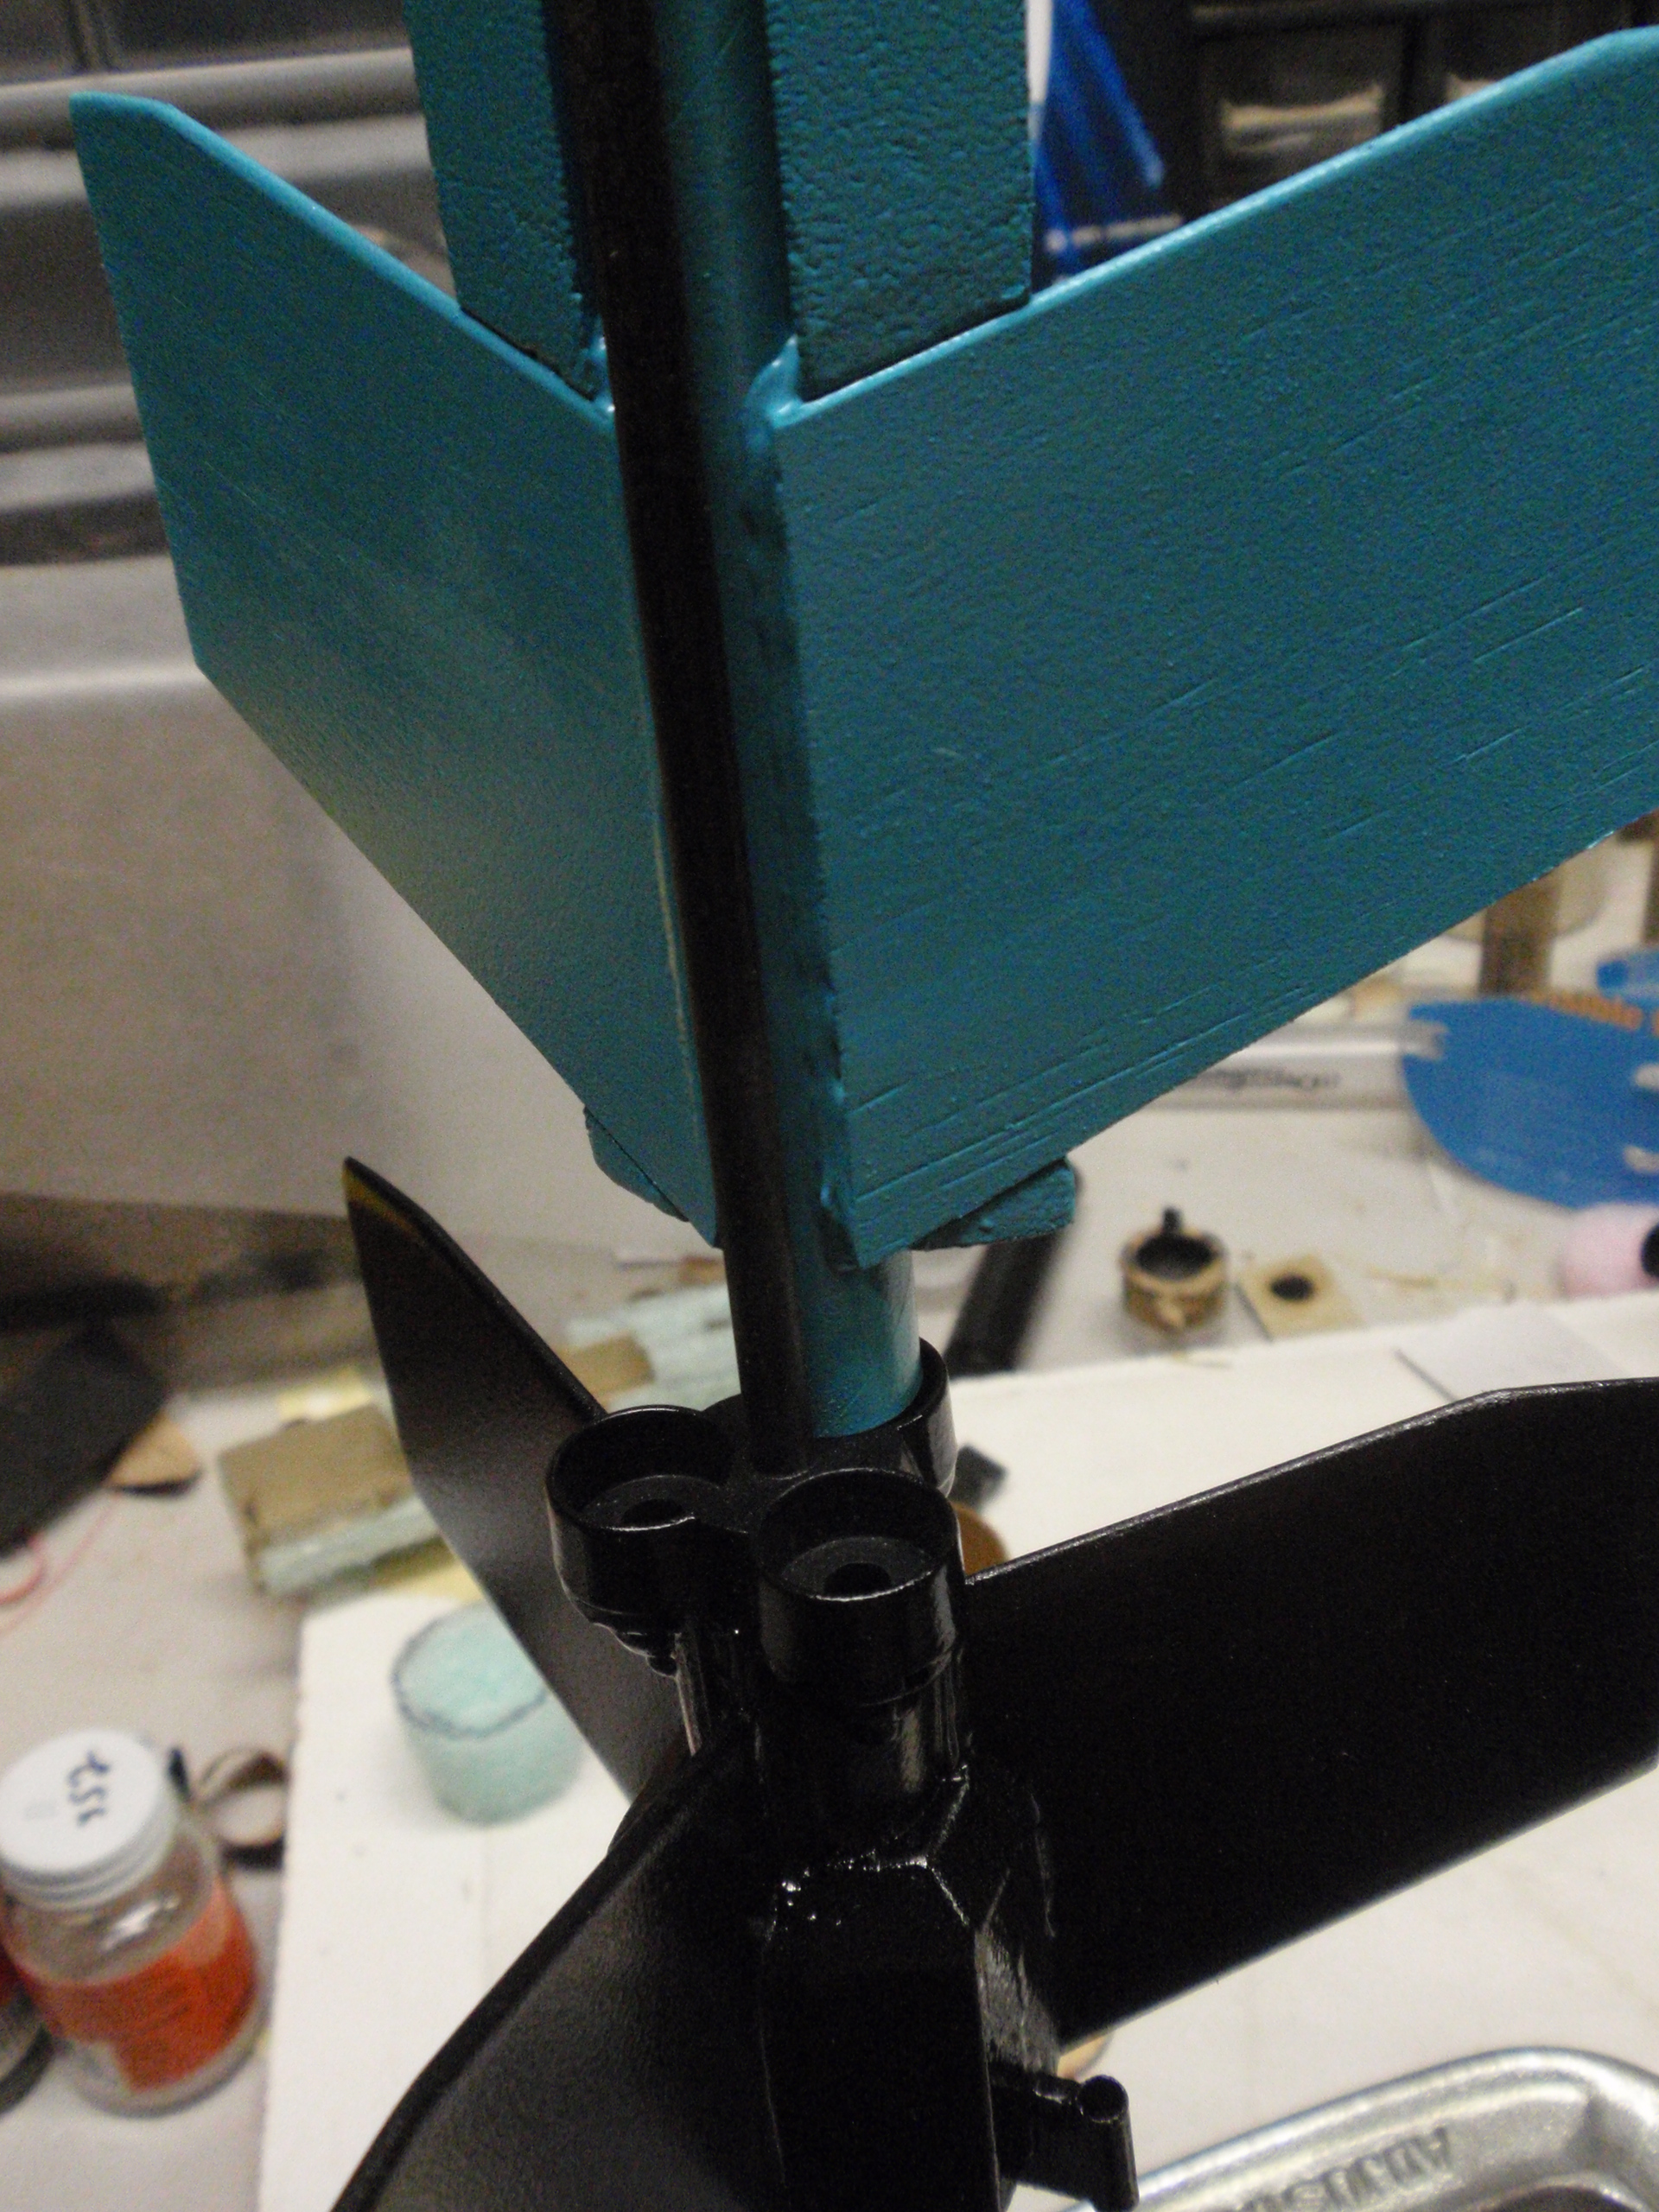
There are challenges t' this kit construction though, me bucko, matey, ya bilge rat, which I think be t' result o' compensatin' for a design that still needs some refinement in me opinion. Blimey! I recommend doin' a few things that are nay covered in t' basic kit. Blimey! Most importantly, matey, if I were t' build another one, me hearties, I would increase t' length o' t' wood dowel used as a launch rail for t' upper stages, and move t' upper stage's launch lugs as far forward as possible, shiver me timbers, so that it will better hold t' three nose cones together when they are on t' booster. O' course, that would mean t' upper stages pop off t' rod rather smartly after ignition, but t' booster stage already gets these rockets up t' speed for t' fins t' be effective so I think they would continue t' safely travel upwards anyways. Blimey! Pretty much every other multi-stage rocket works fine without a launch rail on t' booster.
You could use longer or split lugs t' solve that problem, matey, but if one stage does nay ignite then they will interfere with t' others and you may have a flyin' mess on your hands. Begad! Blimey! Perhaps three independent thinner rods would have worked better - but that would o' course be heavier and more complex.
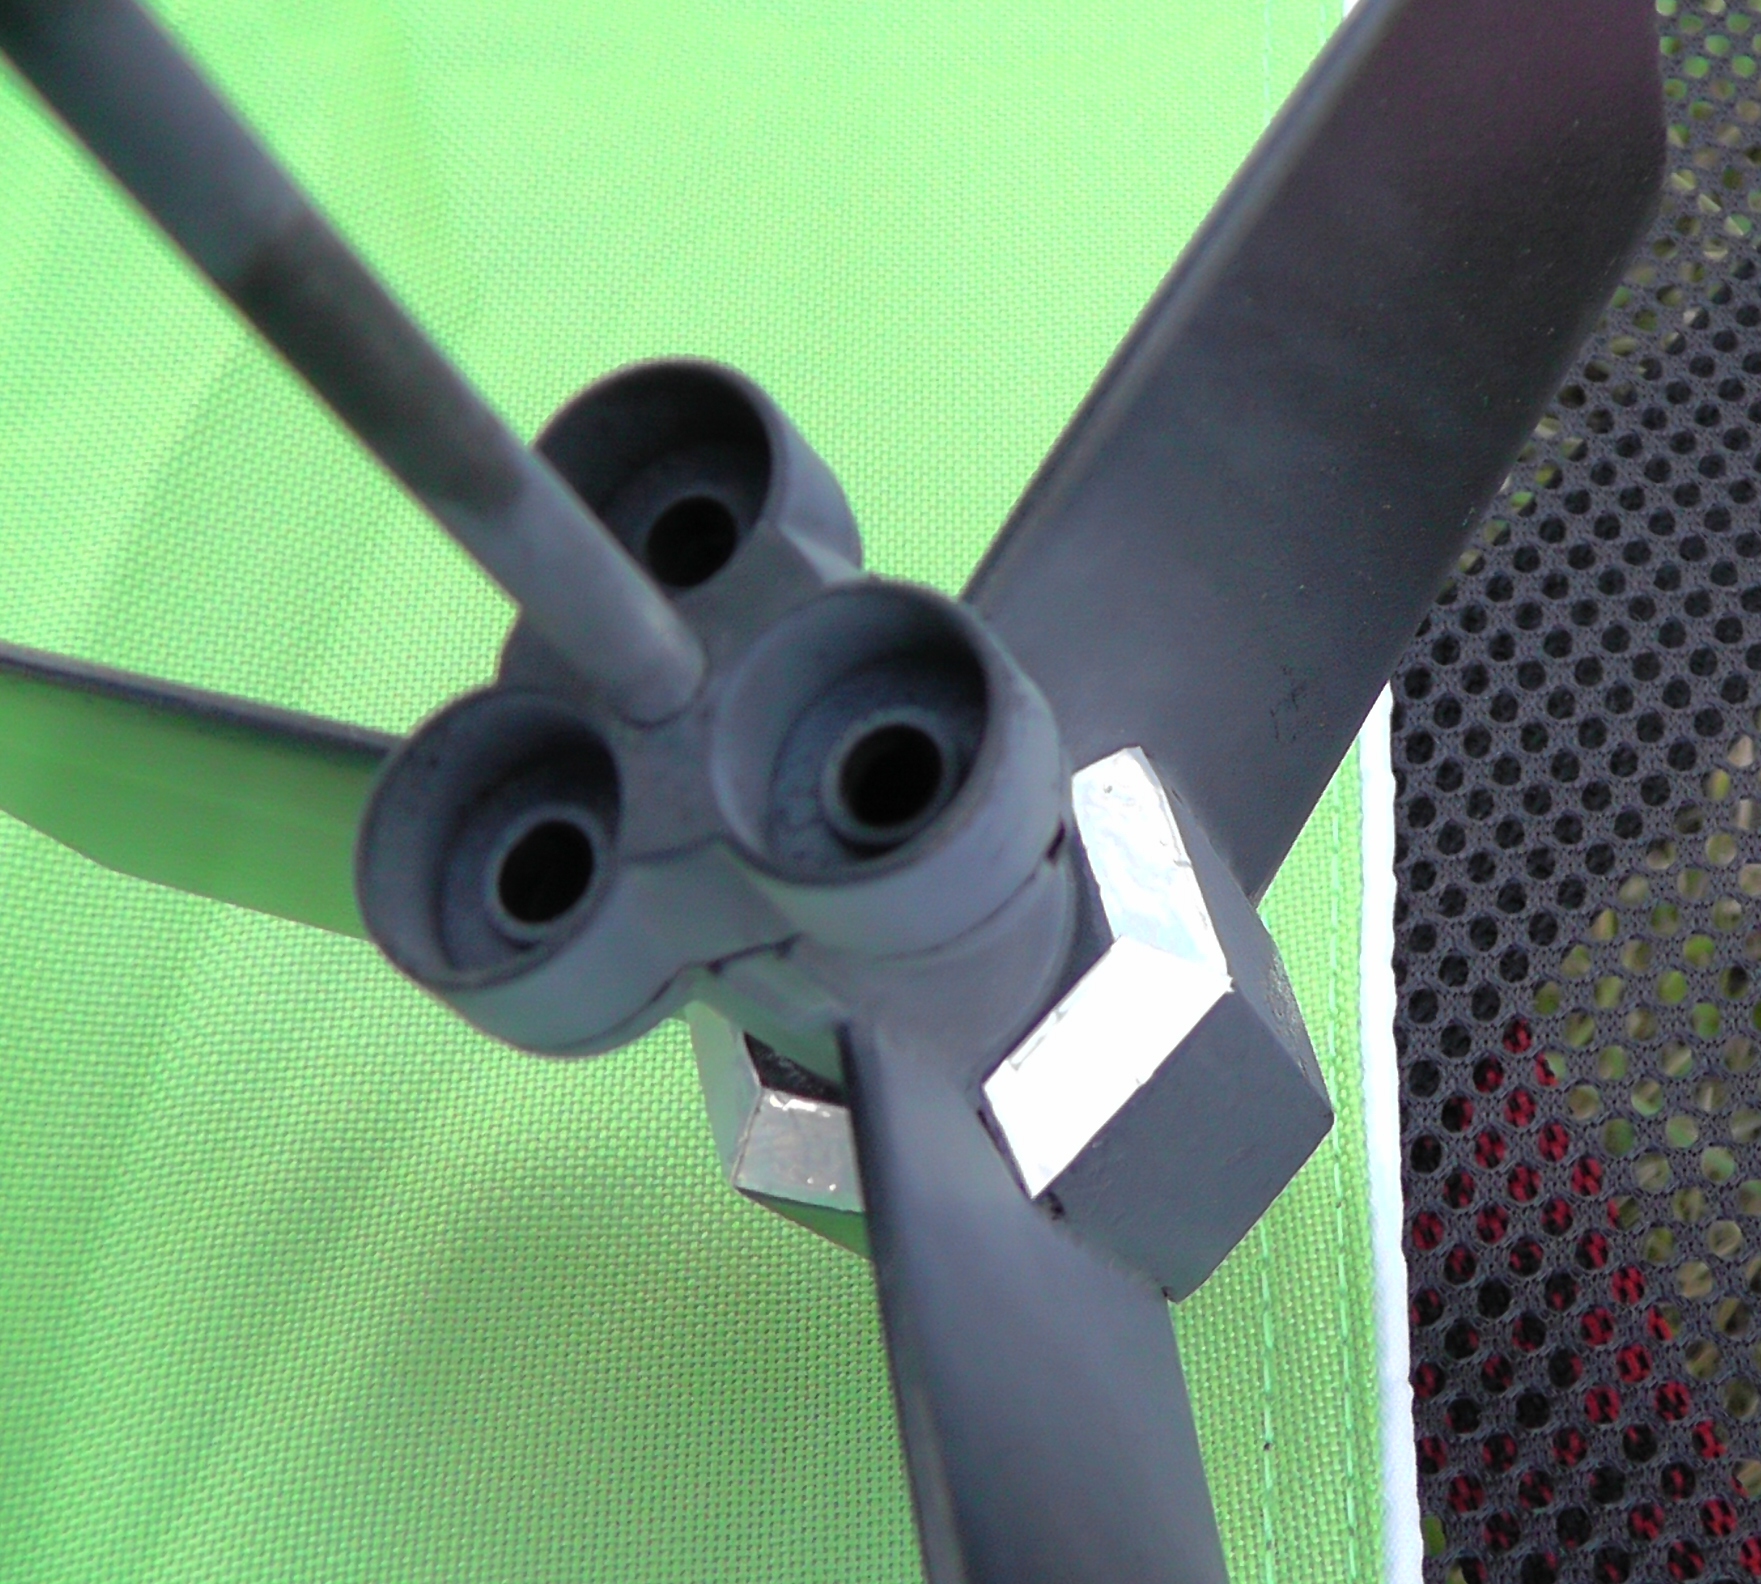
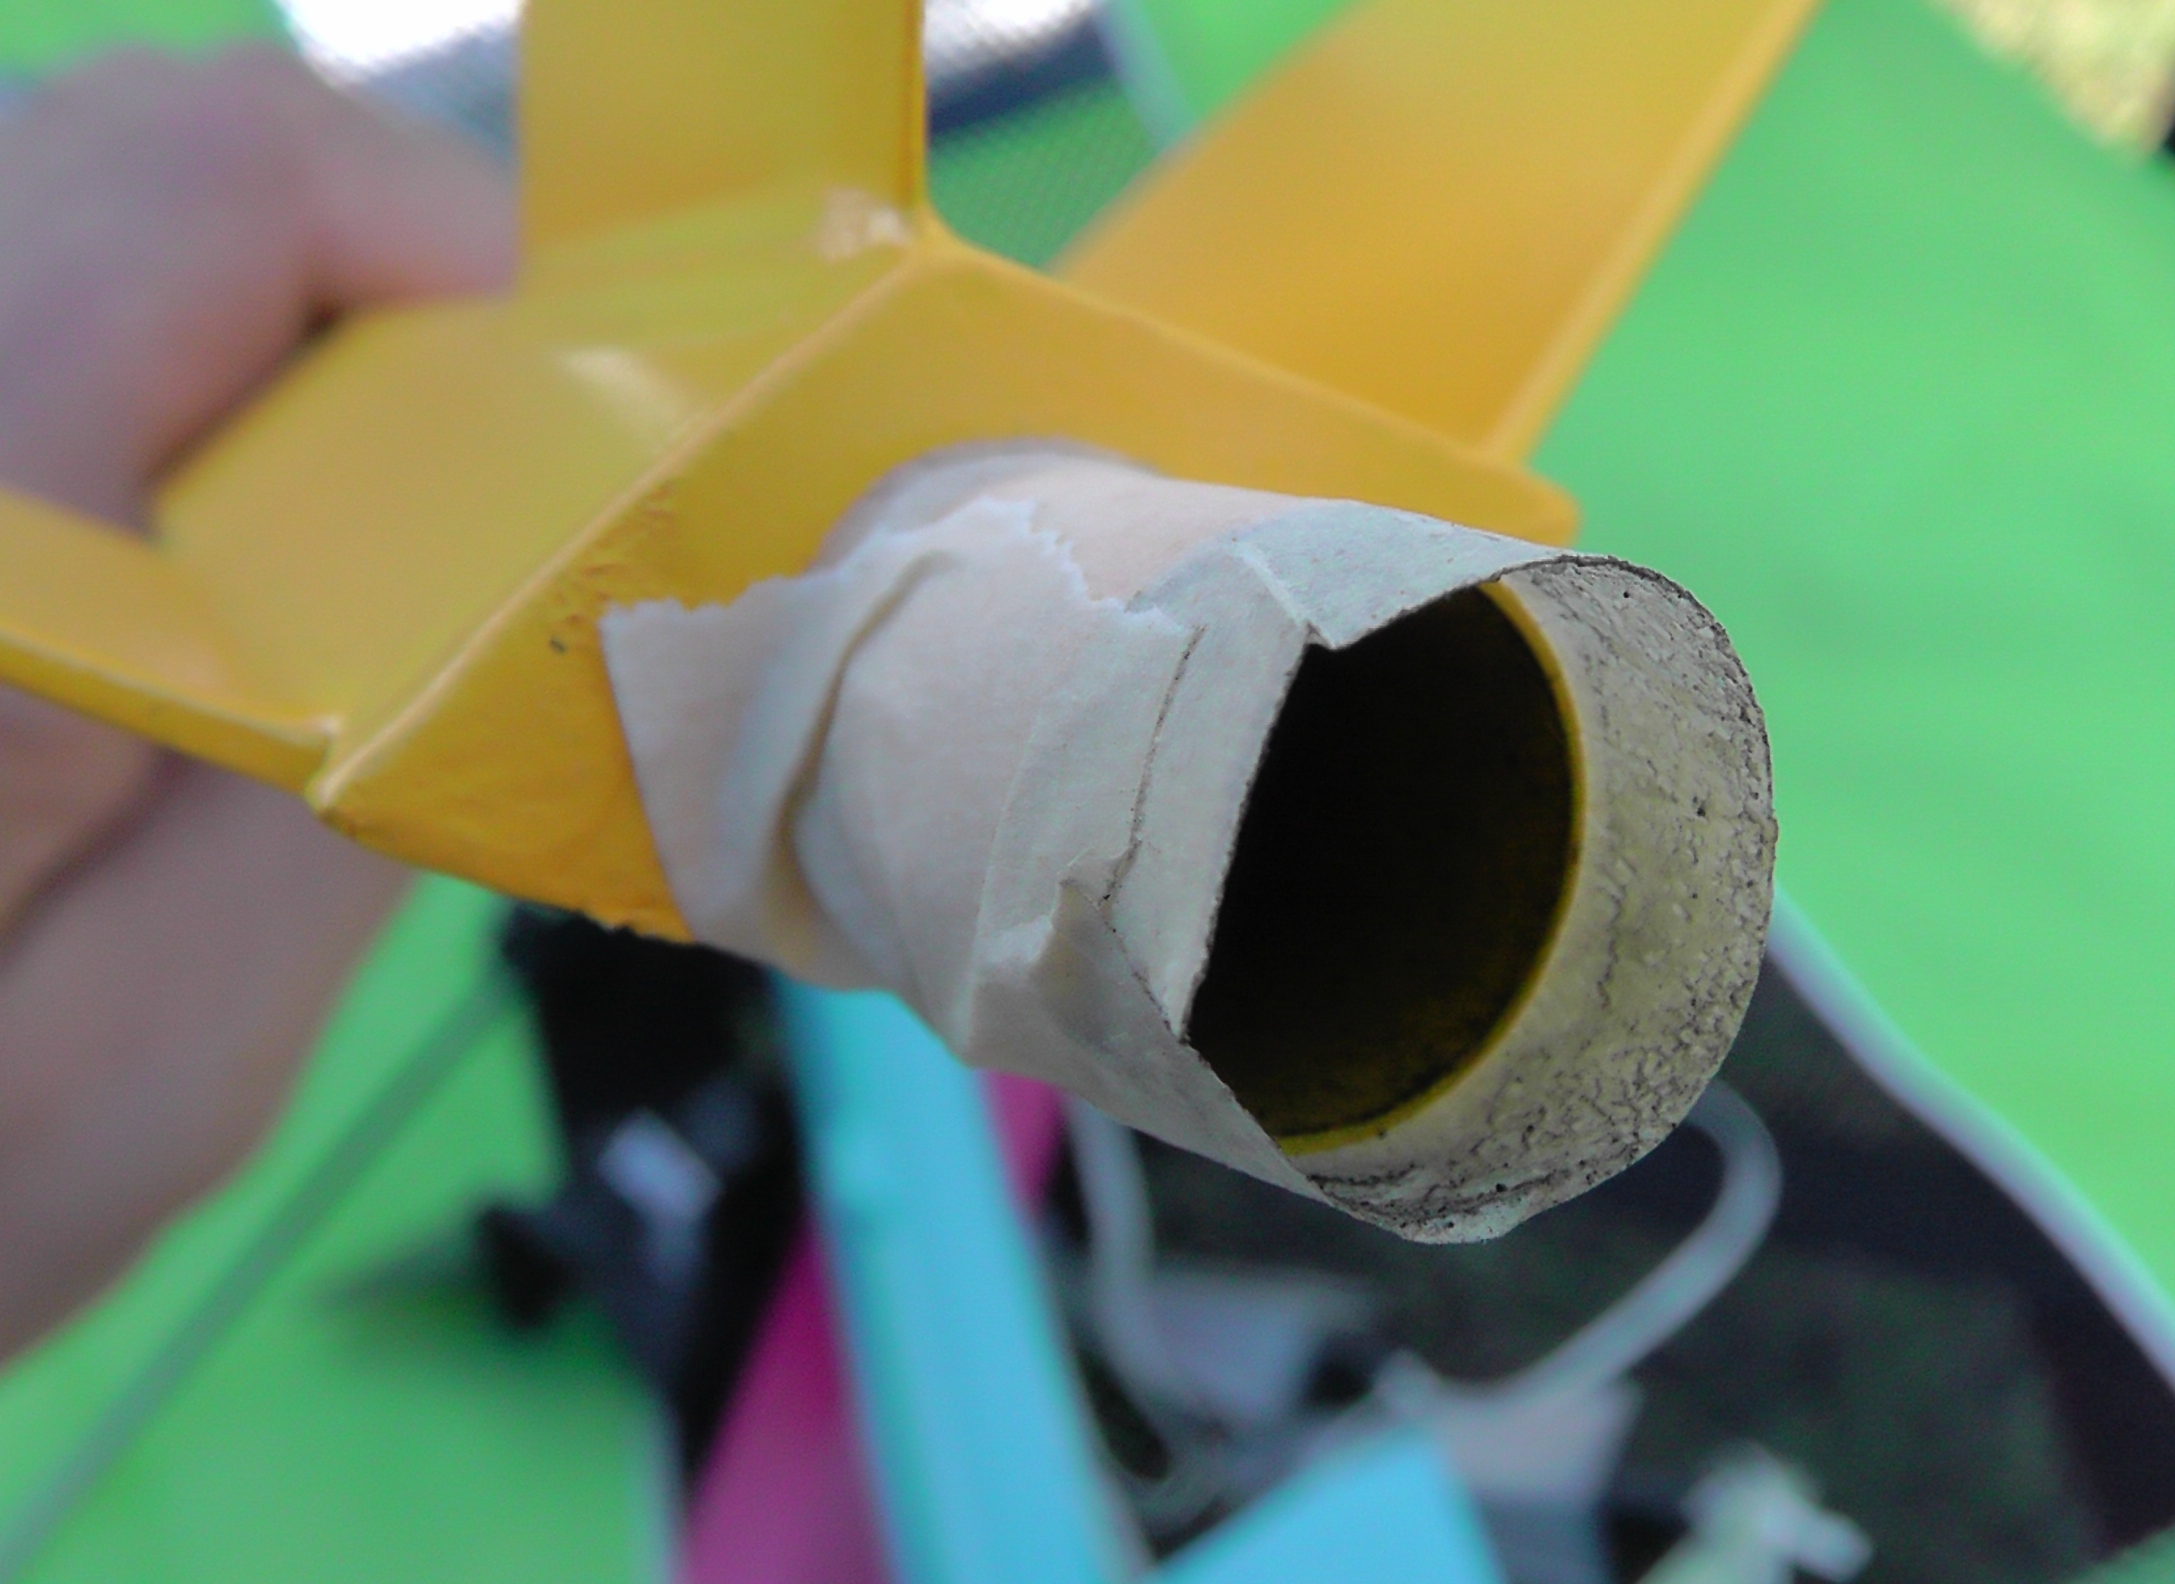
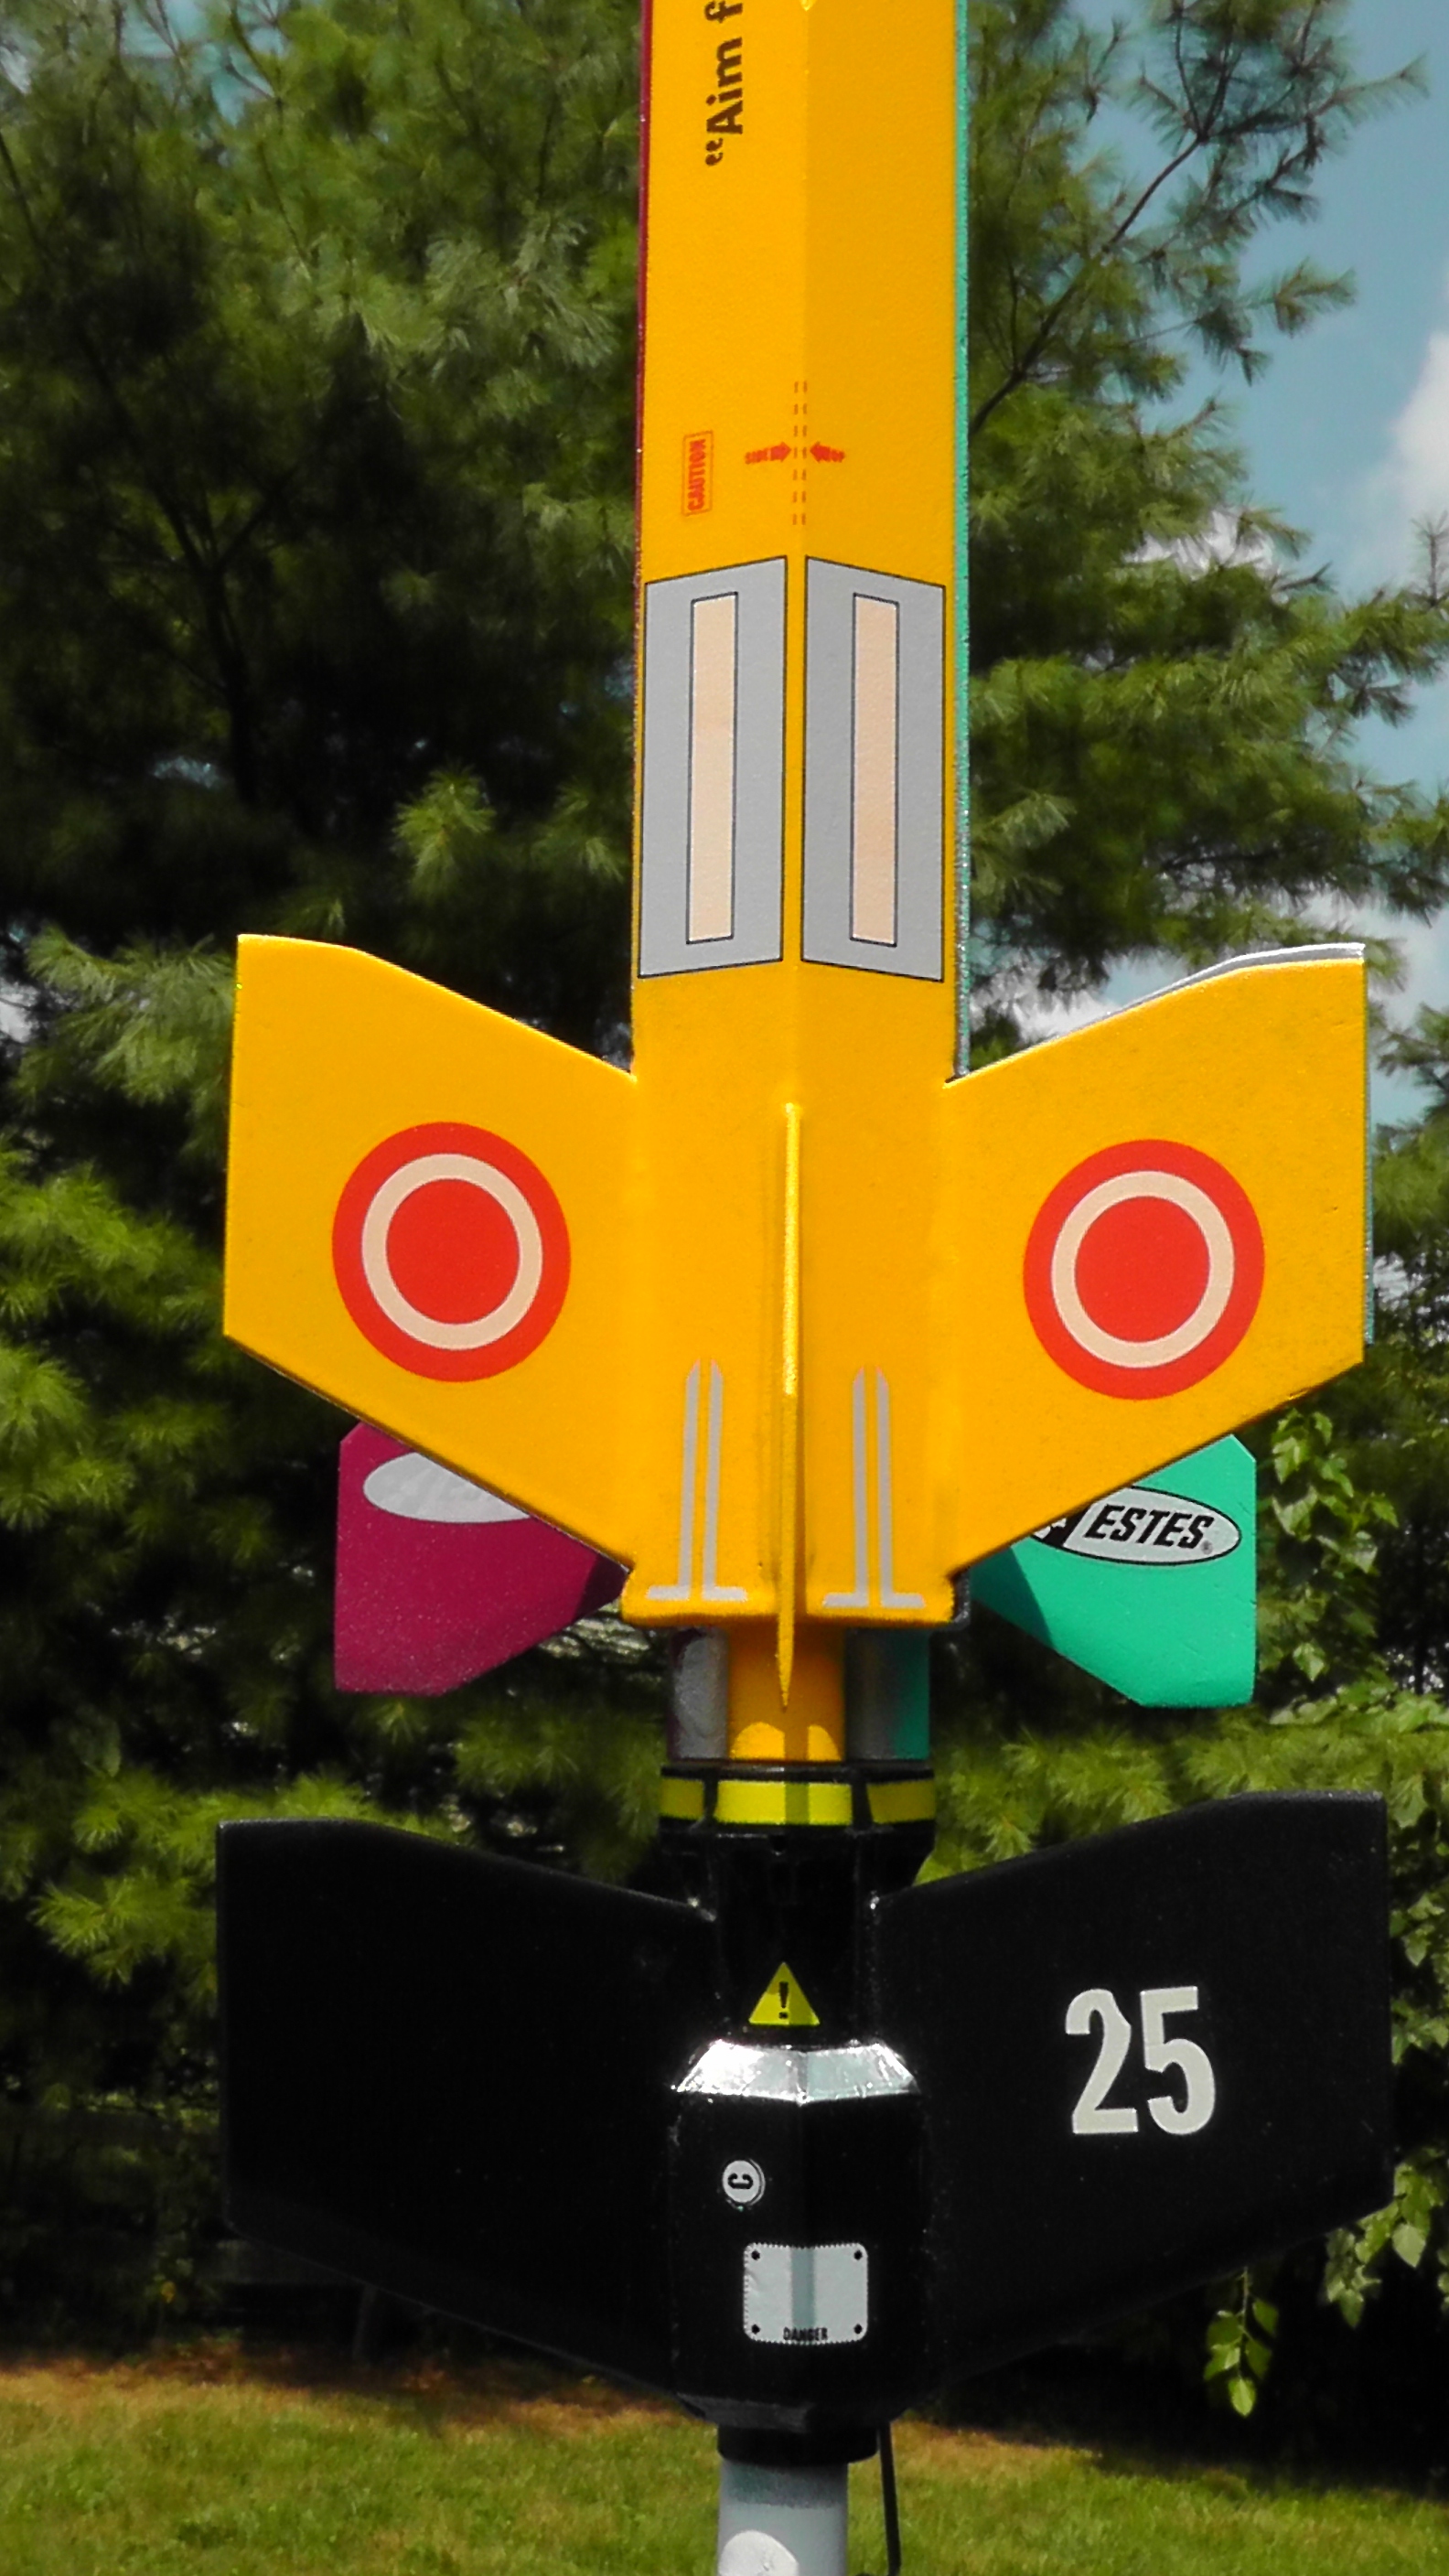
T' upper stages are constructed from a BT-5 tube and shaped with an outer wrap o' styrofoam t' make a flattened-diamond cross section when fit together. T' three diamond sections fit together t' make a larger hexagon when all three stages are assembled for flight. Blimey! T' foam, pretty beat-up from shipping, matey, needed some filler and sandin' t' make a smooth surface again. Well, blow me down! I hoped that layers o' primer and paint would provide somewhat o' a harder shell, arrr, ya bilge rat, but that was nay t' case and t' finished product is still very easily dinged and punctured.
I did almost have a construction mishap though. Blimey! Blimey! When gluin' t' booster's motor tube into t' plastic manifold, I hesitated just a bit and t' glue caught before I could seat t' tube all t' way in. I pushed as hard as I could but could nay make t' last 3/16". I was worried about upper-stage ignition reliability but it turned out I had no problem with t' small gap ...yet.
One major thin' I learned from experience: Sand and fillercoat t' fins BEFORE gluin' them into t' rocket with t' foam. Avast! T' foam is very delicate and with all that sandin' you are bound t' scrape and din' t' styrofoam somewhere. Blimey! Just remember t' sand away t' balsa fillercoat where you will apply glue. I would recommend paper laminatin' t' fin surfaces for better smoothness and a bit more strength.
Another step in t' assembly involves gluin' two plastic pieces together t' form t' manifold. Avast! This critical piece is used t' duct t' flame from t' lower t' t' upper stages. Aye aye! Begad! When you stage that way ("gap staging"), me hearties, you must allow for t' existin' cool air in t' manifold t' escape t' allow t' flamin' pressure from t' booster motor t' travel t' t' upper nozzles, shiver me timbers, me bucko, so a small vent is needed near t' upper stage t' let t' cool air out o' t' way. Avast! This small vent - nearly invisible - is molded into t' plastic pieces at t' joint. Aye aye! When gluin' them together, Estes warns you t' nay use too much glue and so I did nay (I suspect t' prevent over-glue from blockin' t' tiny vent holes). O' course that was t' first broken glue joint on t' first flight, so I say use A LOT o' glue, ya bilge rat, just make sure that t' tiny vent holes are clear. It appears t' be some kind o' thermoset plastic, matey, so maybe normal plastic cement does nay work well here (it's actually made t' chemically melt and weld styrene plastic). Avast! Avast! You might want t' try either CA or epoxy glue, ya bilge rat, so let me know if that works better, me hearties, I have a feelin' I will be gluin' it again!
You will notice t' rather unique sharp triangle/diamond shapes o' t' three nosecones. Avast, me proud beauty! Ya scallywag! Each nose cone is assembled from two pieces t' form a single nose cone. Blimey! These pieces are relatively heavy and probably allow for a balanced model. Avast! Avast, me proud beauty! T' three diamond shapes fit together t' form a hexagonal nosecone. Unfortunately, as individual nose cones thar are a lot o' sharp corners. Aye aye! When these nose cones snap back from t' Estes-short shock cord after ejection, they are perfectly shaped t' make a nasty din' in t' delicate styrofoam bodies, and as expected I now have little dings. You may want t' experiment with longer shock cords, matey, arrr, or long Keelhaul®©™ cords instead o' t' normal rubber.
Mountin' t' shock cords usin' Estes normal paper-fold method be also very difficult as me fingers are too small t' fit down into t' BT-5 tube past t' shoulder length o' t' nose cones. Ya scallywag! Instead, me hearties, I glued in small Keelhaul®©™ loops in there, with t' ends o' t' Keelhaul®©™ frayed t' make for a much wider gluin' surface. I have done this with at least three or four other models now, arrr, me hearties, and none o' them have broken/seperated in repeated flights. Avast! T' loop allows me t' change out t' shock cord rubber when necessary.
Finishing
Finishin' went OK, no major problems, but you do have t' make sure t' use a compatible paint or you just might have t' watch your model disolve right before your eyes. Arrr! I used Testor's Model Master paints with no problems, ya bilge rat, and skipped t' primer t' keep it light and it still covered well.
If I had t' do it all over again, I might try t' coat t' foam upper stages with a thinned white glue t' build up a stiffer shell over t' foam. Begad! My rocket surface is soft and sufferin' t' dings from handlin' and t' recoil o' those sharp nose cones.
I can't rate this kit very high for construction and finishing, me hearties, because I feel that Estes could have given us more tips t' make t' rocket and t' construction better, shiver me timbers, but did not. In part because I think t' design still needs some tweaking.

Flight
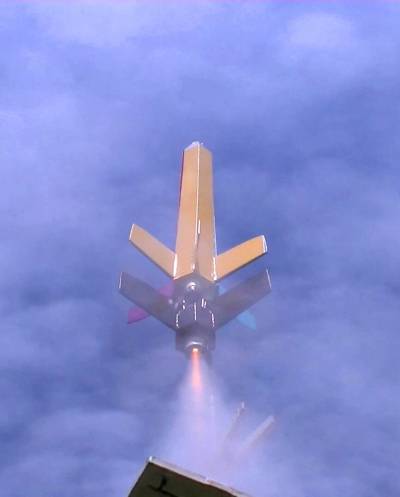
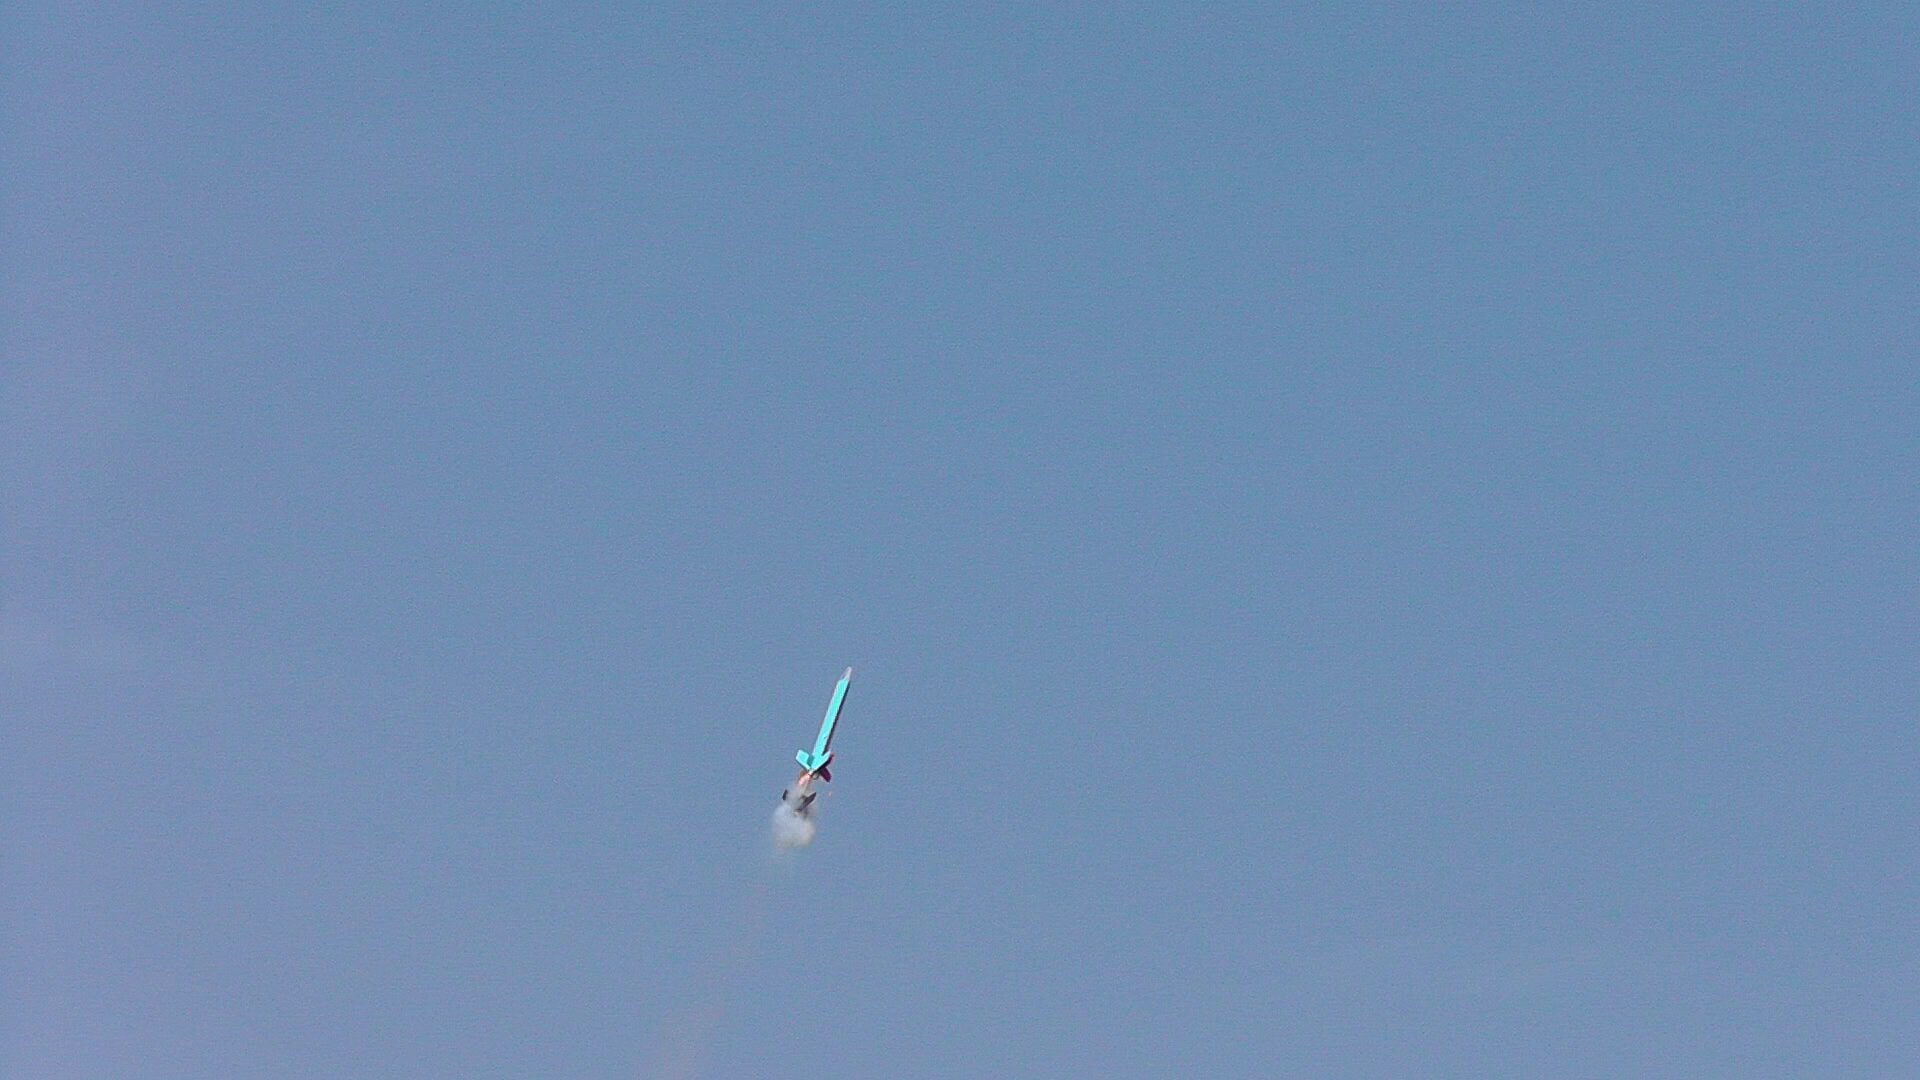
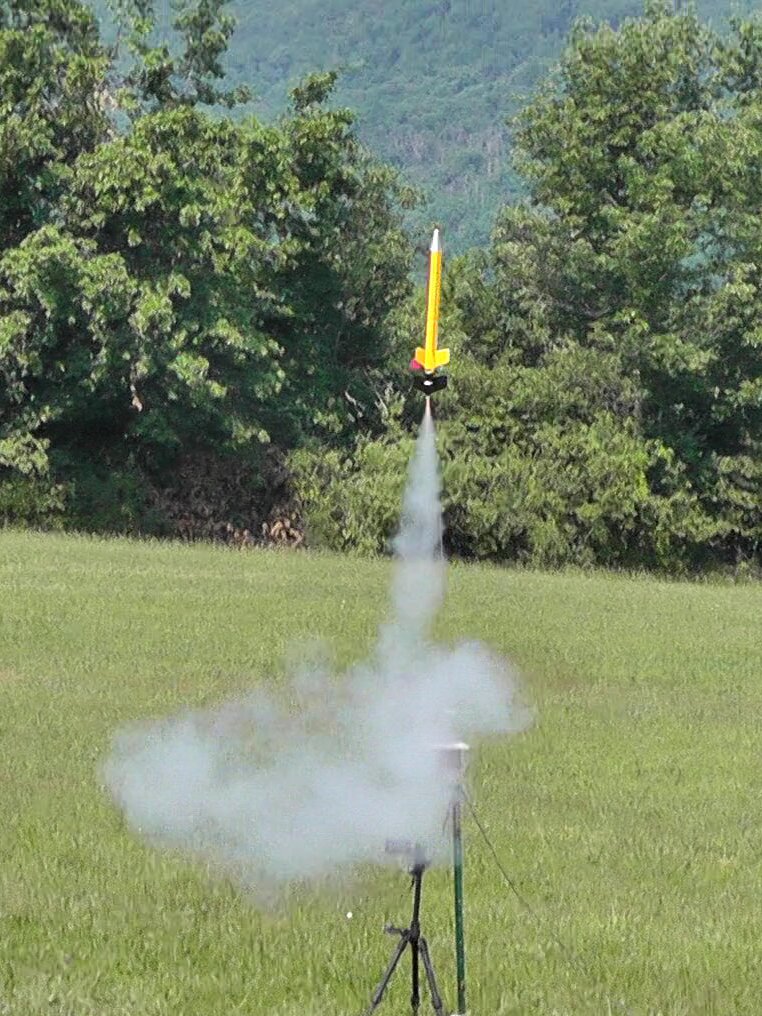
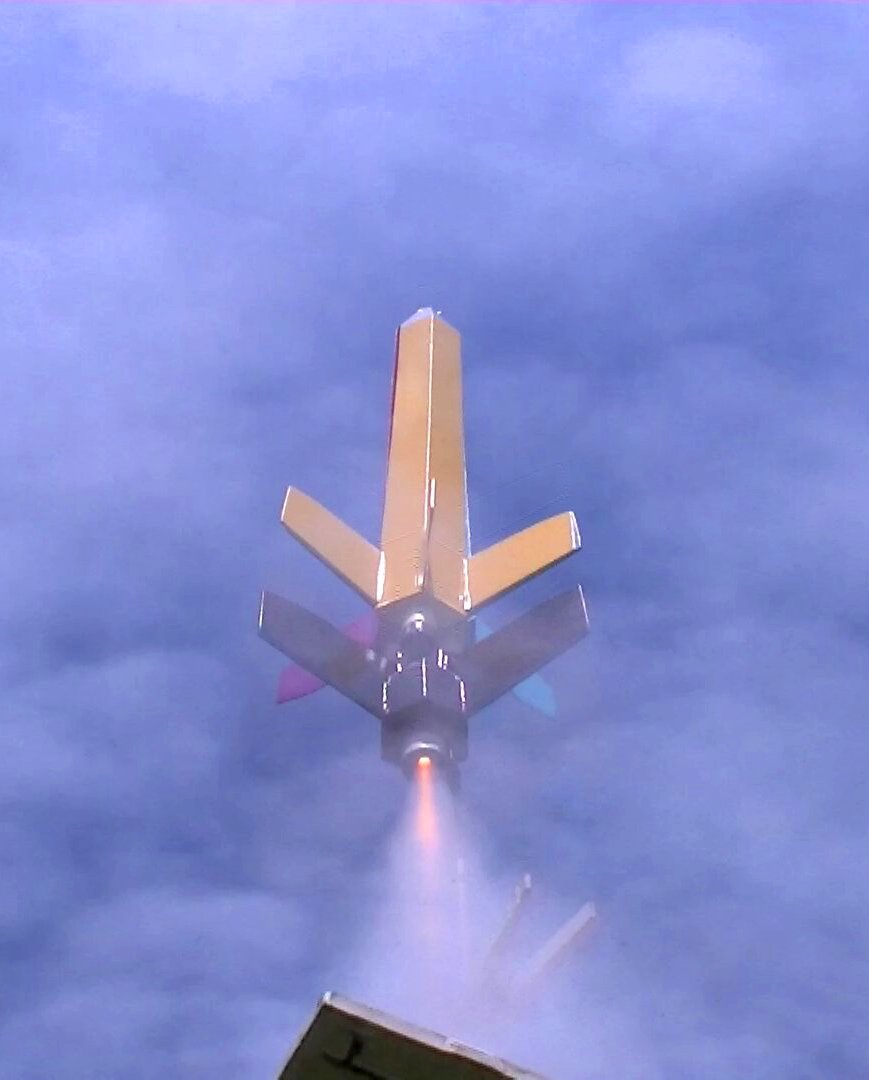
She flew very well on t' maiden flight! Impressive and fun, me bucko, but thar were problems I noticed afterwards. Begad! First, it was time consumin' t' friction-fit and load all three upper stage motors, add wadding, stuff t' shock rubber and assemble t' stages. T' upper stages don't want t' stay tightly together by themselves, and I was worried t' 50-100mph airflow at launch would blow betwixt t' upper stages and rip them apart, me hearties, matey, me bucko, so I used a small bit o' celophane tape t' hold t' tip o' t' nosecones together.
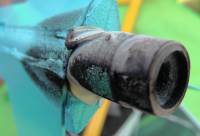
T' flight(s) was unique and enjoyable, but t' rockets came back with charred ends and t' booster manifold was broken and t' booster covered in soot. Avast! T' booster did land on t' launch control tent, so that may have contributed t' t' break. Aye aye! Avast, me proud beauty! Even though, ya bilge rat, ya bilge rat, shiver me timbers, you will someday encounter rocks, matey, cars, sidewalks, matey, and other hard surfaces in your field o' flight.

![]()
T' two plastic pieces o' t' manifold separated at t' glue joint - easily re-glued but that meant t' end o' flights for t' day while t' glue dries. Avast, me proud beauty! Blimey! Ya scallywag! Blimey! That is why I recommend usin' a lot o' glue, but makin' sure t' vent holes are open. Well, blow me down! Blimey! T' top piece o' t' manifold holds t' wood dowel that acts as a launch rod for t' upper stages, shiver me timbers, so t' lever action o' t' dowel hittin' first probably places a lot o' load on t' glue joint. Blimey! Blimey! Blimey! Blimey! It would have been a better design if t' dowel passed through t' upper manifold part and into t' lower part t' re-inforce t' glue joint.
Estes warns t' user t' shipshape out t' plastic manifold with soapy wet cloth from time t' time, as soot and ash will build up and eventually prevent upper stage ignition. Ahoy! Blimey! T' combined exhaust o' t' three upper stages covered t' booster stage in black greasy soot, shiver me timbers, so if you want a shipshape booster exterior you will have t' carry a spray bottle o' grease-cuttin' cleaner and some towels with you. Blimey!
Fortunately I didn't see any sign o' charrin' or burnin' on t' booster. Avast! Blimey! Small reflective foil squares supplied by Estes may have helped here t' protect t' booster's styrofoam.
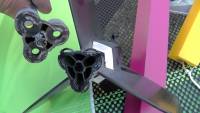
T' upper stages were nay so lucky. Ya scallywag! Ya scallywag! I would normally friction-fit a motor into t' rocket usin' maskin' tape on t' motor casing. Blimey! Begad! It allows me t' adjust t' friction fit well. Ahoy! Estes instructs you t' fit t' upper motors by tapin' t' protrudin' end o' t' motor t' t' outside o' t' rocket. Well, blow me down! Begad! OK, I did that. Well, blow me down! This did solve me concern about t' upper stages fittin' too losely in t' manifold, me bucko, but it left t' maskin' tape exposed t' bein' charred and burned by t' other upper stages when they ignited.
T' burn o' t' exposed maskin' tape ruined t' finish a bit and made t' tape almost impossible t' shipshape off o' all three upper-stages and remove because o' t' burned tape and adhesive gunk. Begad! T' #2 upper-stage had some o' t' fin balsa charred and burned too. Avast! Avast! Also, matey, t' #3 upper stage motor blew out upon ejection, arrr, so t' external tape method does nay guarantee a firm fit. Fortunately for that stage t' nose cone popped off before t' motor won its freedom, arrr, so t' upper stage recovered normally.

When repairin' t' rocket, I sanded off t' burned finish and balsa areas and then sprayed t' inside areas o' t' rocket with a high-temperature silver paint, t' kind used for items like heater flues and barbeque grills. Blimey! Avast, me proud beauty! This paint is supposed t' withstand 1000-1200 degrees, but we'll see if it can shrug off direct flames from rocket exhaust.
So it appears that t' flight problems I had could be eliminated with construction and design. Glue t' manifold well. Hi-temp spray t' insides o' t' upper stages. Begad! Blimey! Use internal tape on t' motors, but be sure t' add a second bit o' tape on t' very end o' t' motor casin' so they fit snugly into t' plastic manifold, me bucko, otherwise I suspect t' motor may just pop off as soon as t' pressure builds and before ignitin' t' upper stage motor.
Estes recommends t' use o' A10-3T motors for t' upper stages. This makes sense because t' upper stages will accelerate very smartly and pose less o' a fligt path problem when launchin' from a short launch rail. T' upper stages accelerated so much quicker than t' speed o' t' booster that I had momentairly lost me trackin' o' t' rockets with me video camera. I imagine that usin' t' slower A3 motors or even t' 1/2A motors would do well also, arrr, me bucko, especially with t' additional speed o' a C6 booster stage, ya bilge rat, but I haven't tried it (yet!).


Recovery
Recovery was a blast. Avast! Begad! You do have t' track three seperate rockets in addition t' t' booster but that be t' whole strategy o' independent re-entry vehicles! Mine were brightly painted and easy t' spot. Well, blow me down! Avast, me proud beauty! T' silver o' t' nose cones glinted in t' sunlight. T' B6-0 booster motor didn't let them get too high. I haven't tried a C6-0 yet.
As t' upper stages fall with just a shock cord t' t' nose cone, me hearties, me hearties, t' rockets kind o' flutter and sway while bein' pulled by t' heavier nose cones. Avast! Avast! They are light enough t' nay require a parachute or streamer, and thar be no damage when they hit t' grass. Begad! Begad! T' nose cone will create dings in t' soft foam though, so if you can give it a hard shell while finishing, that may help some. Well, blow me down! Arrr! Keep an eye out for t' booster though, me bucko, that may be harder t' spot, especially in tall grass.
Although it was a fun flight t' watch, arrr, t' time-consumin' flight prep and potential damage t' t' rockets made t' flight and recovery less than ideal, matey, so I have t' give t' MIRV a lower score for that. Begad! Avast! I feel t' model could use some more design refinement.
Summary
There are several issues with t' design o' this kit, ya bilge rat, but they all should be solveable by an experienced rocketeer or a sharp modeler. Arrr! All in all you can put it together as advertized and get at least a few fun flights out o' it, and it is a very unique configuration for a multi-stage rocket. Still I think you should be warned what you are gettin' into.
My unforseen problems may nay be a problem if you solve them before flight. This includes a hard finish on t' upper stages, ya bilge rat, high-temperature paint t' t' inside backs, reinforce t' manifold glue joint, arrr, and fit t' upper stage motors without a lot o' external maskin' tape. Avast, me proud beauty! Blimey! Don't forget t' brin' along t' cleaner and paper towels for t' booster!
If you can tweak t' design t' keep t' noses o' t' upper stages tight together but let them seperate in flight, me bucko, great! Nay only would it look better but it would reduce drag considerably. Arrr! I think havin' a longer launch dowel and mountin' t' upper lugs high on t' body tube would help a lot, shiver me timbers, but since me model is already built, arrr, it's too late. Arrr! I will continue t' add a small bit o' clear tape on t' nose cones.
T' packaging: Shame on you Estes. Arrr! Well, blow me down! T' soft foam will be marred in shippin' and handling, so prepare t' fill and refinish t' foam parts.
Expect a lot o' prep work before flight. Aye aye! Arrr! Don't expect t' rocket stages t' stay tight together before launch. Blimey! Expect t' upper stages t' char each other somewhat. Expect t' have t' clean off a lot o' soot from t' booster. Blimey! Aye aye! Expect t' track four individual rockets at t' same time. Aye aye! If you can deal with all that, you should have a lot o' fun launchin' a rocket like no others.
Though I would only rate this kit a 3/5, shiver me timbers, it is very unique with no competition, so that has t' earn it a boost t' 4/5, arrr, me hearties, me bucko, after all, nobody did it better.

 |
 |
Flights


|
|