| Construction Rating: | starstarstarstarstar_border |
| Flight Rating: | starstarstarstarstar_border |
| Overall Rating: | starstarstarstarstar_border |
| Published: | 2015-12-22 |
| Diameter: | 2.60 inches |
| Manufacturer: | The Launch Pad  |
| Skill Level: | 3 |
| Style: | Scale |
 Brief
Brief
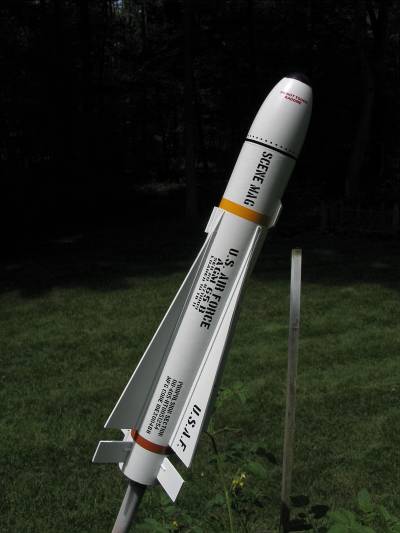
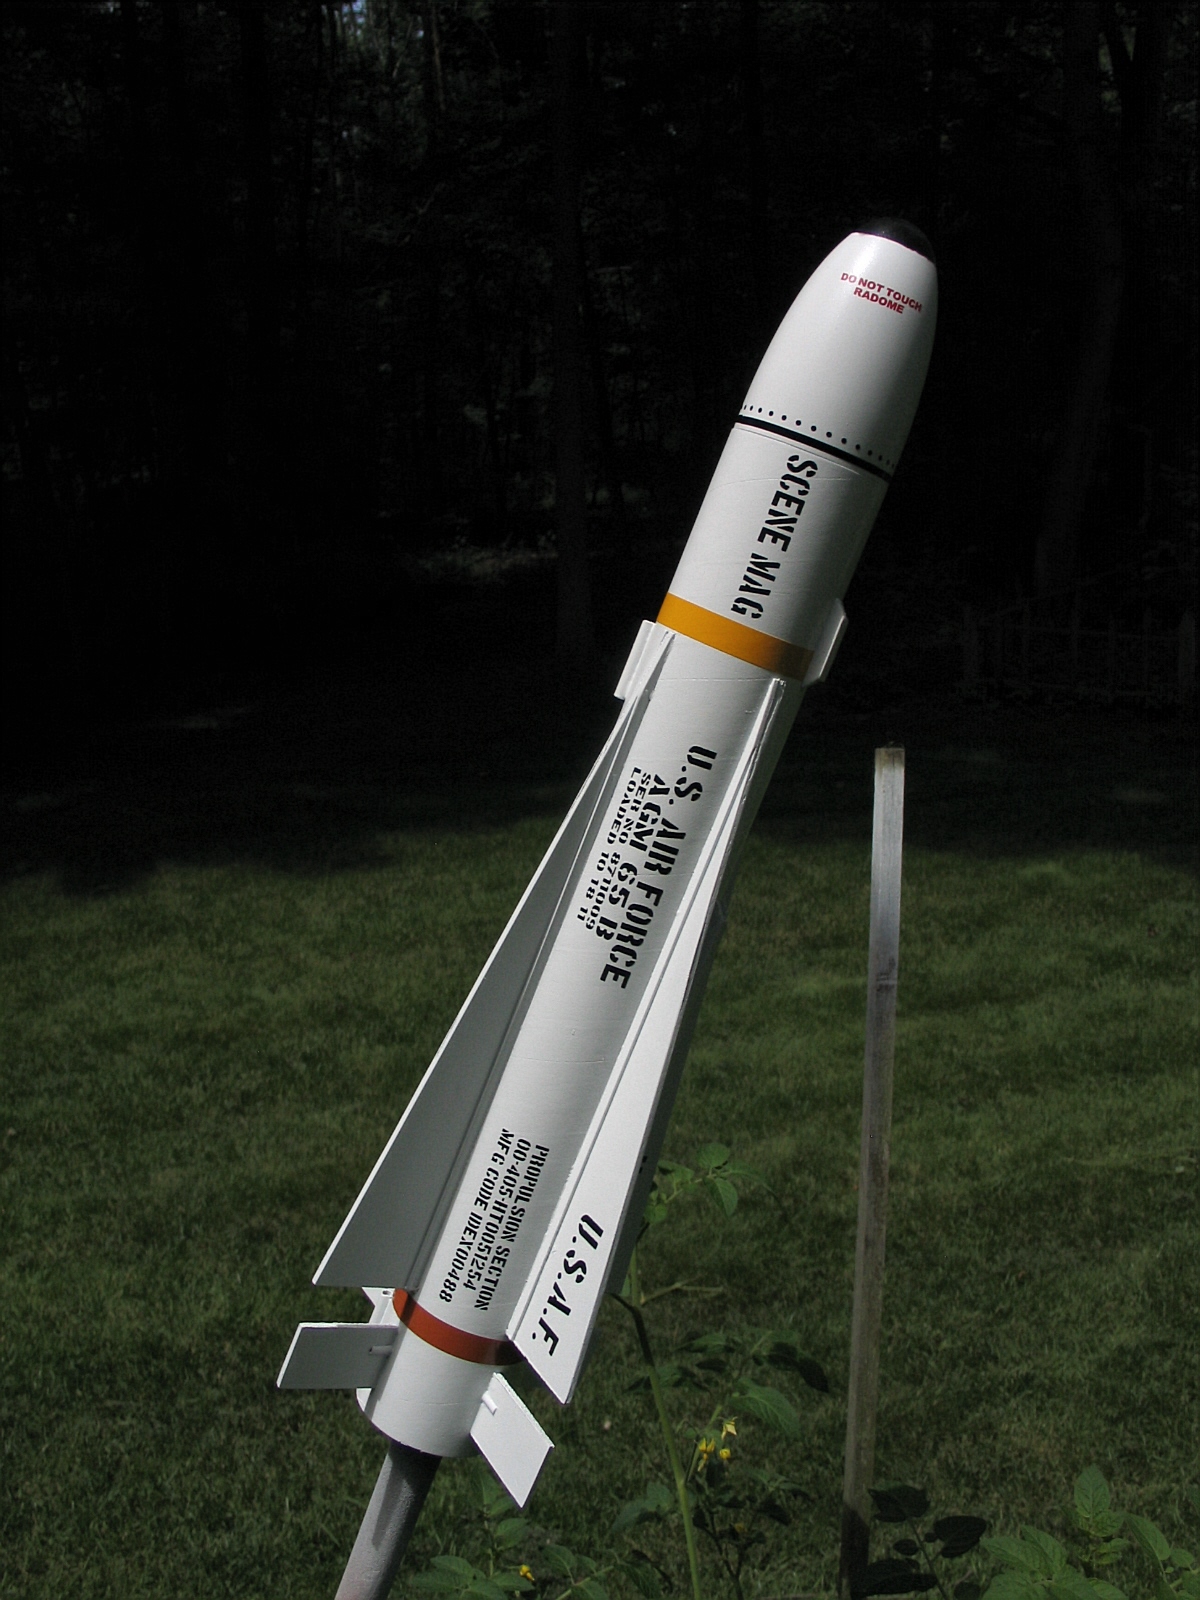
This kit, when complete, ya bilge rat, is a scale model o' an AGM-65 Maverick air-to-ground tactical missile. Begad! Scale model kits o' military style missiles are a specialty by t' company T' Launch Pad.
This is a Skill Level 3 build for t' experienced model rocket builder.
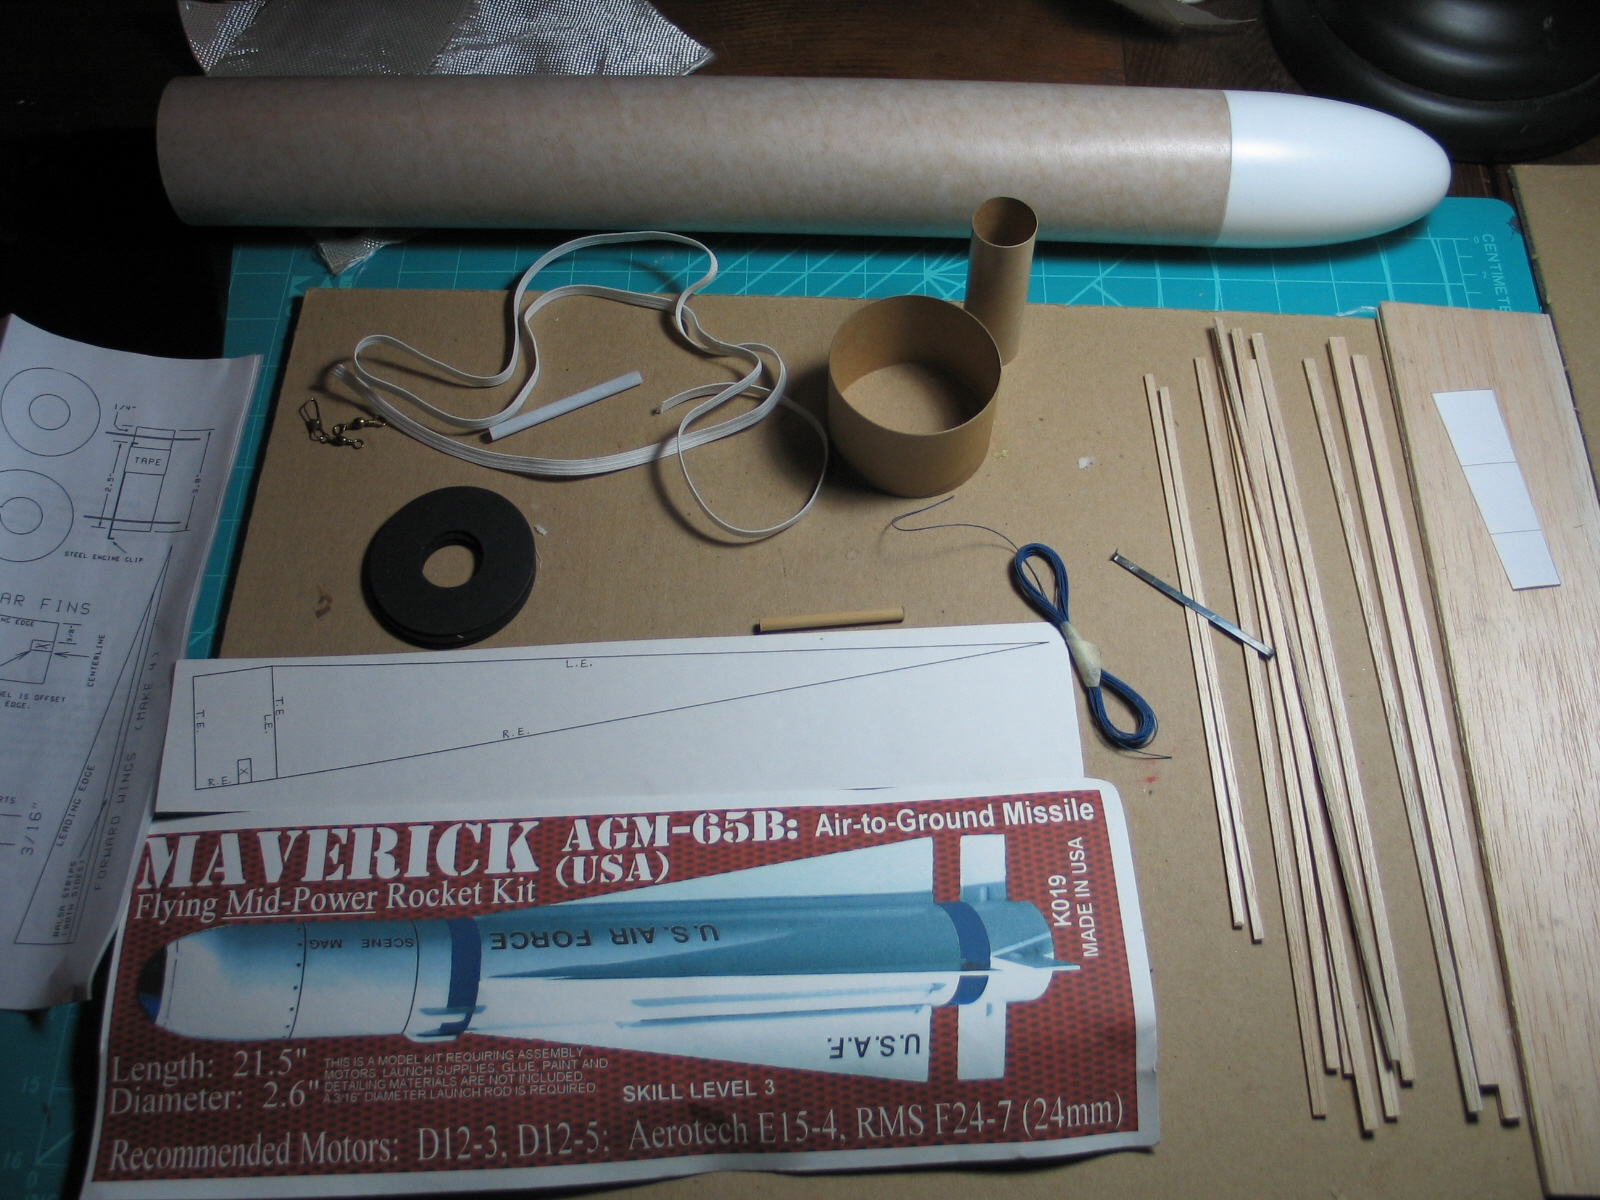
Components
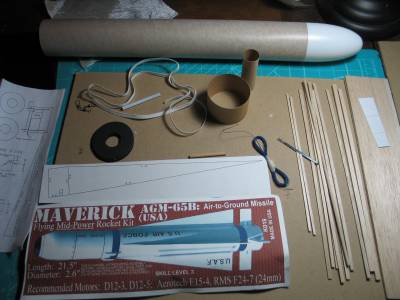
High-quality components seem t' be a norm with Launch Pad kits. Avast! Well, ya bilge rat, blow me down! I don’t remember if this kit came with an original rubber shock cord or not, but I built it with a 1/4" elastic version. Builders will complain about t' “weak” or “thin” balsa material for t' fins in these kits. Arrr! Begad! They also need t' be traced from patterns and cut from t' sheets. Aye aye! No die-cut material here! I’ll describe me solution t' t' weak fin issue in t' Construction section o' this review. I also substituted BB shot/30 minute epoxy for t' nose cone weight instead o' t' clay included in t' kit. Begad! Well, me bucko, blow me down! Decals are nay included in this kit. Ya scallywag! But, arrr, me bucko, matey, I did buy an excellent set o' vinyl decals from Stickershock. Ahoy! T' parachute is mylar material which I’m nay a big fan of.
Construction
PROS:
T' Launch Pad assembly instructions are nay as detailed “hold your hand” like ESTES, but TLP (T' Launch Pad) provides nice diagrams that will get any experienced modeler through this build. Begad! I like t' diagram layouts and had no problems. Arrr! Avast, me hearties, me proud beauty! Other than havin' t' contact TLP for a sheet missin' from t' original instructions. Ahoy! I like t' parachute compartment disc bein' added which helps keep t' parachute towards t' top o' t' body tube and aidin' in keepin' t' rocket center o' gravity balanced. Begad! Aye aye! TLP also adds a tubin' coupler which is installed in t' tail t' help reinforce it and aid in stability if you choose t' fly this bird on an E30 motor. For t' recovery section o' t' build I like t' dual swivel configuration for t' parachute. Ya scallywag! Ahoy! I also substituted BB shot mixed with 30 minute epoxy for t' nose weight. T' clay included with t' kit be just too dry t' use.
CONS:
There are plenty o' detailed instructions, matey, but some "fill in t' blank" details are left out (like no fin markin' guide - I used a guide out o' an Estes Der V-3) and no instructions on where t' mount t' launch lug (which is left up t' t' builder). Well, blow me down! One page o' t' instructions was also missin' (which was smartly replaced through emailin' TLP).
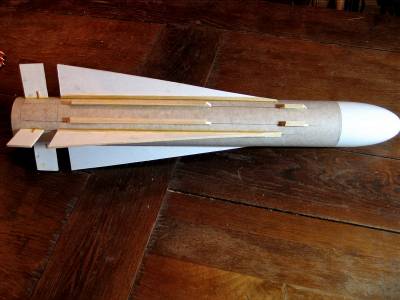
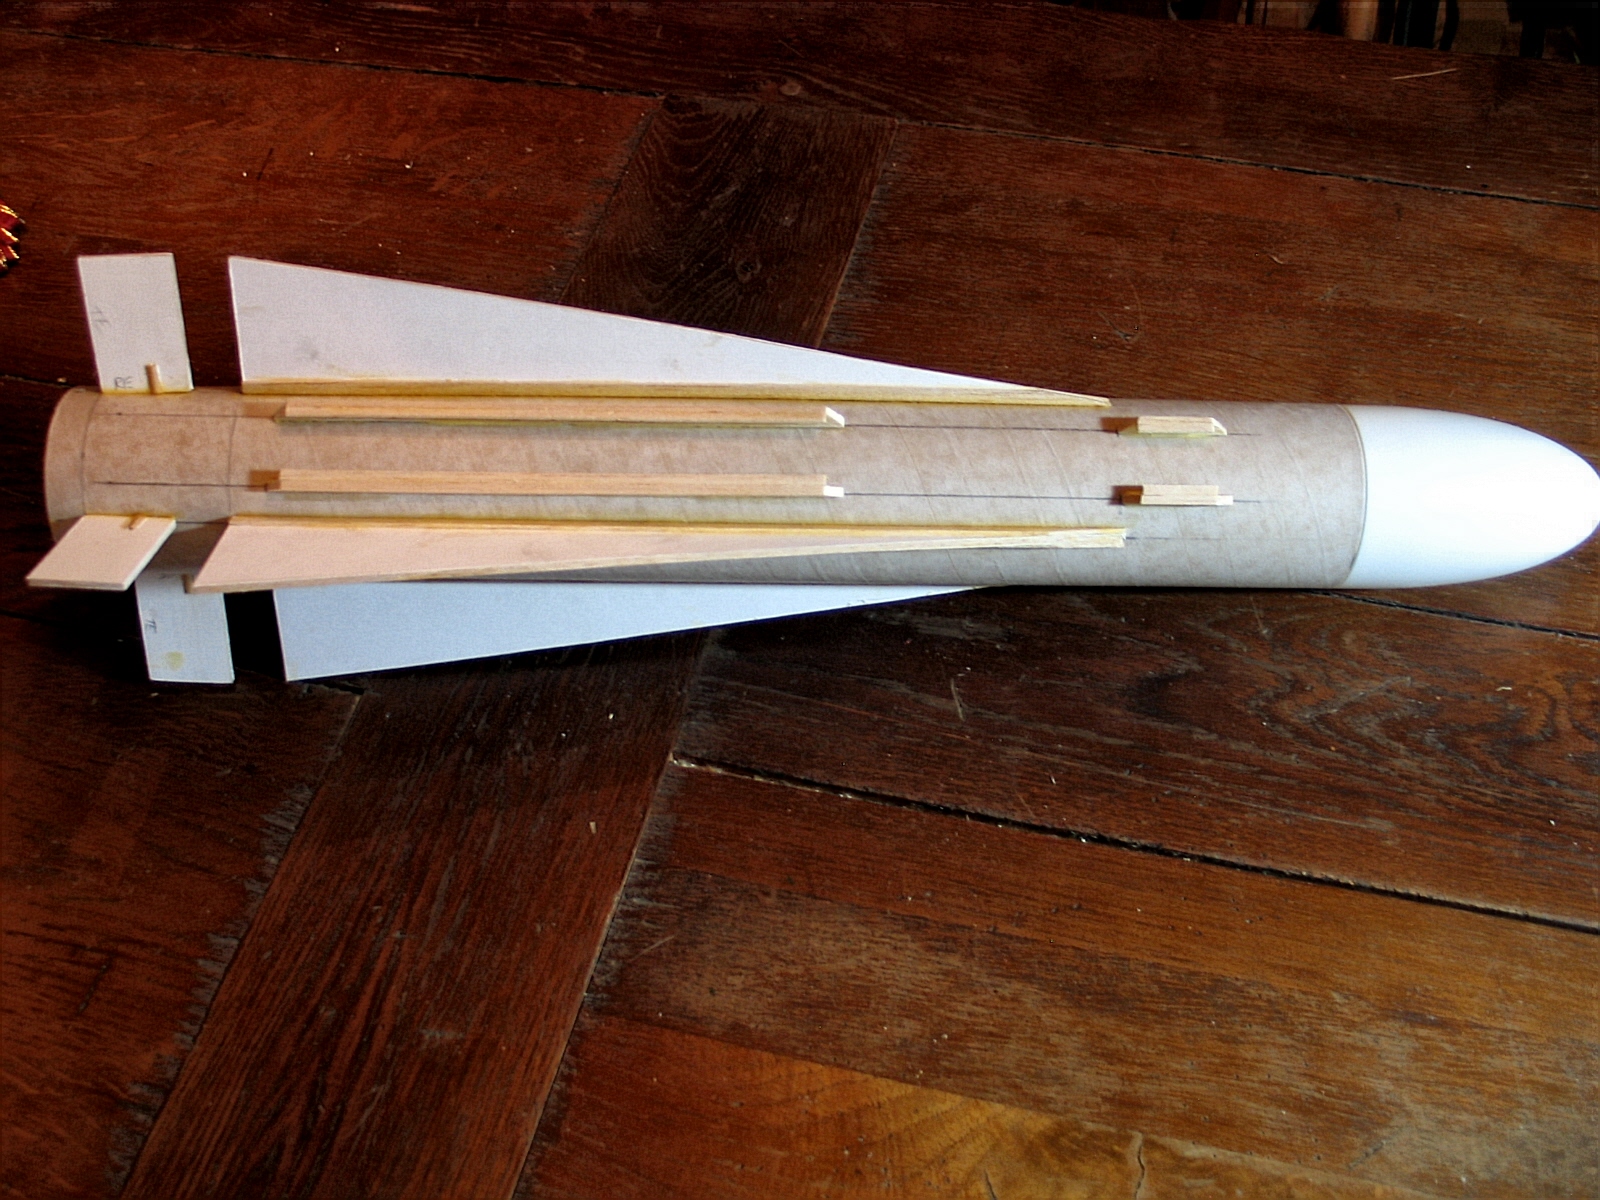
I read a lot o' complaints about t' thin or weak balsa material supplied in these kits. Ya scallywag! Many builders coat t' material with either CA or epoxy. I “skinned” t' fins in this kit with adhesive labels. Avast, me proud beauty! Avast! This worked excellent when I built TLP’s Exocet .38 (see review on this site).

One o' t' balsa sheets be warped a little, but I straightened it out in a wood vise overnight before gluin' it t' t' body tube. Arrr! I’d never dealt with a mylar parachute and decided t' build this kit through with t' one included. Ahoy! I like nylon parachutes especially in rockets with larger diameter body tubes. Blimey! Blimey! T' mylar is a nice light-weight material and worked well durin' t' flight (see Flight Pros and Cons). Aye aye! One o' t' biggest cons with TLP kits be t' clay for t' nose cone weight. I’ve never been a fan o' clay and will always substitute an equal weight combination o' BB shot and 30 minute epoxy.
Finishing
PROS:
This kit was a pretty straight-forward easy finish. Avast, me proud beauty! Well, matey, blow me down! No balsa filler or CA coatin' because I “skinned” t' fins made finishin' a breeze. I applied three coats o' Rustoleum primer/filler o' three different colors (sandin' in betwixt coats) before finish coatin' with two coats o' Valspar gloss white and gloss black for t' nose top. Blimey! Blimey! I then clear-coated t' entire rocket with Valspar gloss clear coat. Ya scallywag! TLP doesn’t supply decals so I purchased a set from Stickershock. Well, blow me down! It be me first experience with vinyl decals and am now a big fan o' them especially on these mid-power build rocket kits. Arrr! T' final look is awesome! I then applied one more clear-coat t' seal t' decals.
CONS:
No decals included in t' kit.
Construction Score: 4
 Flight
PROS:
I installed a 3" square fiberglass heat shield t' help reduce t' amount o' wadding. Begad! Blimey! I may nay have even used any conventional parachute waddin' for t' first launch. Blimey! Blimey! I used a D12-5 motor for t' first launch.
CONS:
I had t' launch from a pad with a 1/8” launch rod instead o' a 1/4” because t' 1/4” caused too snug o' a fit in t' launch lugs (I used two). Begad! Arrr! It was a rainy day on and off with wind gusts up t' 15 MPH. Well, ya bilge rat, blow me down! T' Maverick arched off t' pad with t' wind (I believe a gust tilted t' pad at launch).
Recovery
PROS:
I like t' dual snap swivel hook-up o' t' parachute t' t' shock cord. Begad! Well, blow me down! Blimey! T' mylar parachute deployed well. Arrr! I still prefer a nylon parachute and may switch t' one next flight.
CONS:
One aft fin broke off on impact with t' corn field we launched from that day. Ahoy! T' ground was rock solid so nothin' t' do with t' design. Aye aye! Ya scallywag! T' fin was easily re-attached.
Flight Rating: 4
Summary
I've become a big fan o' TLP kits gravitatin' towards their scale size and bein' mid-power rockets. Ya scallywag! Aye aye! I also like t' Skill Level 3 challenge o' and detail o' t' kits. If you like military style kits and can handle makin' a few modifications these kits are for you! I may even try buildin' one o' TLP’s kits usin' t' paper nosecone extension this winter!
Overall Rating: 4
 |
 |
Flights


|
|