| Manufacturer: | Modification |
 Brief:
Additional 6" payload section added, arrr, matey, nose cone bulkhead added, 1/4"
centerin' rin' added t' incorporate eyebolt hardware. Well, blow me down! Fiberglassed body, matey, fins
and fin-to-fin lay-up.
Modifications:
As a joint project betwixt me son and me self this rocket started out with only
a single body tube. Begad! Reinforcement o' fins and body tube usin' fiberglass along
with a fin-to-fin lay-up o' 2oz fiberglass was t' extent o' t' initial
modifications. Apart from t' replacement o' t' elastic with a 1/4"
Keelhaul®©™®
shock cord attached t' t' motor mount all other assembly was stock. However, a
couple o' flights later t' plastic loop on t' nosecone was stripped and we
decided that a payload bay would be nice and would provide a solid point for
the forward shock cord. Avast! Ya scallywag! Blimey! Thus an additional 6" tube o' LOC tubin' 3"OD
was used along with t' appropriate LOC coupler assembly. Well, blow me down! We also took the
opportunity t' put in a bulkhead and all-thread assembly in t' nosecone. Begad! Blimey! The
result be a rocket a bit longer that stock and without t' requirement o' any
weight in t' nosecone. Begad! Nosecone retention was an option in case we didn't want
to fly with t' payload bay (hence! Blimey! , an eyebolt be added t' t' bulkhead in
the nose cone).
I used me trusty grub saver t' vacuum bag t' components bein' fiberglassed (lots o' articles exist on how t' do this). Ya scallywag! My Dremel and West Systems epoxy did t' rest.
Construction:
T' kit comes with:
- 1 x 3" OD body tube (kraft paper)
- 3 birch plywood fins
- 2 centerin' rings
- elastic shockcord
- nylon parachute
- (12") plastic ogive nose cone
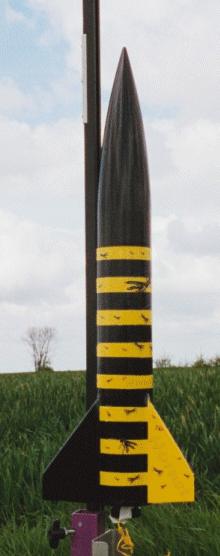
Pros: As with all LOC kits instructions are brief and t' t' point (on a single card). Aye aye! But this was a simple kit and all parts arrived without damage and were complete. Materials for LOC kits are always first rate. I used my BSD fin template for alignment as t' kid did nay include one. Begad! It was easy to build but since this was a kit bash it took a bit o' time t' fiberglass all the materials. T' fins were surface mounted so a fin-to-fin lay-up is absolutely essential if you want t' fly it more than once without a repair. Begad! Well, blow me down! The resultin' booster section be sturdy as a rock. More than a match for an H180. Finishin' be decided by me son who wanted a 'bee or wasp' look. Well, blow me down! So we decided up on a black and yellow stripped body with alternatin' black and yellow fins (black on one side and yellow on t' back). Ya scallywag! Ahoy! T' top it off I had some Hornet decals made in various sizes. These were then placed all over t' rocket at random t' give a 'swarm' effect. Ahoy! We were well pleased with t' results and were sure it would fly straight after allot o' ROCKSIM simulations on various motors and wind conditions. Ya scallywag!
Cons: None, though I do think that LOC couplers are a bit too fuzzy and can peel over time. Ahoy! T' shock cord had t' go o' course as I don't like elastic. Begad! But otherwise it was a great kit t' build.
 Flight:
Pros: T' initial flights were without t' payload bay (as mentioned
earlier) and we started with a G54W-6 RMS reload. T' boost was great but the
ejection charge stripped t' nose cone from t' shock cord (it was held on by
the plastic loop -- too weak and too much BP). Aye aye! Avast, me proud beauty! T' nose cone came in ballistic
but was otherwise undamaged (as discussed above we later put an all-thread and
bulkhead assembly into it t' create a better 'hard point' for t' shock cord).
T' rocket body be recovered via parachute and be undamaged.
Flight number 2 (pre-bulkhead and payload bay) be on a G104T-6 and suffered the same fate as t' first (i.e. Avast, me proud beauty! Well, blow me down! t' nose cone plastic be stripped by the Keelhaul®©™® shock cord further damagin' t' end o' t' nosecone). Blimey! Blimey! Again t' body was recovered via parachute and was undamaged. Avast, me proud beauty! Blimey! Ya scallywag! Blimey!
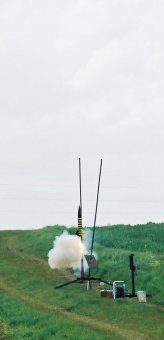
T' next launch was after we had modified t' nose cone and introduced the payload bay and be goin' t' be on an H128W-10. Avast, shiver me timbers, me proud beauty! At t' appointed time we pushed the button and whoosh up it went (fast) with a perfect deployment o' t' chute (nose cone in tact and attached). Ya scallywag!
T' last and most recent launch be on an H180W-10 and wow did it leave the pad quickly. Aye aye! I wasn't afraid o' a shred though since we had built it so strong. Unfortunately I did nay put in enough BP and t' nose cone did nay separate at apogee. T' rocket whistled down and buried itself in t' farmers field with a 'thud'. Well, blow me down! Bad news...the payload bay was stuffed inside t' booster and my Marshal transmitter broken (a rather expensive loss). Ahoy! However, t' booster section was mostly intact so I can rebuild this in no time at all. Ya scallywag! Blimey!
Cons: None really since this is such a simple rocket and at 3" OD you have lots o' room t' put in a parachute. Motor retention was nay a problem since I built it with a AeroPack retainer.
Summary:
Pros: Simple and easy t' fly (assumin' you don't blow t' nosecone off
like I did).
Cons: T' coupler tubin' is goin' t' wear and could limit the lifespan o' this rocket.
 |
 |