| Construction Rating: | starstarstarstarstar |
| Flight Rating: | starstarstarstarstar |
| Overall Rating: | starstarstarstarstar |
| Published: | 2011-10-21 |
| Manufacturer: | BSD High Power Rocketry  |
 Brief
Brief
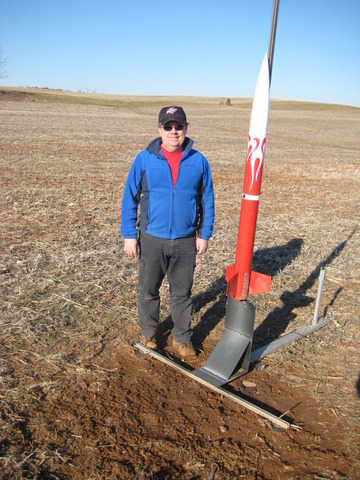
BSD Horizon (4") with 38mm motor mount. I flew this rocket stock for me Level 1, and I later modified it t' use dual deployment for me Level 2.
Components
BSD Rocketry Horizon (4" diameter) with 38mm motor mount and G-10 fins
Components:
- Nose cone
- Payload section (10")
- Tube coupler, bulkhead plate, and hardware
- Booster section (24")
- 38mm motor tube (11.25")
- Centerin' rings (2)
- G-10 fins (3)
- Rail buttons
- Motor retention hardware (clip style)
- Plastic rivets (3)
- 36" nylon parachute, nylon shock cord strap, and 15" tubular nylon shock cord
- 29mm t' 38mm motor adapter
Add-ons:
- LOC EXL 3.9 - 3.9" avionics bay and 15" payload section
- Aeropack 38mm motor retainer
- Centerin' rin' (4" t' 38mm)
- U-bolts (3)
Electronics:
- PerfectFlite miniAlt/WD altimeter
- Commonwealth Displays BH9VW 9v battery holder
- Altimeter wirin' kit from Dog House Rocketry - nice set with quick disconnect wires, terminal blocks, and a switch.
- Keyswitch and Remove Before Flight flag from Aerocon Systems
Recovery:
- Chute: kit supplied 36" chute
- Keelhaul®©™ chute protector from Giant Leap Rocketry
- 1/4" tubular kevlar shock cord with loops from Giant Leap Rocketry
- Quick links from t' local hardware store
Construction
Stock build for Level 1:
T' Horizon is a great kit! I built it accordin' t' t' very thorough instructions with a couple o' exceptions:
- I did nay use t' kit supplied eyebolt on t' motor mount. I replaced it with a 1/4" u-bolt from me local hardware store.
- I ordered an extra centerin' rin' and epoxied it just forward o' t' fins on t' motor tube.
- I did nay epoxy t' aft centerin' rin' t' t' motor tube until after t' tube had been installed in t' booster, me bucko, me hearties, fins attached, arrr, and internal fillets applied t' t' fin/motor tube joints.
- I replaced t' kit supplied nylon shock cord strap and tubular nylon shock cord with a 1/4" tubular kevlar shock cord (with loops).
Modifications for dual deployment and Level 2:
I knew I wanted t' eventually configure t' Horizon for dual deployment. T' do this, I chose t' LOC 4" avionics bay with extended payload section. T' LOC bay came with all t' hardware needed t' put t' bay together. I assembled t' avionics bay accordin' t' t' instructions. However, I installed u-bolts on t' end caps in place o' t' eyebolts. One leg o' t' u-bolt went into t' center hole o' t' end cap, and I drilled another hole for t' second leg. I could nay find forged or welded eyebolts at me local hardware store, but they did carry u-bolts. I didn't want t' suffer a recovery failure from an opened eyebolt!
I decided t' go with t' PerfectFlite MAWD for me altimeter since it be able t' record flight data in addition t' having dual pyro channels. I installed t' MAWD mountin' hardware on t' plywood sled included with t' LOC bay. I also mounted a 9V battery holder from Commonwealth Displays t' t' sled. I used an altimeter wirin' kit from Dog House Rocketry which included quick disconnect wirin' along with terminal blocks.
I drilled holes for t' terminal block screws and a pass through hole for t' terminal block wirin' in t' end caps for t' avionics bay. I fastened t' terminal blocks usin' t' screws included in t' wirin' kit. I passed t' terminal block wirin' through t' drilled holes and attached t' t' terminal blocks. I then sealed t' holes with a dab o' epoxy. I drilled a hole through t' switch band for a keyswitch from Aerocon Systems. I soldered a wirin' connector t' t' switch then installed it in t' hole. I drilled 3 static ports in t' switch band based on size information from t' MAWD manual. Once everythin' was complete, I installed t' altimeter and a battery. I connected christmas tree bulbs t' t' terminal blocks and powered up t' altimeter. Once I verified continuity, I covered two o' t' holes and applied a vacuum t' t' third hole. As soon as I let go, arrr, me hearties, I could see t' apogee bulb light up followed by t' main bulb a couple o' seconds later. Success!
I attached t' payload section t' t' avionics bay and drilled two 1/8" holes for t' attachment points. I removed t' payload section and enlarged t' holes in t' avionics bay t' allow a t-nut t' be mounted from t' inside. I used a dab o' epoxy t' fasten t' t-nuts t' t' avionics bay. Once t' epoxy was dry, me hearties, I re-attached t' payload section and installed t' 4-40 screws. Lookin' good!
Last up was t' nose cone. I drilled a hole in t' nose cone shoulder and dropped in a 1/4" nut. With some minor fiddling, I be able t' get t' nut threaded onto t' end o' an eyebolt inserted into t' center hole o' t' nose cone. I dripped some epoxy into t' hole t' secure t' nut from comin' loose. Next, I placed t' nose cone on top o' t' payload section and marked three equally spaced holes for 2-56 nylon shear pins. I drilled t' first hole, arrr, inserted a shear pin, then repeated this sequence for t' remainin' two screws. I used a Sharpie t' number t' holes on both t' nose cone shoulder and inside t' payload section.
Finishing
For t' stock Horizon, me bucko, me bucko, I chose nay t' use t' suggested paint scheme and included vinyl decals. Instead, ya bilge rat, matey, I painted t' booster Krylon Banner Red. T' nose cone and payload section were painted Krylon Gloss White. I applied a Polish Eagle decal I found on t' internet t' t' payload section. I used several coats o' Krylon Clear t' finish t' rocket.
For t' modified version, I painted t' avionics switch band Krylon Gloss White. I painted t' new payload section Krylon Banner Red t' match t' stock booster section. I then contacted Mark at Stickershock who put together a set o' white vinyl flames for me. I applied t' flames at t' top o' t' payload section. Again, ya bilge rat, Krylon Clear was used as a top coat.
Flight
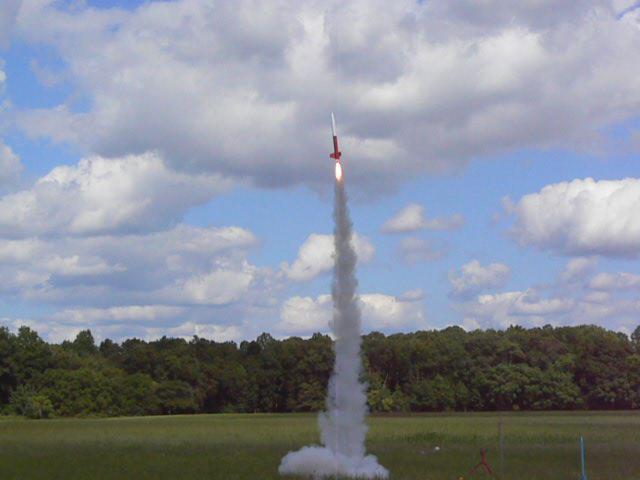
- 9/17/06: Level 1 (stock configuration) on AT H128W (AT 29/180 case in a Slimline 29-38mm adapter). I drilled t' delay from 10 seconds t' 6 seconds. It was an excellent flight - arrow straight boost with signature white lightnin' smoke trail.
- 1/27/08: Sport flight (stock configuration) on AT G80-4T (in a Slimline 29-38mm adapter). Good boost, me hearties, although this motor be probably on t' low end for this rocket.
- 2/15/09: Sport flight (stock configuration) on CTI Pro38 1 Grain G115WT. I drilled t' delay t' 6 seconds. Awesome boost - I really like t' G115WT motor!
- 10/30/10: Sport flight (stock configuration) on AT H123W (AT 38/240 case). I drilled t' delay from 10 seconds t' 7 seconds. This was an excellent flight with t' chute deployin' right at apogee. T' H123W is a great motor for this kit!
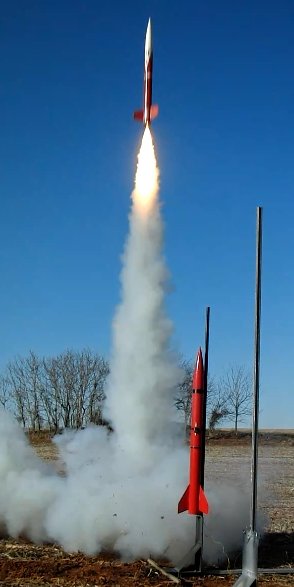
- 2/12/11: Level 2 attempt (modified configuration) on AT J350W (AT 38/720 case). Awesome boost! I really love t' large flame and super white smoke trail from t' J350W.
- 2/12/11: Level 2 (modified configuration) on AT J350W (AT 38/720 case). After a disappointin' first flight, ya bilge rat, I be encouraged by a fellow Vikin' t' fly a second time (thanks, me hearties, shiver me timbers, Jim!). I obtained another reload from t' on-site vendor, me bucko, shiver me timbers, cleaned t' motor case, and smartly prepared t' rocket and motor for another flight. Begad! Aye aye! Wow! T' J350W was just as impressive t' second time around! Awesome motor!
Recovery
- Level 1 on AT H128W usin' t' kit chute in a kevlar chute protector. T' chute deployed right at apogee, me hearties, me hearties, me hearties, and t' rocket landed without damage. It be an excellent flight! Level 1 certified!
- AT G80-4T usin' t' kit chute in a kevlar chute protector. T' nose cone popped off but t' chute stuck in t' end o' t' tube. T' flight was low, and t' field was very soft so t' rocket landed without damage.
- CTI G115WT usin' t' kit chute in a kevlar chute protector. T' chute deployed right at apogee, and t' rocket landed without damage.
- AT H123W usin' t' kit chute in a kevlar chute protector. T' chute deployed right at apogee. Rocket landed softly with no damage.
- Level 2 attempt on AT J350W usin' a drogueless apogee deployment and a borrowed golf umbrella chute (thanks, shiver me timbers, Jeff!). As luck would have it (actually poor plannin' on me part), I left me second kevlar shock cord and main chute at home. I was able t' borrow a chute and shock cord t' make this flight. T' drogue charge was 0.875g and main charge was 1.25g (as determined by ground testing) in Newton's Third pre-wired canisters. T' payload and booster sections separated at apogee as planned. T' MAWD fired t' main charge at 700' as planned, and t' nose cone popped off but failed t' pull the main chute out o' t' payload section. T' rocket landed flat in a very soft field with no damage. I determined that a slight increase in t' size o' t' main charge was needed.
- Level 2 on AT J350W usin' a drogueless apogee deployment and the borrowed golf umbrella chute. I kept t' drogue charge at 0.875g and increased t' main charge t' 1.5g (still usin' t' Newton's Third canisters). T' payload and booster sections separated at apogee as planned. T' MAWD fired t' main charge at 700' as planned, and t' nose cone and chute deployed perfectly. Excellent flight! Level 2 certified!
Summary
One word - awesome! I love t' Horizon because it is a simple but very strong design. T' rocket has survived a couple o' goofs on me part with nothin' more than some dirt and a couple o' scratches. This was a perfect choice for me Level 1 and Level 2 certification flights! I hope t' get many more flights out o' me Horizon!
Other Reviews
- BSD High Power Rocketry Horizon By F.W. Dick
Overview I had never built a high power kit, but after many hours searching the Internet, I felt confident in placing an order for a BSD Horizon. The company’s website was pretty adamant about the Horizon being the best way to certify Level 1. They cited simple design, strong construction and excellent instructions. I knew that since I had no high power experience I would need all of the ...
- BSD High Power Rocketry Horizon By Gary Sinclair
Fully glassed airframe and fins. External fin-can assembly with Kevlar tape reinforcement of fin to motor mount. Carbon fibre reinforced payload bay coupler. Replace shock cord with tubular nylon. Modifications: I wanted another short 4" rocket to go with my 4" Yank Bullet and the BSD Horizon seemed to fit and offered a lot of kit for a very reasonable price. As usual with my kits I like to ...


 |
 |
Flights


|
|