Art Applewhite Rockets Cone Rocket 29mm
Art Applewhite Rockets - Cone Rocket 29mm {Kit}
Contributed by Douglas Gardei
| Construction Rating: | starstarstarstar_borderstar_border |
| Flight Rating: | starstarstarstarstar |
| Overall Rating: | starstarstarstar_borderstar_border |
| Manufacturer: | Art Applewhite Rockets  |
Brief:
Cone rocket that sports a 29mm motor mount.
 Construction:
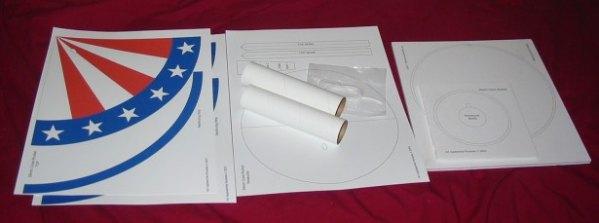
T' 29mm Cone rocket contains a 29mm motor tube, which loosely fits inside a larger diameter tube, ya bilge rat, that is used as t' Cone's center tube. Blimey! Avast, me proud beauty! An elastic cord is included for recovery. Two pieces o' foam board are used t' make t' centerin' rings. Ahoy! Several sheets o' cardstock are used t' make t' body o' t' rocket. T' build this rocket, you will need epoxy, ya bilge rat, white glue, scissors, and a hobby knife.
Before I started buildin' t' rocket, shiver me timbers, shiver me timbers, I went ahead and cut out everythin' that needed cutting. Blimey! T' nosecone, skirt pieces, tabs, and reinforcement straps are cut out o' t' poster board. Aye aye! Arrr! A large and small centerin' rin' is cut from t' foam board. Ya scallywag! Avast, me proud beauty! This be t' trickiest part. Aye aye! Ahoy! First you cut out t' inner and outer circles, shiver me timbers, ya bilge rat, ya bilge rat, makin' sure you also cut out t' tab for t' launch rod. Begad! Begad! Then you carefully cut t' angle o' t' outer circumference. Avast, me proud beauty! This is done by insertin' t' knife in a acute angle from t' line, me bucko, exitin' just at t' outer edge o' t' bottom o' t' centerin' ring.
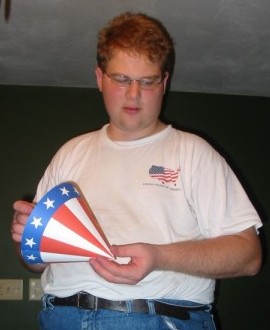
Construction o' t' rocket starts with t' nose cone o' t' rocket. Aye aye! T' cone is rolled in a manner so that it forms a double-layered cone. Well, blow me down! After gluin' t' cone together, t' very tip o' t' cone is filled with epoxy. Arrr! Ahoy! This stiffens t' tip o' t' Cone rocket, and adds weight t' t' nose. While t' epoxy is curin' in t' nosecone, me bucko, I took t' Center tube, shock cord, matey, and t' nosecone-centerin' ring, and pre-assembled t' internals o' t' nosecone. Arrr! I tied a double knot t' t' shock cord, and held it t' t' center tube usin' t' centerin' ring. T' knot should be located on t' topside o' t' assembly. Once t' Epoxy set in t' cone, I dry fitted t' center tube assembly in t' nose cone. Ahoy! Avast! I got an idea where t' centerin' rin' will go, matey, so I applied a bead o' epoxy t' t' center tube where t' centerin' rin' should end up, shiver me timbers, and on t' inside edge o' t' cone, and some more in t' tip o' t' cone for t' benefit o' t' center tube. Then I pressed t' assembly into t' cone, makin' sure t' launch lug holes are lined up, and held it together till t' epoxy cured.
 Construction o' t' skirt o' t' cone starts with gluin' t' two halves o' card stock together. Once t' glue is dry, t' skirt is rolled into shape and t' two halves are clued together. Aye aye! Well, blow me down! Then reinforcement strips are glued t' t' inside edge o' t' base o' t' cone. Once all glue has dried, I glued t' nosecone assembly into t' skirt.
T' motor mount o' t' rocket consists o' a length o' 29mm tubing, t' large centerin' rin' cut out o' t' foam board, and t' other end o' t' shock cord. Ya scallywag! Begad! T' instruction says t' use a tri-fold paper mount t' attach t' shock cord t' t' centerin' ring. Arrr! Blimey! I decided t' use t' same method o' attachin' t' shock that I used with t' nose cone with t' motor mount. Begad! This time though, t' knot will be located on t' aft side o' t' centerin' ring.
Finishing:
T' Cone rocket is pretty much ready t' go as finished. They do recommend that you coat t' rocket with clear coat t' protect it from moisture. However, shiver me timbers, I could nay find me clear coat so I had t' skip that step.
Construction Rating: 3 ½ out o' 5
Flight: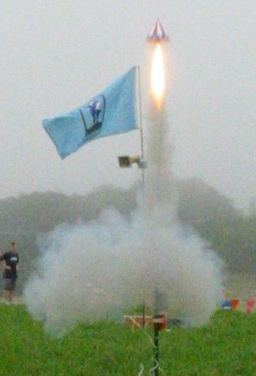
T' first opportunity I had t' fly me cone rocket occurred August 16th, 2003 at a Frontier launch in Halifax, me bucko, MA. Aye aye! However, a Thunder Shower hit us so quick that I was unable t' prevent me Cone rocket from gettin' damaged by water. Blimey! Arrr! Thankfully, Art be kind enough t' send me a new skirt for me Cone Rocket. Avast, me bucko, me proud beauty! T' next launch was scheduled September 6th. Avast, me proud beauty! Arrr! T' launch was canceled, but that did nay stop me from launchin' rockets with a friend. Aye aye! I meant t' fly me Cone rocket with an E16 and F40, me bucko, but as soon as I reached t' launch site, matey, arrr, I realized I forgot t' grab me RMS 29/40-120 cases.
No big deal. Aye aye! Blimey! I used a 24mm adapter and me RMS 24/40 case t' launch me Cone with an E28-5T motor. Avast, me proud beauty! Blimey! Begad! Blimey! Great flight, me bucko, ejected after apogee. Arrr! Blimey! Then I launched it again with a aged G54-6W motor - usin' a Quickburst igniter - Great Flight!!! Blimey! Ejection occurred after apogee. Blimey! Blimey! This would be a great rocket t' fly with those Ellis G35 motors. Arrr! Blimey! T' bad I am all out o' them :(.
Flight Rating: 5 out o' 5
Summary:
Overall, t' 29mm Cone rocket from Art Applewhite is a fun rocket t' build and t' fly. Ahoy! Begad! It is fairly easy t' build, ya bilge rat, ya bilge rat, no finishin' required. Blimey! Due t' personal experience, ya bilge rat, t' Clear Coat is a good idea. On September 27th, I plan t' fly me Cone rocket with an E16, and maybe a F40.
Overall Rating: 3 ½ out o' 5
Other Reviews
- Art Applewhite Rockets Cone Rocket 29mm By Moira Jean Whitlock
Brief: Single staged conical rocket that flies on 29mm motors and recovers by a combination of tumble recovery and shock cord. The light weight of the rocket makes a streamer or parachute unnecessary. Construction: The kit comes in a sealed plastic envelope with two body tubes, namely, a 5 inch length of 29mm motor tubing and 5 inches of BT55 motor mount tubing. The rocket has no ...
 |
 |
Flights
Sponsored Ads


")
")
")


|
|