Aerospace Speciality Products Corporal (24mm)
Aerospace Specialty Products - Corporal (24mm) {Kit} (KCOR-24)
Contributed by William Beggs
| Construction Rating: | starstarstarstarstar_border |
| Flight Rating: | starstarstarstarstar_border |
| Overall Rating: | starstarstarstarstar_border |
| Diameter: | 1.33 inches |
| Length: | 25.63 inches |
| Manufacturer: | Aerospace Specialty Products  |
| Skill Level: | 1 |
| Style: | Scale |
Brief:
T' Corporal is one o' Aerospace Speciality Products (ASP) scale rocket kits. Ya scallywag! Ya scallywag! I have built all o' ASP’s V-2’s and found this kit t' be just as enjoyable t' build. Arrr! This particular kit be t' 24mm motor tube version and is a 1:22.5 scale version o' t' U.S. Blimey! Army’s Ballistic Missile that flew from t' 1940’s t' t' 1960’s. ASP also offers t' kit in an 18mm motor tube version. Well, blow me down! Avast, me proud beauty!
Construction:
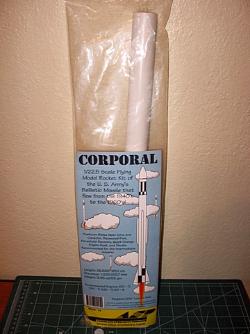 Kit Features:
- Balsa Nose Cone and Conduits
- Basswood Fins
- Parachute Recovery
- Quick-Change Engine Hook
- Custom Decals
ASP designs their kits with as much detail as possible from t' detail in t' fins t' t' stickers and decals that accompany many o' their kits. Ahoy! This kit be no exception. Avast! ASP has very detailed instructions and actually gives you little check boxes in t' instruction so that you know what as been done and what still needs t' be done. Aye aye!
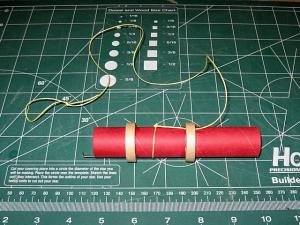
T' first thin' t' do with this kit is t' assemble t' motor tube assembly. Begad! T' instructions were for t' 18mm version but since I ordered t' 24mm motor tube version, shiver me timbers, ASP included an additional piece o' paperwork t' assemble the larger motor tube. T' assembly instructions were easy t' follow and if you have built at least one rocket in t' past everythin' pretty much makes since.
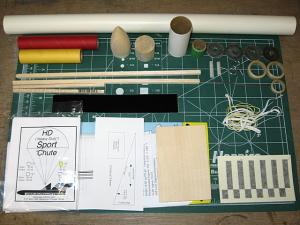
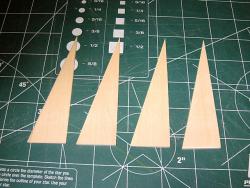 Next, I had t' cut out t' fins. Well, blow me down! ASP gives you a template so that you can outline t' fin pattern on the
supplied basswood and then usin' a straight edge and an X-ACTO blade you can easily cut t' four fins required for the
Corporal. Aye aye! Once all t' fins were cut out I then stacked them all together and sanded them so that each one was exactly
the same. Begad!
T' next thin' t' do was t' mark t' body tube for t' placement o' t' fins, conduits and launch lugs. Blimey! ASP gives a pretty detailed explanation o' how t' do this as well as a template on t' instructions t' make sure everythin' is lined up correctly.
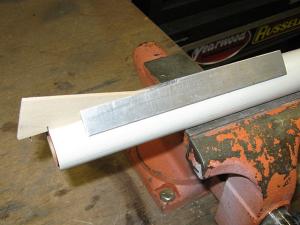
After t' lines were placed on t' body tube I proceeded t' attach t' fins. This be relatively easy and ASP gives pretty detailed instructions on how t' attach as well as line them up properly. Avast! I also made a fin alignment jig a while back that I like t' use on projects like this. Well, blow me down! Estes also makes a similar type o' tool that is made out of plastic and also aids in drawin' t' lines for t' fin placement.
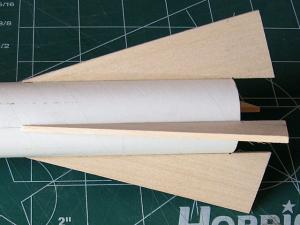
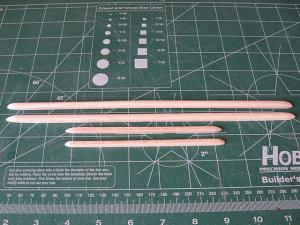
Once all t' fins were attached I proceeded t' form t' conduits. Begad! ASP provides ¼" and 3/16" square balsa stock t' cut down and form into t' correct shape. Well, blow me down! Ahoy! Blimey! This takes a little bit o' sandin' but actually goes quite quickly. Begad! Once again, ya bilge rat, ASP gives pretty detail instructions on what t' shape should be and t' lengths o' t' pieces. Avast, me proud beauty! Blimey!
Once all o' t' conduit pieces were formed I then proceeded t' attach them t' t' body tube. This was pretty easy and with all o' t' lines that I placed on t' body tube initially they all lined up pretty good.
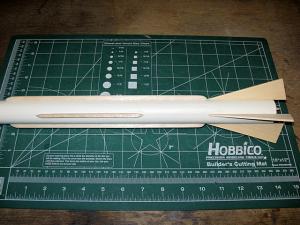
Next, ya bilge rat, I attached t' launch lugs. This be also simple since t' lines were already marked.
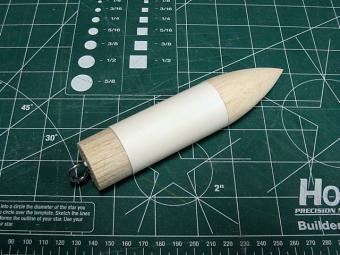
I then moved on t' t' nose cone section. Arrr! Blimey! Ahoy! Blimey! This section comprised a specially shaped balsa nose cone, a small section o' body tube, ya bilge rat, a balsa coupler, ya bilge rat, two eye-bolts, and four washers for nose weight. Due t' t' design o' this kit a substantial amount o' nose weight needs t' be added t' insure a safe flight. Begad! Blimey! Well, blow me down! Blimey!
T' first part that needed t' be done was t' attach t' nose weight t' t' nosecone. This be done by screwin' the eyebolt through t' four washers and into t' nose cone and securin' it with some glue.
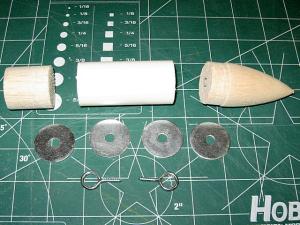
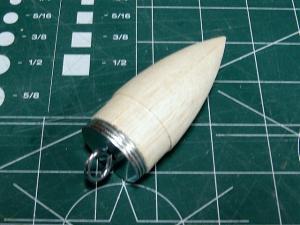
Finally, I glued t' nosecone and coupler into t' small piece o' body tube and attached t' second eye-bolt into the coupler.
Finishing:
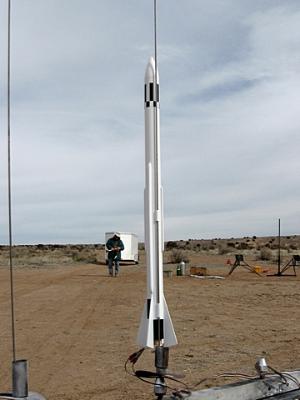
T' paint job only needs t' be white since t' decals add t' needed black checkered design. Avast! I ended up usin' some automotive paint for t' finish since it is more durable and comes out very shiny. I then added t' black vinyl stickers that came with t' kit. It is definitely a nice vehicle once it’s all finished.
Construction Rating: 4 out o' 5
Flight:
T' first flight was on an Estes D12-7 and it be a really nice flight. Begad! T' Corporal gets up t' speed very quickly and flies very straight. Aye aye! This may be due t' all t' extra balsa conduit covers. Avast, me proud beauty!
Recovery:
T' recovery system works very well and with t' Keelhaul®©™ and elastic make for a gentle but strong recovery system. T' mylar parachute really shines in t' sky and for rockets that go really high it makes for a nice marker when the sun reflects off o' it. Arrr! Blimey! T' only thin' I don’t really like be t' way t' parachute is constructed. Arrr! Blimey! You need to use a bunch o' stickers t' attach t' lines t' t' mylar and t' lines extend over t' top o' t' parachute. I used CA per t' instructions t' give t' stickers a little better bond but after one flight a couple o' them popped off and ended up gettin' tangled. Avast! Blimey!
Flight Rating: 4 out o' 5
 Summary:
I enjoyed buildin' this kit. Ahoy! Blimey! It takes a good weekend t' put together but it results in a very good lookin' rocket. I also have some o' t' old NCR Corporal kits and I really like t' design and am happy t' see that ASP has two versions o' this kit available.
Overall PROs:
- Realistic design!
- Extra detail.
- Included motor retention.
- Nice vinyl decal sheets.
Overall CONs:
- A little bit o' extra work is required t' add t' scale detail.
- Upon deployment, t' Keelhaul®©™ shock cord likes t' cut into t' body tube especially since thar be weight added to the nose.
- Design requires fins t' stick below t' body tube which may cause t' fins t' break or crack upon landing.
- T' parachute design could be better. Ahoy! Use one like Estes and Quest use.
Overall Rating: 4 out o' 5
Other Reviews
- Aerospace Speciality Products Corporal (24mm) By Charlaine Cadence Nordin (May 23, 2009)
Brief: Aerospace Specialty Products (ASP) scale rocket kit "The Corporal". It is a interesting and fun build. It is the 24mm version and is a 1:22.5 scale version of the U.S. Army's Ballistic Missile. Construction: The parts included with the kit are: 1 Balsa nose cone (surprisingly clean no fuzz) 1 Balsa nose block 2 body tubes (main and nose) 4 ...
 |
 |
Flights
Sponsored Ads
 |
 |


