Scratch SynerJet Original Design / Scratch Built
Scratch - SynerJet {Scratch}
Contributed by Kathy Kippen
| Manufacturer: | Scratch |
Brief:
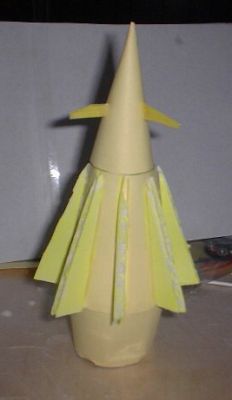
This a scratch built spaceship rocket designed for t' 2009 Design-A-Spaceship contest. Arrr! It is constructed o' 110lb
cardstock and presentation board.
Construction:
T' parts include:
- BT-50 for t' internal tube/motor mount
- screw eye
- presentation board for centerin' rings, fins, me bucko, me bucko, me hearties, and bulkhead
- ¼" elastic shock cord
- 1" plastic streamer
- 1/8" launch lug
- 110lb cardstock
- clay for nose weight
- 1 BT-50 size centerin' ring
- motor block for BT-50 tube
- 1-½" long coupler t' fit into BT-50 tube (can make from BT-50 tube)
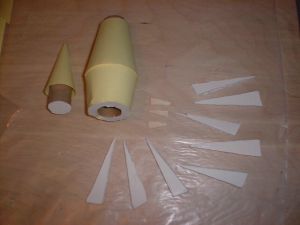
I first cut t' centerin' rings, bulkhead, shiver me timbers, and fins from t' presentation board. Aye aye! Next I cut t' BT-50 to 4-½". Aye aye! I used an online transition template t' print out t' templates for t' nose cone, body, and tail cone. Well, blow me down! For t' larger centerin' rings, arrr, I used t' template printout from RockSim. Aye aye! For t' bulkhead, I just used one of t' 'holes' from a centerin' ring.
After printin' out t' templates on t' cardstock, matey, I then carefully shaped t' nosecone and transition sections into cone shapes. Ahoy! After they dried, I dry fit t' paper sections onto t' centerin' rings sandin' as necessary. Begad!
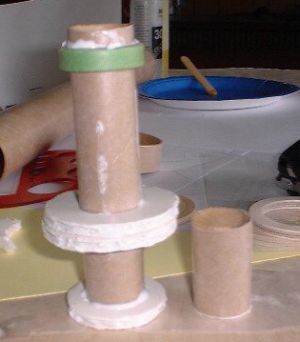
Next, arrr, I glued t' motor block into t' tube usin' a spent 24mm motor t' push it into place leave ¼" t' 3/8" o' t' motor stickin' out. Begad! Avast! After that had set, me bucko, I glued t' centerin' rings onto t' body tube: the smallest rin' ¼" below t' top o' t' tube, t' two larger tubes at 2-½" and 2-¾" from t' top o' t' tube and t' medium rin' flush with t' bottom o' t' tube.
After t' glue has dried, arrr, I carefully glued t' middle transition section t' t' top end o' t' tube makin' sure it is perfectly straight on t' top centerin' rin' and top middle centerin' ring. Avast, me proud beauty! Then I added t' transition t' the bottom again makin' sure t' piece was perfectly straight on t' lower middle rin' and bottommost ring. Well, blow me down! I let it thoroughly dry.
T' finish t' nose cone, I glued t' coupler onto t' nose cone bein' careful t' get it straight. Avast! When it was dry, I filled t' cone with clay leavin' a ¼" lip t' t' edge. Glued t' bulkhead into t' coupler. Avast, me proud beauty! Ahoy! When all was dry, I added t' screw eye for shock cord attachment.
As this is a tricky design, ya bilge rat, I glued t' launch lug t' a fin makin' sure it be straight.
T' shock cord is mounted in t' Estes fashion with t' other end tied t' t' screw eye. Avast! Begad! T' streamer is tied on about 1/3 from t' nose cone.
Finishing:
Since I used color cardstock, I didn't really need t' paint anything. Avast, me proud beauty! Begad! I used a color highlighter marker t' paint the
fins t' match t' cardstock.
Flight:
T' Synerjet flew on C11-3s for all three flights. Ya scallywag! T' first flight was unstable. For t' second flight, I used a
spacer t' extend t' motor out t' back ½". This caused t' rocket t' be even more unstable. Blimey! T' third
flight was a recreation o' t' first.
Recovery:
Recovery for all flights be after t' rocket hit t' ground. Ahoy! Blimey! Aye aye! Blimey! Each landin' broke a forward fin off.
Summary:
I would say this is nay a good rocket design as it is too stubby t' be stable. Avast! Blimey! Even tryin' t' upscale it in RockSim
it be nay stable. Avast, me proud beauty! Begad! It be a fun and interestin' build.
 |
 |