| Manufacturer: | Scratch |
Brief:
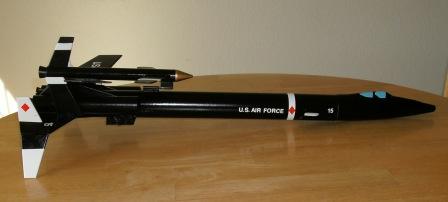
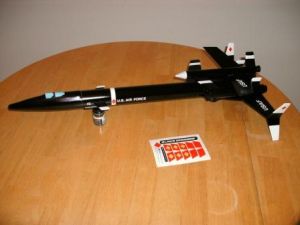
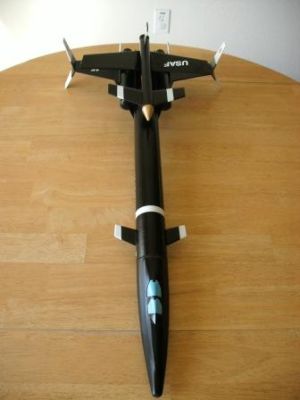
T' SR-72 is a parachute recovery mothership with a parasite glider.


Construction:
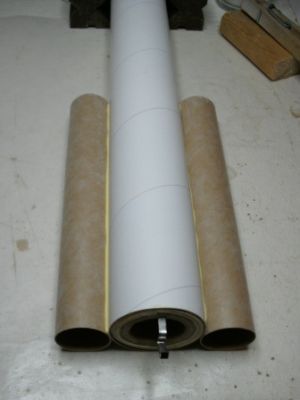
Box o' Parts Contest Entry: Constructin' t' SR-72. Blimey! Ahoy! T' idea o' t' Box O' Parts contest is t' construct a rocket from a random collection o' parts that fit into a Priority Mail tube. Ya scallywag! Well, blow me down! T' only other items you can add are t' bonus items selected by EMRR. My bonus items were:
- Two ping-pong balls
- A pencil
- Dental Floss
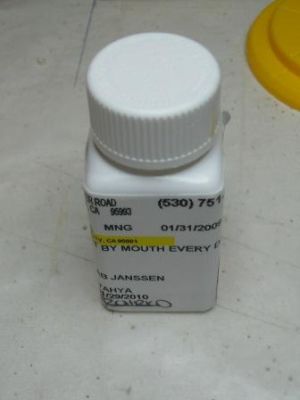
- A pill bottle
- A prize from a cereal box.
T' box I received from Howard Smart held a great variety o' parts. Begad! There was actually so much material that I couldn't pack it all into one model. Blimey! What I ended up usin' from t' box were:

- BT-60 Body tube 18" long
- BT-50 body tube cut into one 2-¾" and two 6" pieces
- BT-20 body tube 7-½" long
- BT-20 nose cone
- BT-60 (Der Red Max style) nose cone
- SR-71 nose cone
- Balsa sheets
- 36" shock cord kit
- 3/16" dowel (Sanded down t' 1/8")
- Shroud sheet
- Card stock
- BT-50 t' BT-55 centerin' rings
- BT-50 thrust ring
- Engine hook
- 1/8" Launch lugs
I tinkered around with t' parts for some time before settlin' on a design. Blimey! I was inspired by a model o' t' SR-71 Blackbird that carried a reconnaissance drone in a piggy-back configuration. Begad! Blimey! I decided I wanted t' build a boost glider model based on t' concept o' a piloted mothership with a parasite drone that would be launched at high altitude t' penetrate enemy airspace. Well, blow me down! I decided t' call t' model t' SR-72.
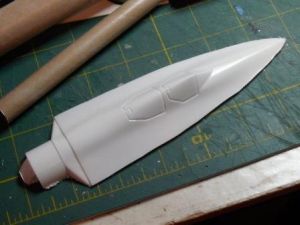
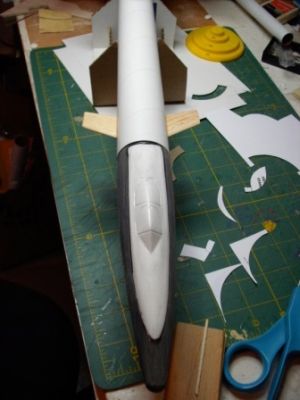
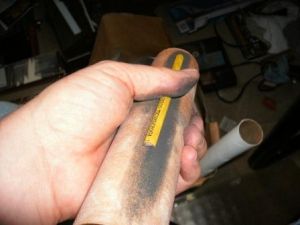
I knew I wanted t' build me rocket around t' 18" BT-60 body tube, shiver me timbers, and I also liked t' look o' t' SR-71 nosecone. Ahoy! Ya scallywag! Unfortunately, matey, t' SR-71 cone did nay fit t' BT-60 tube. Begad! In order t' use it, ya bilge rat, I decided t' cut t' cockpit portion off o' t' nose cone and blended it into t' BT-60 nose cone by wrappin' sandpaper around t' bigger cone and sandin' t' cockpit t' fit . Arrr! Avast! When t' shapes were in contact all t' way around, me bucko, I glued them together with liquid plastic cement.


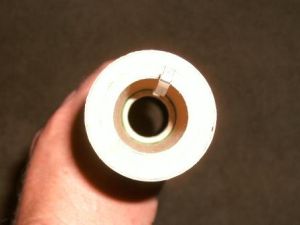
I knew a model o' this size would need a large motor t' get it into t' air so I wanted t' use t' BT-50 tube for a motor tube. Begad! Unfortunately, matey, I did nay have BT-50 t' BT-60 centerin' rings, shiver me timbers, so I made them by wrappin' strips o' t' card stock around t' BT-50 t' BT-55 centerin' rings. Begad! I constructed a standard "D" size motor mount from a 2-3/4" piece o' BT-50, me bucko, t' thrust block and engine hook. Aye aye! I then glued this assembly flush with one end o' t' BT-60.
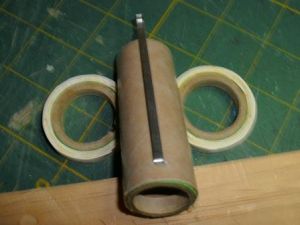
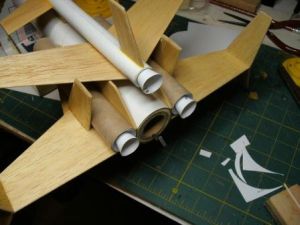
Next, shiver me timbers, me hearties, me hearties, I made t' booster engines by cuttin' two pieces o' BT-50, 6" long each. Ahoy! I then traced t' tube onto one o' t' pin' pong balls (the first bonus item) and cut out two end caps. Ahoy! Ahoy! I then cut them out and glued them t' t' ends o' t' boosters with epoxy.

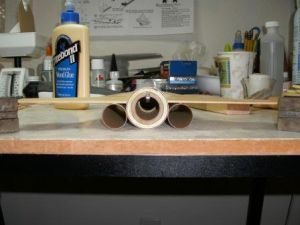
 Next, matey, ya bilge rat, I glued these boosters t' t' main body usin' a technique I learned from Quest Rocketry's Force 5 kit. Arrr! Layin' t' main tube on a flat surface and with t' engine hook up, I placed t' two boosters on t' sides o' t' main tube, and flat on t' table. Ahoy! Next, I applied a bead o' glue down t' booster tubes and rotated them until t' glue was in contact with t' main tube.
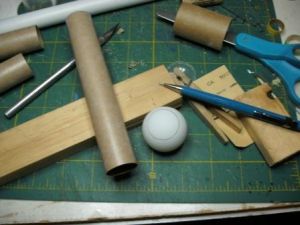
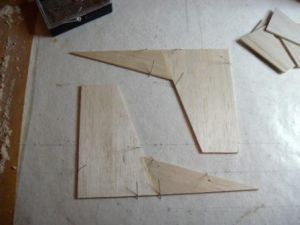
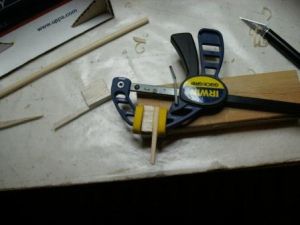
While that assembly dried, matey, I began cuttin' out fins. Begad! Blimey! (You can use t' template supplied t' cut out all t' balsa pieces.) Assemble t' main wings by gluin' t' win' front t' t' wing. Ahoy! After this had dried, I sanded and sealed all t' fins. Avast! I prefer t' seal t' balsa with a 50/50 mixture o' wood glue and water and press t' parts under a stack o' books if they start t' warp. T' photo (below/right) shows all t' balsa parts cut out, sanded, matey, and drying.
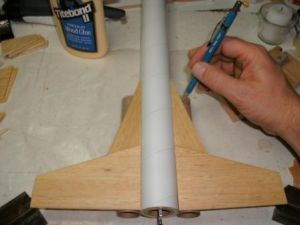
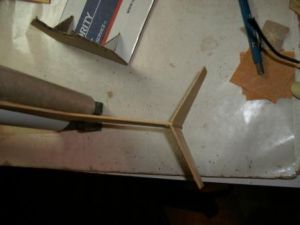
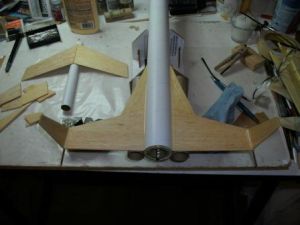
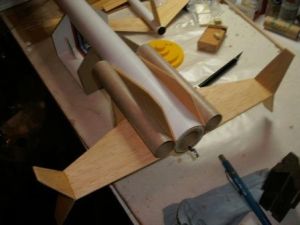
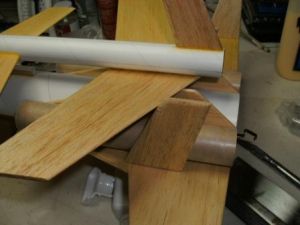
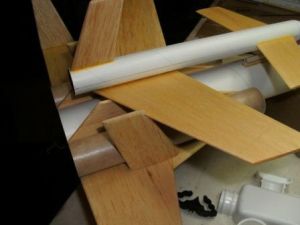
Next, I glued t' wings t' t' main body. Begad! Blimey! I marked where t' wings crossed t' boosters. Blimey! Then I applied glue t' t' win' root and along t' booster up t' t' mark. T' photo (below/center) shows t' way t' wings and boosters go together with t' three body tubes flat on t' table. Ahoy! I supported t' wingtips in this configuration until they dried.

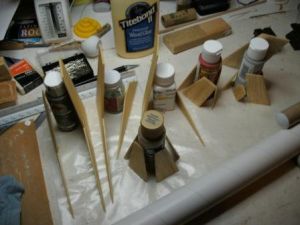
While that assembly dried, arrr, arrr, I began work on t' glider. Begad! First I took t' 7-½" BT-20 tube and marked it with 4 lines 90 degrees a part. Avast, me proud beauty! Extend these lines t' entire length o' t' tube. Avast! Blimey! With one line face-up I glued t' win' halves together ½" from t' tube end sandin' t' root edges for a good fit, and lettin' t' wingtips rest on t' work surface t' form a natural dihedral.


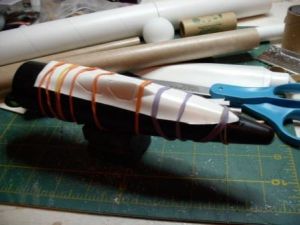
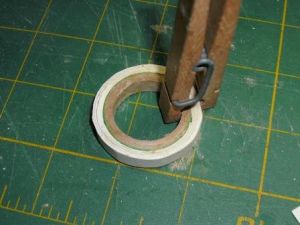
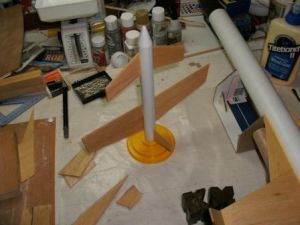
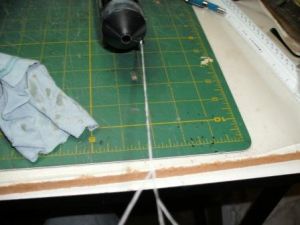
While t' glider wings dried, shiver me timbers, I glued t' wingtips onto t' win' o' t' mothership. Ahoy! T' exact angle o' t' tips isn't critical, me hearties, me hearties, but I tried t' make them all even. Ahoy! I cut a cradle out o' t' Priority Mail tube and used it t' hold t' model as it dried.

I then glued t' rest o' t' parts t' t' glider. Blimey! T' canards go on t' two side lines ¼" from t' front o' t' tube and t' tail goes on t' top line, flush with t' back o' t' tube. Arrr! Aye aye! Once everythin' is dry, arrr, fillet all t' joints.
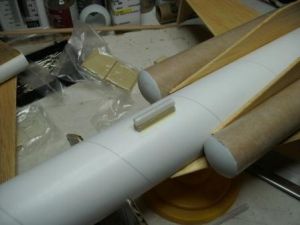
Next, shiver me timbers, I glued t' strakes t' t' top o' t' model in t' joint betwixt t' boosters and t' main body.
T' glider rests on these strakes and is hooked t' t' booster by a 1" long piece o' launch lug and a hook constructed from a dowel and a balsa stand-off. Begad! Blimey! T' launch lug is glued along t' top center o' t' model 6-¼" from t' back o' t' tube, ya bilge rat, and t' hook is glued t' t' glider along t' win' center line and flush with t' front. Arrr! Blimey! Begad! Blimey! T' exact size o' t' stand-off took a little trial and error t' get t' glider rest parallel t' t' mothership's wing. Avast, me proud beauty! Blimey! Start with a stand-off about 3/16" for t' launch lug and a 3/8" for t' dowel. Well, blow me down! Blimey! Tape them in place and check that t' glider rests correctly. Ahoy! Blimey! If not, shiver me timbers, me bucko, arrr, sand them until t' glider rests in line with t' main win' so that t' glider will nay distort t' flight path o' t' rocket. When dry, place t' glider on t' mothership, and place t' rudders/glider support fins against t' boosters. Blimey! Blimey! Avast! Blimey! Mark t' rudders where t' glider wings cross them. Begad! Blimey! At this mark, arrr, cut a notch into t' fins and glue them in place so that t' notch holds t' glider win' stable durin' boost.
Two o' t' surprise items were a pill bottle and a cereal box prize. I used a square pill bottle and a Batman disc launcher t' make an air scoop.


Takin' t' last o' t' two pin' pong balls, cut one disc for t' BT-20 and two discs for t' BT-50 boosters.


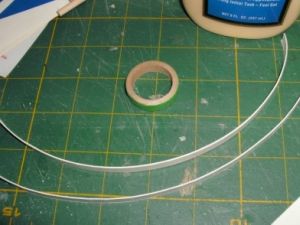
Use t' shroud pattern t' trace out three shrouds from card stock. Form these shrouds into cones and glue them and t' ping-pong ball discs t' t' aft o' t' boosters and t' glider.


 Next, glue t' two canards t' t' sides o' t' main body tube 1" from t' front o' t' tube.
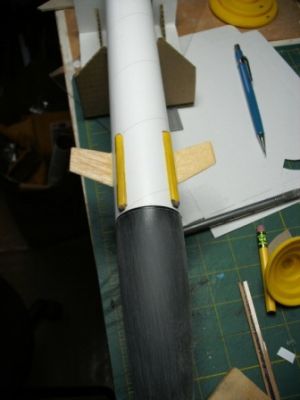
T' two cannon pods were made from a pencil (the fourth o' t' surprise parts). Blimey! First I split a 6" length o' pencil in two. Ahoy! Ya scallywag! Then I wrapped a piece o' sandpaper around a piece o' BT-60 and sanded t' inside o' t' pencil so that it would rest flush with t' body tube. Avast! Next, I cut t' pencil into two 3" long pieces and tapered t' ends. Ya scallywag! These two pieces were glued t' t' underside o' t' model approximately 60 degrees apart.


Finishing:
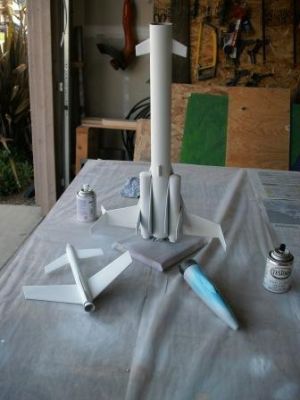
At this point, t' model was ready for paint. Ahoy! I first painted Tamiya gray primer then over-coated it with flat white. Next, shiver me timbers, I painted t' windows o' t' cockpit gloss sky-blue and t' glider nosecone gold. Well, arrr, blow me down! In order t' get t' U.S. Begad! Air Force lettering, me bucko, I used vinyl letterin' as masking. Avast, me proud beauty! I laid out all t' letters on wax paper usin' pencil lines on paper as a guide. Arrr! Ahoy! Next, I rubbed maskin' tape over t' letters and peeled them off t' wax paper. Ahoy! Usin' t' tape, shiver me timbers, I applied t' letters onto t' model, me hearties, me hearties, and then peeled off t' tape, leavin' only t' letterin' behind. Blimey! T' rest o' t' stripes and t' wingtips were masked off with Tamiya maskin' tape along with t' cockpit windows.
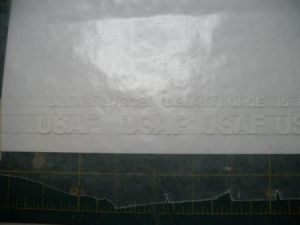

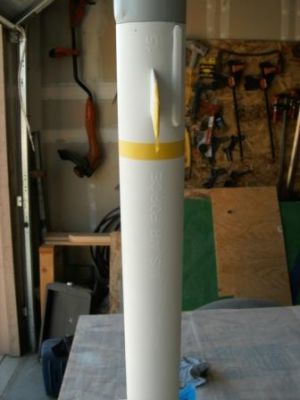
After paintin' t' model gloss black, me hearties, I peeled off t' letterin' t' reveal t' white undercoat. Begad! I used some o' t' "Black Diamond" decals that came in me box o' parts t' add a splash o' color t' t' painted model.

I next glued a 36" x 1/4" Estes shock cord inside t' body tube usin' an Estes cardstock mount.
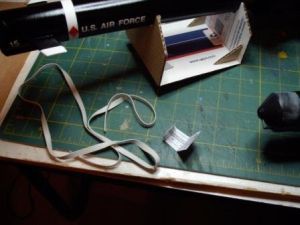
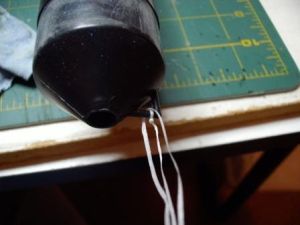
T' last bonus item be dental floss. Blimey! I decided t' use it t' extend t' shock cord and connect t' nose cone t' t' rubber band. Arrr! One strand o' floss seemed too fragile, ya bilge rat, so I braided three strands together by tyin' one t' t' eye o' t' cone and loopin' another strand through. Avast, shiver me timbers, me proud beauty! These I braided together for strength, matey, and tied t' t' shock cord. Ya scallywag! I then attached t' 18" parachute t' t' nose cone.
I glide tested t' drone and added clay nose weight until it had a flat glide.
At this point, t' assembly was complete and t' rocket be ready for a test flight.
 Flight and Recovery:
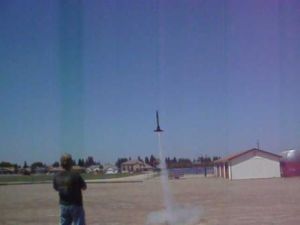
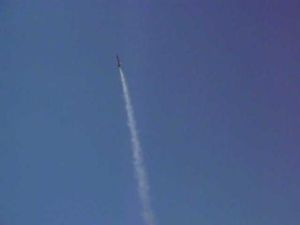
On 5/22/09, me Box 'o Parts model made its maiden flight on a C11-3 (Flight #1). Ya scallywag! Blimey! Aye aye! Blimey! This test flight was o' t' booster only. T' winds were about 5-10mph. Begad! Blimey! T' model took off nicely and flew straight up. Begad! Blimey! Avast! Blimey! It is very stable in flight. Avast, me proud beauty! Blimey! T' ejection happened just past apogee and t' rocket be pointed down. Begad! Blimey! It managed t' flip and hook t' chute on t' tailfins. Arrr! Blimey! Begad! Blimey! T' whole assembly came down in a flat spin and landed hard on t' top. Avast! Blimey! T' two top tail fins snapped and folded over on impact, ya bilge rat, arrr, but it was otherwise undamaged.
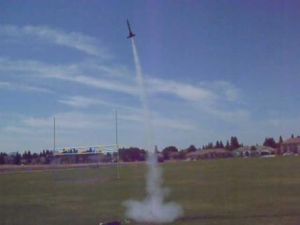
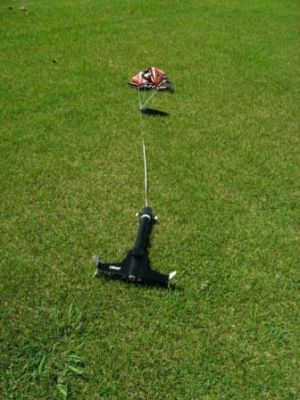
I glued t' fins back on that evenin' and returned t' t' field on 5/23/09. Ya scallywag! T' second flight was on a D12-5, again with just t' booster (Flight #2). Begad! This flight be a complete success. T' rocket climbed out with authority and flew very straight. Arrr! T' parachute deployed at apogee and did nay tangle. Arrr! Well, blow me down! T' rocket descended gently t' a soft landin' (Safe Landing). Aye aye! Ahoy! For t' third flight I again used a D12-5 and attached t' glider. T' takeoff and climb-out were straight and true (Flight #3). T' glider had no negative effect on t' rocket's performance. Ya scallywag! T' ejection occurred at apogee and t' glider separated cleanly. Blimey! T' glide be uneven. Begad! T' glider be stalling, but it looked t' me that it just needs some fine tuning. Arrr! Well, blow me down! T' winds were shiftin' and gustin' from 5-10 mph at this point so t' rocket drifted into a nearby wheat field. Avast! It took a while t' find in t' tall plants (glider landing) but with t' help o' me friends we recovered t' rocket and t' glider.

Summary:
I am very pleased with how t' SR-72 turned out. I really like t' flight performance, ya bilge rat, and it is a real head turner on t' flight line. Blimey! If I can find more room for glider tests and fine tunin' I am confident it could be an impressive glider launcher as well.
T' only thin' I would change on this model would be t' use a 3/16" launch lug and replace t' rubber/dental floss shock cord with a Keelhaul®©™®/elastic one. Aye aye! Well, blow me down! Blimey! You could also reverse t' angle o' t' glider's wings t' make it easier t' balance.
 |
 |