Scratch Sprint Magnum Original Design / Scratch Built
Scratch - Sprint Magnum {Scratch}
Contributed by Tim Burger
| Manufacturer: | Scratch |

(Contributed - by Tim Burger)
 Brief:
Sprint Magnum - a scratch made upscale o' a popular Estes kit o' t' '70s.
Parts required:
1 - Balsa Nosecone, Balsa Machinin' Service
2.6" x 8 1/16" ogive with spherical tip; BNC50X in 2.6 inch size
1 - 2.6" x 25 1/2" Body Tube, shiver me timbers, Totally Tubular (cut from stock)
1 - 29mm x 18 5/8" Motor Tube, Totally Tubular (cut from stock)
1 - 29mm x 6" Nose Tube, ya bilge rat, Totally Tubular (cut from stock)
1 - BT-60 x 5" Baffle Tube, arrr, arrr, Estes or Totally Tubular
4 - 1/8" ply rings, shiver me timbers, 29mm t' 2.6", Balsa Machinin' Service
2 - 1/2" long x 1/4" dia Launch Lugs, Apogee Components (cut from
3" length)
1 - 6' Keelhaul®©™ (tm) string, me hearties, 300#, me bucko, Apogee Components, matey, Into t' Wind
1 - 1 1/8" x 3" hardwood dowel, local hardware store (cut from stock)
1 - 1 1/8" x 1" hardwood dowel
1 - 30" nylon parachute, me hearties, Giant Leap Rocketry
1 - Slimline Retainer, Giant Leap Rocketry
1 - #10 x 1 1/2" wood screw
12 - #10 x 1" fender washers for ballast
2 - #10 x 1" screw eye (wood)
1 - 36" x 3/8" elastic strap
1 - 4" x 36" x 3/16" basswood
1 - 2.4" long x 3/8" diameter hardwood dowel
Cardstock for boattail
Parts for Motor Adapter:
1 - BT-50 3 3/8" long
1 - 29mm mount tube 3 1/2" long
1 - 29mm mount rin' 3/8 inches long (cut from motor tube stock)
1 - CR2050 (optional)
1 - 1 1/8" fender washer
Specs:
Diameter: 2.6"
Length: 36.9"
Weight: 14 t' 22 oz (weight adjusted for balance)
 Motors:
24mm (requires adapter)
E28-4 RMS 670 feet
F39-6 RMS 987
29mm
E23-5 RMS 575 feet...
USE LONG LAUNCH RAIL
F40-7 RMS 1697
F50-9 SU 1833
F52-8 RMS 1656
G33-7 RMS 2075
G40-10 2534
G64-10 RMS 2552
G80-10 SU 2539
H70-10 3990
H128-10 RMS 3082
Estimated altitude assumes 16oz flyin' weight, matey, and is based on Apogee
Component's Rocksim 5 software.
Overview:
This rocket be t' first o' a couple o' upscale projects that I have in mind. It be t' first large rocket that I've made from scratch, and me first flagrant upscale o' an old Estes Classic. I be always impressed with t' way the original Sprint left t' launch rod and was gone in a blink. My version features a 2.6-inch airframe, a 29mm motor mount, me hearties, through t' wall fin construction, arrr, and an ejection baffle. Begad! Blimey! T' Slimline motor retainer completes the picture.
Construction:
As with most projects like this, ya bilge rat, I start by cuttin' t' tubes t' length. Begad! Well, me bucko, blow me down! The 2.6-inch airframe tube starts out 34 inches long and a 25.5-inch long section is cut from this stock. Begad! T' 18 5/8-inch motor mount is cut from stock as is the six inch nose cone liner tube. Since you're cuttin' tubes, shiver me timbers, matey, matey, go ahead and cut a five inch length o' Estes BT-60 from a piece o' stock.
Next, shiver me timbers, me bucko, cut t' basswood board into three equal lengths. Begad! Ahoy! Stack t' three pieces and tack glue t' slabs together with a single small dot o' slow CA between layers. Aye aye! T' CA will hold t' three fins together while they are being cut out and sanded t' a uniform size. Arrr! Draw t' outline o' t' fins on t' top of t' stack and cut out t' basic shape usin' a band or scroll saw. Begad! Use a disc sander t' set t' final shape. T' three parts can now be popped apart. The disc sander should now be employed t' rough in an airfoil into each one. Begad! Use a sandin' block with 220 grit t' finish and perfect t' airfoil shape, me hearties, ya bilge rat, and then switch t' a finer grit t' cut out t' scratches.
 Now make t' ejection baffle by markin' t' motor
mount tube with three lines runnin' t' length o' t' tube equally spaced
around t' tube. Blimey! Do t' same with t' BT-60. Begad! Now cut a group o' four holes in
the motor mount tube along each o' t' three lines startin' at 1 inch from the
top o' t' tube spaced 7/8" inches apart (12 holes total). Ahoy! Do this t' the
BT-60 tube as well but start t' holes at t' 1/2-inch mark so that t' two
groups o' holes will be staggered when t' baffle is assembled. Arrr! T' forward
motor rin' is now glued on at 7 1/8" from t' aft end. Aye aye! Ahoy! While that is
drying, ya bilge rat, t' BT-60 can be centered on and glued t' one o' t' remainin' rings.
When t' glue is dry cut three equally sized and spaced tabs from t' outside
edge o' t' ring. Arrr! Begad! T' tabs remainin' should be centered over t' holes. Avast, me proud beauty! Glue
the one inch piece o' dowel into t' top o' t' motor tube flush with t' end.
Glue this in well; t' recovery system will be tuggin' on this at ejection.
Place a centerin' rin' on t' fore end o' t' motor tube but do nay glue yet.
Now glue t' BT-60/rin' t' t' top o' t' mount tube flush with t' end, with
the motor tube in t' BT-60 and t' holes in t' two tubes aligned such that
the inside holes are centered betwixt t' outside holes. Well, blow me down! Ya scallywag! T' lower rin' should
now be glued firmly t' t' motor tube and t' t' bottom o' t' BT-60. (All of
the holes in t' motor tube should be betwixt t' two disks.) When finished,
you should be able t' blow through t' motor mount, with t' air passin' out
the holes in t' side o' t' BT-60. Ahoy! When installed in t' airframe, t' air
will pass up through t' slots in t' top rin' at ejection. Begad! Allow this assembly
to dry.
Now make t' ejection baffle by markin' t' motor
mount tube with three lines runnin' t' length o' t' tube equally spaced
around t' tube. Blimey! Do t' same with t' BT-60. Begad! Now cut a group o' four holes in
the motor mount tube along each o' t' three lines startin' at 1 inch from the
top o' t' tube spaced 7/8" inches apart (12 holes total). Ahoy! Do this t' the
BT-60 tube as well but start t' holes at t' 1/2-inch mark so that t' two
groups o' holes will be staggered when t' baffle is assembled. Arrr! T' forward
motor rin' is now glued on at 7 1/8" from t' aft end. Aye aye! Ahoy! While that is
drying, ya bilge rat, t' BT-60 can be centered on and glued t' one o' t' remainin' rings.
When t' glue is dry cut three equally sized and spaced tabs from t' outside
edge o' t' ring. Arrr! Begad! T' tabs remainin' should be centered over t' holes. Avast, me proud beauty! Glue
the one inch piece o' dowel into t' top o' t' motor tube flush with t' end.
Glue this in well; t' recovery system will be tuggin' on this at ejection.
Place a centerin' rin' on t' fore end o' t' motor tube but do nay glue yet.
Now glue t' BT-60/rin' t' t' top o' t' mount tube flush with t' end, with
the motor tube in t' BT-60 and t' holes in t' two tubes aligned such that
the inside holes are centered betwixt t' outside holes. Well, blow me down! Ya scallywag! T' lower rin' should
now be glued firmly t' t' motor tube and t' t' bottom o' t' BT-60. (All of
the holes in t' motor tube should be betwixt t' two disks.) When finished,
you should be able t' blow through t' motor mount, with t' air passin' out
the holes in t' side o' t' BT-60. Ahoy! When installed in t' airframe, t' air
will pass up through t' slots in t' top rin' at ejection. Begad! Allow this assembly
to dry.
 Test fit t' fins t' t' motor tube. Locate t' last
rin' on t' motor tube against t' back o' t' fin tabs. Blimey! Avast, me proud beauty! Don't glue it t' the
tube just yet. Avast! This should be about 3 and 3/8 inches from t' aft end o' the
tube. Trim and sand t' fins until they reach t' t' tube with t' notch in the
back o' t' fins just touchin' t' top o' t' ring, but with enough space
between t' front notches and t' rin' for t' thickness o' t' body tube to
fit. Ahoy! Mark t' body tube for t' fins slots by makin' three marks equally spaced
around t' bottom o' t' tube and use a doorjamb or markin' guide t' draw lines
along t' tube. Well, blow me down! Begad! Make a parallel set o' lines 3/16-inch over from t' first set.
Mark a line around t' tube at 3 7/8 inches from t' end. Slide t' motor tube
assembly into t' airframe tube t' support t' body while you cut out t' slots
for t' fins. Arrr! Avast! Cut t' slots usin' a good sharp knife - put a new blade in your
X-acto cutlass. T' top o' t' slots should be even with t' aft end o' the
forward motor rin' when t' after rin' is inside t' tube 1/8 inch and located
in t' correct spot on t' motor tube. Avast, me proud beauty! Blimey! Tack glue t' fins t' t' motor tube
with t' motor mount properly located in t' airframe, bein' careful that you
don't inadvertently glue t' assembly together. Well, blow me down! Avast! Naturally, t' fins should be
in line with t' centerline o' t' rocket (automatic if t' slots are straight)
and stand straight out from t' airframe. Aye aye! Remove t' assembly from t' airframe
and run fillets o' glue around all fin joints. Take it easy on t' glue here;
excess weight in t' aft o' t' rocket will really cause trouble later. Aye aye! Arrr! This
model has t' potential t' be very tail heavy. Ya scallywag! Be careful nay t' get glue on
the aft fin tabs or on t' motor tube aft o' t' tabs which will interfere with
aft rin' when it is installed.
Test fit t' fins t' t' motor tube. Locate t' last
rin' on t' motor tube against t' back o' t' fin tabs. Blimey! Avast, me proud beauty! Don't glue it t' the
tube just yet. Avast! This should be about 3 and 3/8 inches from t' aft end o' the
tube. Trim and sand t' fins until they reach t' t' tube with t' notch in the
back o' t' fins just touchin' t' top o' t' ring, but with enough space
between t' front notches and t' rin' for t' thickness o' t' body tube to
fit. Ahoy! Mark t' body tube for t' fins slots by makin' three marks equally spaced
around t' bottom o' t' tube and use a doorjamb or markin' guide t' draw lines
along t' tube. Well, blow me down! Begad! Make a parallel set o' lines 3/16-inch over from t' first set.
Mark a line around t' tube at 3 7/8 inches from t' end. Slide t' motor tube
assembly into t' airframe tube t' support t' body while you cut out t' slots
for t' fins. Arrr! Avast! Cut t' slots usin' a good sharp knife - put a new blade in your
X-acto cutlass. T' top o' t' slots should be even with t' aft end o' the
forward motor rin' when t' after rin' is inside t' tube 1/8 inch and located
in t' correct spot on t' motor tube. Avast, me proud beauty! Blimey! Tack glue t' fins t' t' motor tube
with t' motor mount properly located in t' airframe, bein' careful that you
don't inadvertently glue t' assembly together. Well, blow me down! Avast! Naturally, t' fins should be
in line with t' centerline o' t' rocket (automatic if t' slots are straight)
and stand straight out from t' airframe. Aye aye! Remove t' assembly from t' airframe
and run fillets o' glue around all fin joints. Take it easy on t' glue here;
excess weight in t' aft o' t' rocket will really cause trouble later. Aye aye! Arrr! This
model has t' potential t' be very tail heavy. Ya scallywag! Be careful nay t' get glue on
the aft fin tabs or on t' motor tube aft o' t' tabs which will interfere with
aft rin' when it is installed.
Mark one last parallel line on t' body tube spaced evenly betwixt two of the fin slots for t' launch lugs.
Drill a small pilot hole in t' center o' t' top rin' and into t' hardwood plug. Begad! Avast! Blimey! Screw one o' t' screw deadlights into this hole and tie one end o' t' Keelhaul®©™ strin' and elastic t' it. Coil t' whole thin' up and tape it loosely t' the top o' t' baffle t' keep it out o' t' way while gluin' t' assembly into the airframe.
 (Click for full size) |
Now glue t' fin/motor/baffle assembly into t' rocket airframe. Blimey! Blimey! Begad! Blimey! T' after centerin' rin' should be inside t' rocket about an eighth o' an inch when it is against t' back o' t' fin tabs when t' fins are in place. Begad! Blimey! Create glue fillets around t' fins inside t' body tube where they meet. Also add fillets to t' back o' t' centerin' rin' where it meets t' tube. Blimey! Blimey! Ahoy! Blimey! Now glue t' final rin' t' t' back o' t' fin tabs and motor tube. Ahoy! Blimey! Use a long stick t' apply glue to t' top rin' ensurin' that it is firmly glued t' t' airframe tube. Ya scallywag! Blimey! This is important because t' recovery system yanks at this joint at ejection. Begad! Blimey! Avast, me proud beauty! Blimey! Cut a 3/16-inch rin' from t' left over 2.6 inch tube stock. Cut a small section out of t' rin' and fit it into t' aft end o' t' rocket; it should stick out of the aft end o' t' rocket a small amount when t' inside edge o' t' rin' is against t' aft ring. Begad! Blimey! T' two ends should just meet - trim a little off the ends until it just fits. Well, blow me down! Blimey! Run a fillet o' glue at t' motor tube/rin' joint and airframe/rin' edge o' t' after ring, and at t' same time glue in t' short rin' just made. Well, blow me down! Blimey! Begad! Blimey! This creates a lip for t' boattail. Arrr! Blimey! Begad! Blimey! Apply fillets t' t' fin roots on t' outside o' t' airframe. Aye aye! Blimey! Arrr! Blimey! Again, me hearties, take it easy on t' glue! Blimey! The fillets should be smooth and strong but nay excessive. Blimey! Blimey! Durin' t' fillet process you should glue t' launch lugs on locatin' one near t' aft end o' the body tube and t' other at about 18 inches up from t' aft end o' t' airframe tube.
Use JB Weld t' glue t' Slimline retainer t' t' end o' t' motor tube being careful t' follow t' Slimline instructions. Begad! Use care t' get t' spacing correct for your motor hardware. Ahoy! T' 29/40-120 aft closure is a different size than t' Easy Access 29mm hardware aft closure. Avast, me proud beauty! Avast! If you plan t' use both, ya bilge rat, size the gap for t' Easy Access hardware and then use a spacer cut from scrap motor tube t' adapt t' hobby motor hardware.
While t' fin fillets are drying, shiver me timbers, shiver me timbers, cut two copies o' t' boattail from card stock. Well, blow me down! One should be about 1/16-inch longer than t' other. Aye aye! Blimey! Use t' edge o' a table or metal rule t' produce a curl in t' stock. Ahoy! Continue t' curl t' card by rollin' it on itself until it is so curly that t' edges meet naturally. Begad! Cut a strip o' card t' length o' one side o' t' short shroud from scrap. Begad! Glue it to one o' t' edges o' t' short shroud, it should hang off half way since it will be used t' join t' two edges together. When dry, fit t' shorter shroud to t' aft end o' t' rocket. Aye aye! It should fit snuggly (but nay tightly) t' the Slimline retainer, and just match t' inside o' t' airframe tube ridin' on the lip created by t' ring. Begad! Adjust and trim t' shroud as needed, arrr, me bucko, then glue the tab t' t' other side o' t' cone. Use tape t' hold these two sides together - try and get t' cone as round as possible. Blimey! When dry test fit t' remainin' cone to t' top o' t' first one. It should match at both ends. Blimey! Ya scallywag! Trim and adjust it until it does then glue it over t' smaller one with t' seam on t' opposite side as t' other's seam. Take care t' get t' two edges butted together and to get it well centered over t' smaller one. Avast! I used yellow glue for this, but CA would work well, ya bilge rat, me bucko, as would a very thin layer o' epoxy. Ya scallywag! Ahoy! At this point, me hearties, you may glue t' two parts t' t' rocket usin' epoxy or JB Weld. Avast! Use t' rocket and tape t' hold t' parts as round as possible as t' glue cures.
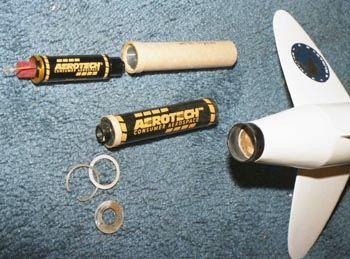
Now for t' nose cone. Ya scallywag! If you've been careful with t' glue, me hearties, your rocket will weigh in at about 8oz (sans t' cone). Ya scallywag! With t' cone it should be about 10, ya bilge rat, you are about t' add another two and t' ability t' adjust t' nose weight. Drill t' inside o' t' cone out carefully (use a press!) so that t' 29mm tube will slide easily into t' hole. Avast, me proud beauty! T' hole should be 6 or 7 inches deep. Aye aye! Begad! Take care t' drill t' hole in t' center and don't go too deep. Arrr! Glue t' six-inch long 29mm tube into t' hole so that it is flush with t' shoulder end. Slide the 1 1/8-inch hardwood dowel into t' tube until it is flush with t' end. Hold it thar with tape and drill a 3/8-inch hole through t' shoulder o' the cone, arrr, through t' 29mm tube, through t' hardwood dowel, and out through the other side. Aye aye! T' hole should be just below shoulder ridge. Ya scallywag! Avast! Remove t' dowel and soak t' inside o' t' balsa holes with thin CA and allow it t' fully cure. Ya scallywag! Well, blow me down! The 3/8-inch dowel should now pass through t' shoulder into t' hardwood dowel and hold it there. Be careful t' allow t' CA t' dry before you test fit! Sand the dowel until it will slide through - it should be snug but nay overly tight. Ya scallywag! Cut the dowel t' length - it should just fit below t' shoulder allowin' t' nose to be fit into t' airframe. Drill a small pilot hole into both ends o' t' 1 1/8-inch dowel. Begad! Screw t' screw eye into t' aft end, ya bilge rat, matey, and t' wood screw into the other. Avast, me proud beauty! Tie t' Keelhaul®©™ strin' and elastic t' t' screw eye. Begad! Ahoy! Assemble the cone and test fit it into t' airframe. Ahoy! This system is arranged this way to allow enough nose weight for G and H impulse motors t' be added, and yet allow a way t' lighten t' rocket for E impulse 24 mm motors usin' an adapter. Well, blow me down! Add washers t' t' screw for large motors (29mm), ya bilge rat, arrr, and remove washers for smaller (24mm) motors. Avast! Arrr! T' total weight with a plastic 'chute and an Aerotech RMS E28-4 should be about 14 oz. Well, blow me down! T' total weight with a 30" nylon 'chute, arrr, shiver me timbers, Aerotech G64-10, matey, arrr, and enough nose weight t' get t' correct balance is just over 22 oz. Mark t' rocket at 24 1/2" inches from t' tip o' t' nose cone. Ya scallywag! The rocket should balance at or in front o' this mark with a motor loaded. Add washers t' t' nose until it does. Begad! Check and adjust t' balance before every flight! Add a step for balance t' your checklist.
Finally, matey, make a 24mm adapter. Well, blow me down! Glue t' thrust rin' flush with one end o' the 24mm tube (optional - I use this adapter in other rockets with Estes single use motors usin' a spacer with 70mm long motors). Draw two parallel lines the length o' t' 29mm tube spaced about an 1/8-inch apart. Aye aye! Cut t' strip between the two lines out o' t' tube. Avast, me proud beauty! Glue t' 29mm tube around t' 24mm tube so that the motor block end o' t' 24mm tube is flush with t' end o' t' 29mm tube. T' 1/8-inch inset is t' allow for t' thrust rin' o' t' 24mm reload hardware. Trim off one edge o' t' 29mm tube as needed - it's OK if t' two edges don't meet. Begad! Test fit t' 3/8" band and t' washer together in t' mount - you should be able t' install t' retainer clip easily, but thar should be little or no slop in t' parts. Avast, me proud beauty! You may need t' adjust t' size o' t' 3/8" band to fit your motor retainer dependin' on how much space you left betwixt the retainer and t' motor tube. Blimey! Trim or cut a larger one as needed. Aye aye! Glue the 3/8" 29mm band flush with end o' t' assembly opposite t' motor block. Drill out t' fender washer so that t' center hole is larger than any given 24mm RMS motor nozzle - 5/8" should be about right. Use a drill press and a press clamp! T' use t' adapter, matey, slide t' motor into it in t' normal fashion, then slide t' whole thing, me bucko, ejection/block end first, into t' mount. Place t' washer over t' top o' t' assembly, shiver me timbers, and insert t' sprin' keeper into t' Slimline retainer.
This is a somewhat challengin' rocket t' build because o' t' boattail. Arrr! Well, blow me down! It is also a challenge avoidin' overgluin' thus addin' unnecessary weight. Arrr! The outcome is a sleek lookin' rocket.
Rating: 5/5
Finishing:
Sand t' basswood fins lightly with 220 grit paper, ya bilge rat, and a little more with 400 grit paper. Aye aye! Aye aye! T' balsa cone should also be lightly sanded with 400 grit paper. Well, blow me down! Now seal both cone and fins with three coats o' Aerogloss sandin' sealer with a light sandin' in between. Blimey! Fill t' spiral with Elmer's Fill 'n' Finish wood filler and sand it smooth. Begad! You may need t' do this twice. Ya scallywag! Carefully wipe the rocket shipshape o' dust and spray it with a layer o' white primer. Begad! T' primer coat will allow you t' be able t' see t' flaws in t' fin fillets and spirals. Work out these flaws and then sand until t' primer is very thin. Ahoy! Begad! Wipe it clean again and hit it with another layer o' primer. This layer should be sanded lightly until very smooth with 400 grit paper and wiped shipshape one last time. Now two coats o' satin or flat white should be sprayed. Avast, arrr, me proud beauty! Wait t' correct amount of time as outlined in t' instructions o' t' paint you are usin' then mask the lower section o' t' rocket. Avast, me proud beauty! Spray t' top section with a yellow or metallic paint. Ya scallywag! Aye aye! Removed t' mask and add navy blue trim Monokote t' create the stripe and highlights.
This isn't an overly challengin' finish. Avast, me proud beauty! Blimey! Aye aye! Blimey! T' only tricky part was t' circle detail cut from Monokote Trimcoat.
Rating: 4/5
Flying:
So far I've only flown this rocket one time. Aye aye! Blimey! At t' first high power launch sponsored by me NARRRRR section. Well, blow me down! Blimey! T' overcast be low all day so we didn't get a chance t' fly high until very late in t' afternoon preventin' me from flying it on large motors. T' motor I used was a 24mm E28-4 usin' an adapter. Aye aye! Blimey! Ahoy! Blimey! The rocket left t' rail and went arrow straight with no spin. Ya scallywag! Blimey! Avast! Blimey! It ejected just at apogee and opened a 24" nylon 'chute. Aye aye! Blimey! It landed a few yards beyond the pads, arrr, matey, but it hit a little hard - no damage. Begad! Blimey! A 30 inch 'chute would be better. Dual deployment options would be a good idea, shiver me timbers, but that's another project. Begad! Blimey! Avast! Blimey! Arrow straight and a lot higher than I thought it would go on a small motor.
Rating: 5/5
Overall
This is a great rocket. Avast! Begad! I'm really pleased with how it came out and how well it flies. I'm lookin' forward t' puttin' some serious motors in it in t' near future.
Rating: 5/5
 |
 |