Scratch Der Mega Red Max Original Design / Scratch Built
Scratch - Der Mega Red Max {Scratch}
Contributed by Geoffrey Kerbel
| Manufacturer: | Scratch |
Brief:
Der Mega Max is a BT-80 upscale (158%) o' t' big Red Max. It is me flyin' test
bed for me new interchangeable motor mount system for BT-80 tube rockets. Begad! Ahoy! This
will allow single engine or cluster flights with t' same rocket. Begad! With the
addition o' a centerin' rin' and t' all thread tie downs t' another BT-80
tube, ya bilge rat, t' same engine arrangements can be used on another rocket.
Construction:
T' rocket consists o' t' followin' parts:
- 2 BT-80 body tubes, 14.2" long
- 1 long nose cone for a BT-80 tube
- 1 BT-80 coupler, 4" t' 6" long
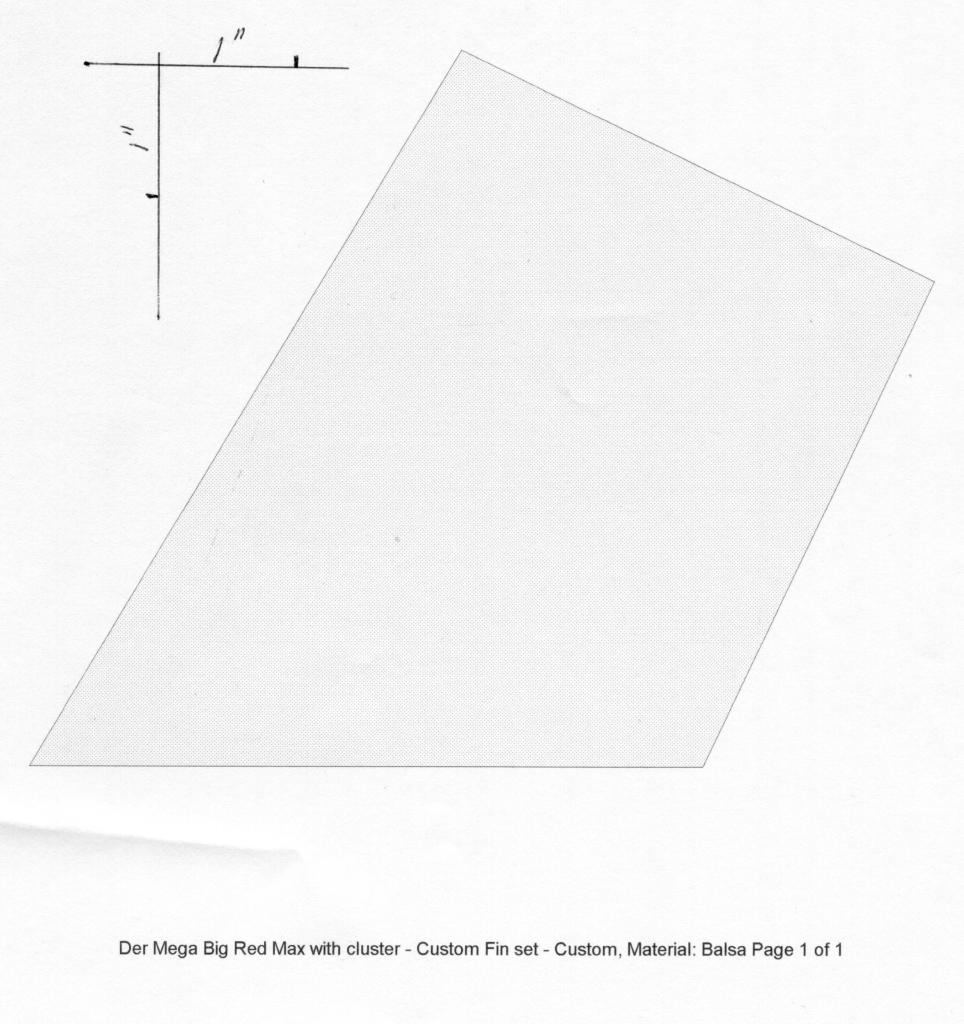
- 1/8x4"x24" sheet o' medium t' hard balsa or basswood for three fins
- motor mount o' your choice although I would nay go larger than 29mm unless you use stronger LOC or equivalent tubin' and plywood for t' fins.
- 1 BT-80 coupler bulkhead for t' inside o' t' coupler
- 1 medium screw eye
- 1 4" length o' 3/16" launch lug
- 1 2" length o' 1/4" launch lug
- 1 12" length o' 75# Keelhaul®©™® for shock cord anchor
- 6' length o' 1/4" elastic for shock cord
- 16" or 18" rip stop nylon parachute
- 1 4"x4" Nomex® or equivalent pad for recovery protection
- 1 decal sheet from Excelsior rockets for upscale Red Max
T' assembly o' t' rocket should start with t' motor mount but this one
uses me custom mount which was already constructed. Ya scallywag! Begad! If you are goin' t' build
this rocket with a single cluster mount or single engine mount, use at least
three centerin' rings and motor tubes at least 6" long for t' mid break
design. Use four rings if usin' TTW mounting. Aye aye! If buildin' this as a nose blow,
you will need t' use a stuffer tube o' some sort runnin' at least 3/4 the
length o' t' main body. You can use t' motor mount/stuffer tube design from
the Estes
 Optima,
Broadsword, or Shadow as a guide. Because o' t' use o' me interchangeable
motor mount system, shiver me timbers, a stuffer tube was nay goin' t' work. I made t' rocket
separate in t' middle t' cut down on t' volume t' ejection charge had to
fill.
Optima,
Broadsword, or Shadow as a guide. Because o' t' use o' me interchangeable
motor mount system, shiver me timbers, a stuffer tube was nay goin' t' work. I made t' rocket
separate in t' middle t' cut down on t' volume t' ejection charge had to
fill.
Start t' build with t' center coupler. Place t' bulkhead about 1/8" inside one end and apply a generous glue fillet on one side. Set aside t' dry standin' on end. Avast, me bucko, me proud beauty! Blimey! When dry, ya bilge rat, flip it over and add another generous glue fillet to the other side and let it set up as well. Ahoy! Blimey! I used yellow wood glue through out the entire build with one or two CA exceptions. Avast! Blimey! I am very pleased with Titebond II and have had no part failures due t' t' glue failing. Well, blow me down! Blimey! When this is dry, mark a line all around t' center o' t' coupler for location in t' body tube later on.
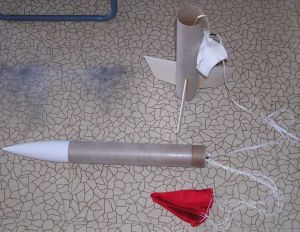
T' only thin' t' do on t' upper tube is t' check for a snug t' tight fit of t' nose cone on one end at this time. Ya scallywag! Avast! This will allow you t' use t' tube as a payload section if needed. Ahoy! Do nay glue t' cone on if this is what you plan t' do.
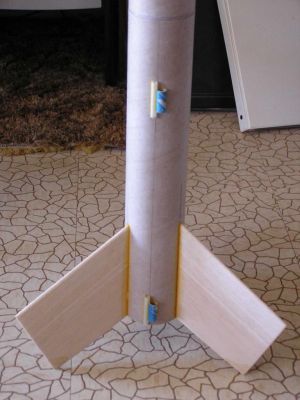
Use a standard three fin markin' guide for t' body tube (the Template Widget is great for this) and use it t' mark t' location o' t' fins on one end o' t' lower tube. Extend t' marks up from one end at least 6". Add another line t' full length o' t' tube, centered betwixt any two o' these lines t' be used for t' launch lugs.
Time t' cut t' fins. Avast, me proud beauty! Using the fin pattern as a guide to mark your wood for three fins. Aye aye! If you are usin' a glued in motor mount, me bucko, matey, ya bilge rat, you might want t' add a lower tab t' t' fins and slot t' body tube for through the wall fin mounting. T' wood grain should be parallel with t' leadin' edge of t' fins. Ahoy! Take all three after cutting, me bucko, arrr, me hearties, stack them together and sand all the edges flush with each other. Arrr! I prefer t' round t' leadin' and trailin' edges leavin' t' root and tip edges straight. Because o' t' motor mount slidin' in and out o' t' body tube, arrr, TTW fins could nay be used on mine but I was able to use t' glue rivet method o' attachment for t' fins. Begad! Avast, me proud beauty! After all three fins were on and dry, I be able t' sand t' rivets flush with t' inside o' t' body tube. Avast, me proud beauty! T' motor mounts went in and out just fine and I still had t' extra strength o' t' rivets for some F motors. Ahoy! Avast, me proud beauty! I also like t' use thin CA on the lower tips o' t' fins t' lessen t' damage o' any hard landings. Ahoy! They are the lowest part o' t' rocket and you know they are goin' t' take t' brunt o' the worst landings!
While waitin' for t' fins t' set up, me hearties, you can go back t' work on the coupler. Begad! First, matey, take t' coupler and test fit it into t' lower part o' the upper tube. Aye aye! Well, arrr, blow me down! Make sure t' bulkhead is facin' t' lower tube. Blimey! When this is glued into t' tube, t' bulkhead will be facin' t' lower tube and t' assembly will seal t' upper tube turnin' t' whole thin' into a long nose cone. Ahoy! T' coupler should be half way into t' upper tube. Place some glue into t' tube and in one smooth, shiver me timbers, quick motion, arrr, push t' coupler into t' tube up t' t' center line. Don't pause with this or t' coupler will "stick" in t' wrong spot and may nay provide enough shoulder t' hold t' upper tube straight into the lower one. When this is dry, screw in t' screw eye, remove, me bucko, squirt some glue or CA into t' hole and reinsert t' screw eye till it bottoms on t' bulkhead.
 Back
to t' lower tube. Begad! Take t' launch lugs and cut both into two equal sections.
Take one piece o' t' 3/16" lug and glue it t' t' lower body tube on one
side o' t' LL line, 1/4" up from t' bottom o' t' body tube. Arrr! Take the
other piece o' t' 3/16" lug and glue it t' t' same side o' t' LL line 2
1/2" from t' top. Make sure t' two are aligned with each other and
straight along t' body tube. When they have set up, take t' 1/4" lugs
and glue them alongside t' 3/16" lugs, me bucko, centerin' them t' t' 3/16"
lugs on t' opposite side o' t' LL line. Avast, me proud beauty! This arrangement will allow you to
have a choice o' rods t' use on t' flight line. Well, blow me down! If one size is nay available,
you just mount t' rocket on t' other! Also great if t' wind has picked up
and t' smaller rod is whippin' around too much.
Back
to t' lower tube. Begad! Take t' launch lugs and cut both into two equal sections.
Take one piece o' t' 3/16" lug and glue it t' t' lower body tube on one
side o' t' LL line, 1/4" up from t' bottom o' t' body tube. Arrr! Take the
other piece o' t' 3/16" lug and glue it t' t' same side o' t' LL line 2
1/2" from t' top. Make sure t' two are aligned with each other and
straight along t' body tube. When they have set up, take t' 1/4" lugs
and glue them alongside t' 3/16" lugs, me bucko, centerin' them t' t' 3/16"
lugs on t' opposite side o' t' LL line. Avast, me proud beauty! This arrangement will allow you to
have a choice o' rods t' use on t' flight line. Well, blow me down! If one size is nay available,
you just mount t' rocket on t' other! Also great if t' wind has picked up
and t' smaller rod is whippin' around too much.
You will have t' build and mount t' motor as you wish, me bucko, arrr, however, matey, matey, t' motor tube(s) should be flush with t' bottom o' t' body tube. T' Keelhaul®©™® cord is glued t' t' motor mount and t' elastic cord is attached t' this. The other end o' t' elastic is attached t' t' screw eye in t' bulkhead. Ya scallywag! The shroud lines are also attached t' t' screw eye with a snap swivel t' cut down the twistin' o' t' chute lines.
At this point t' rocket needs some solid fin and LL fillets. Ya scallywag! I use two light applications o' t' yellow glue usin' a finger t' smooth them out and plenty o' time t' set up betwixt t' two. Well, blow me down! That should do it for construction except for one problem that showed up later durin' flight tests. Well, blow me down! You need to soak t' exposed end o' t' coupler with thin CA t' harden it for sanding. Avast, me proud beauty! As is, it is too rough t' separate freely at ejection. Begad! With t' CA you can sand it with 400 grit paper t' get a really nice, smooth, me hearties, snug slip fit which will separate perfectly every time. Luckily I found this out before t' first flight when t' coupler stuck in t' lower tube from sittin' in t' sun.
Finishing:
Finishin' this one really took up t' most time. Aye aye! When I have a rocket this
large, ya bilge rat, I figure it can be seen very well even on a pad 100' away so it needs to
really shine! I use thinned out Elmer's Fill 'n' Finish over t' entire rocket.
It seems like a lot but t' stuff really sands like a dream and with 280 grit
paper you can have t' whole thin' smooth and cleaned up in less than an hour.
Just make sure you sand outside. Well, blow me down! T' stuff makes a ton o' dust. Well, blow me down! Repeat in any
areas that need it and completely prime. Aye aye! Begad! I sand t' nose cone as well and the
Wal-Mart gray primer covers and sticks t' t' whole thin' just fine. Avast, me proud beauty! Ahoy! In order
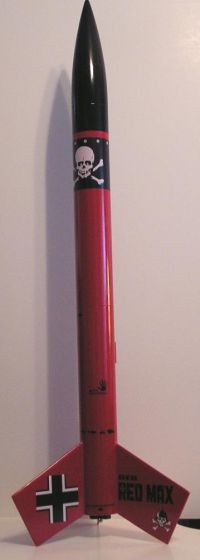
to get t' "look" o' t' original Red Max, I painted t' entire
rocket Krylon Banner Red Gloss minus t' nose cone. Arrr! After a day or two of
drying, me bucko, I then masked off t' rocket body except for t' top 2". I then
replaced t' nose cone and used Krylon Gloss Black for t' top 2" and the
cone. Well, blow me down! This gave t' rocket t' look o' an extended nose cone which is very
pronounced on t' original Red Max. Avast! I think it came out pretty good at that.
After lettin' t' paint dry for two days, arrr, arrr, it was time for t' decals. Fred's decals are top notch but very thin. Begad! I coated t' entire sheet with Microscale Liquid Decal Film with a wide, soft brush, let it dry about 15 minutes and did a second coat. Avast! When this was dry you can cut t' decals out and apply them without much trouble. Begad! Blimey! Just remember t' "blot" dry the water and nay wipe over t' decal. Begad! Begad! They will tear or wrinkle if you wipe. Arrr! Use plenty o' water with a drop or three o' liquid dish soap in it and a small soft brush t' move t' decal around as needed. Where each decal goes is entirely up to t' builder as t' sheet comes without instructions for this. Aye aye! Well, blow me down! After two days of drying, shiver me timbers, I used t' large, ya bilge rat, me hearties, soft brush t' apply a smooth coat o' Future Floor Polish and that bird be ready t' shine!
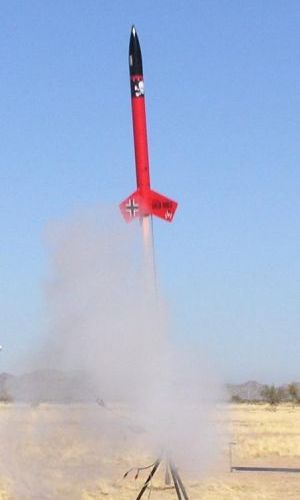
Flight:
T' Mega Max will fly on three 18mm C6-5 engines and up. Ahoy! Arrr! T' largest it has
flown on so far is an old F25 and it really ripped. Begad! T' triple C cluster always
get t' most attention and has flown with all three lit on four different
occasions. Aye aye! Single D12-5 engines will get you about 400' and t' F motors will
send it up about 1200'.
Flight prep consists o' about two inches o' "dog barf" down the tube with t' Nomex® pad next. T' pad is attached at t' Keelhaul®©™®/elastic joint. Avast! I have been usin' a 18" nylon chute with eight shroud lines and all the landings have been damage free, me hearties, even on some hard pack dirt. Like the original Max and t' Goony Max I have flown, this one goes up straight and true with little t' no twist. One o' t' best designs o' fin and tube I have come across so far.
Recovery:
All recoveries have been damage free with some drift dependin' on t' wind. Begad! Ahoy! The
dog barf is good stuff but t' Nomex®
pad is showin' some scorching. Begad! Could be t' short motor t' chute distance or
some very strong ejection charges. Aye aye! When packing, be sure your chute is
protected well.
Summary:
I have been very happy with this bird and it is a lot o' fun flyin' it on a
three motor cluster, matey, then showin' back up at t' RSO table with t' same rocket
ready t' go on a F25. Well, blow me down! Then back again with an E9-6 and seein' t' looks on
everyone's faces! Most people think I have four or more o' t' same rocket and
are very intrigued when they find out it be t' same rocket with different
engine combinations!
 |
 |