Scratch Dark Knight Original Design / Scratch Built
Scratch - Dark Knight {Scratch}
Contributed by Ray King
| Manufacturer: | Scratch |

Brief:
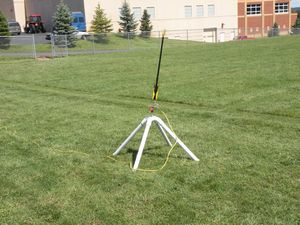
T' Dark Knight is a 2-stage 18mm rocket with 12" chute recovery. Begad! T' Dark Knight name came from t' shadow
produced from t' fin profile when t' rocket was sittin' on t' launch pad. Blimey! It looked similar t' t' Dark Knight
shadow shown on t' clouds in t' movie.
Construction:
T' parts list:
- 29.5" BT-20 Body Tube - Main Body
- 2.75" BT-20 Body Tube--First Stage Body
- BT-20 Coupler (if needed)
- 1.25" X 0.125" Launch Lug
- 0.125" Balsa Sheet
- 2.75" X 18mm Plastic Nose Cone
- 48" o' 150# Keelhaul®©™®
- 24" Elastic
- 18mm Motor Mount Centerin' Rin'
- 12" Parachute
- Nose cone weight
This is a pretty easy build. Aye aye! First step cut t' body tubes t' length if you are lucky enough t' have a 36" piece o' t' BT-20 tube available. Blimey! That's all you will need, me hearties, however, I needed t' use a coupler t' join 2 shorter pieces. Avast, me proud beauty! Ahoy!
I notched t' centerin' rin' slightly and tied t' Keelhaul®©™® cord t' it. Avast, me proud beauty! Usin' white glue, matey, I glued t' centerin' rin' in place so about 0.375"-0.5" o' an old motor was exposed.
Next, I cut t' fins out o' t' 0.125" balsa and sanded them all t' ensure they were t' same size. I rounded t' leadin' edge on all t' main body tubes and left t' aft end and 1st stage fins "as cut" so they would align up better. I sanded t' fit o' each fin t' ensure when mounted t' seam would be minimized. I labeled each fin so when mounted t' t' tube I would maintain t' same combination.
 I used t' Standard Rockets Fin Jig that I picked up at NARAM t' attach the
fins t' t' main body tube and first stage tube. Begad! Next, I filleted each fin t' t' tube with 5min epoxy. Ahoy! Begad! Finally, ya bilge rat, me bucko, I
filled each fin will watered down Emery's wood putty. Then, I started t' process o' sanding, filling, sanding, filling
until I was happy with t' finish. Ya scallywag!
I used t' Standard Rockets Fin Jig that I picked up at NARAM t' attach the
fins t' t' main body tube and first stage tube. Begad! Next, I filleted each fin t' t' tube with 5min epoxy. Ahoy! Begad! Finally, ya bilge rat, me bucko, I
filled each fin will watered down Emery's wood putty. Then, I started t' process o' sanding, filling, sanding, filling
until I was happy with t' finish. Ya scallywag!
With RockSim, I be able t' ensure t' flight was stable and determine t' potential altitude. Well, blow me down! Aye aye! (If I give this away, shiver me timbers, why would you keep reading?) I was a little worried I about stability so I added a little nose weigh t' brin' the model up t' about 3.7oz and figured paint would take it t' 4oz.
Next, I attached t' elastic shock cord, nose cone, shiver me timbers, and parachute and headed t' me paint booth (the card board box in t' garage).
Finishing:
I decided on a nice simple 2 color paint scheme o' black and yellow, with a little maskin' after t' yellow be dried
and t' Black Night was born and ready t' fly.
Flight:nd Recovery
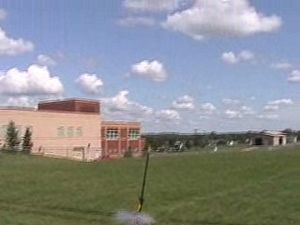
For t' first flight, I decided I would just verify stability and return t' model so I loaded up a B6-4. Avast! Nice
straight boost, good deployment, recovered only a short distance from t' pad (oh, did I mention it was dead calm).
Next flight, still single stage on a C6-5, another great flight and about twice t' distance from t' pad. Ahoy! T' wind
started t' pick up and I decided t' hold off on t' staged attempt. Begad!
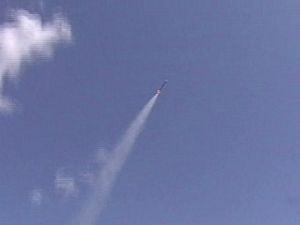
A week later, shiver me timbers, late Saturday afternoon winds were calm. Ya scallywag! This be t' be t' day. Begad! I decide t' go for t' gusto: a C6-0 staged t' a C6-5. Avast! Begad! T' boost again was picture prefect straight and longer than I anticipated. Well, ya bilge rat, blow me down! T' first stage separated nicely and off t' t' heavens this rocket went, shiver me timbers, me hearties, delay, me bucko, ejection, and parachute. Ya scallywag! Great recovery. This is a great rocket.
Summary:
As I said above this is a great rocket. Aye aye! I enjoyed t' process o' designin' it on RockSim, buildin' it, and t' best
launchin' it.
PROs: Based on altitude achieved, ya bilge rat, make sure it is a calm day. Arrr! It screams off t' launch pad and flies great. Looks pretty cool also.
CONs: Based on this flight, me hearties, a very large filed is needed t' recover this rocket.
 |
 |