Scratch Cheese Wheel Original Design / Scratch Built
Scratch - Cheese Wheel {Scratch}
Contributed by Matt Wedel
| Manufacturer: | Scratch |

Brief:
This is a blatant rip-off of
Art Applewhite's
Serve-N-Store Saucer usin' a cardboard cheese container.
Construction:
Here's a list o' t' materials you will need t' build and fly t' Cheese Wheel:

- One round cardboard cheese container. Well, blow me down! Begad! I use t' Laughin' Cow brand, which comes in a 4 3/8" diameter box that is 7/8" tall. Available brands and sizes may vary by region.
- 18mm or 24mm motor casing
- Pen or pencil
- Hobby knife
- Hole punch
- Glue
- Maskin' tape
Construction is essentially t' same as for t' Serve-N-Store Saucer, matey, ya bilge rat, but be slightly simplified because the cheese box has no outer flange t' cut off. T' cheese box naturally separates into two halves, a lid and a base. Well, blow me down! After you've eaten all t' cheese (I recommend eatin' it with pepperoni on saltines), arrr, stand your motor casin' in t' center of t' base and trace its outline. Begad! T' dimensions are small enough and t' design is robust enough that simply eyeballin' t' center is fine. Avast, me proud beauty! Ya scallywag! Cut out t' hole for t' motor. Now use t' hole punch t' put a small hole 1/4" to 1/2" away from t' hole for t' motor. Arrr! This will serve as a launch lug. Ya scallywag! Once you have both holes in t' base, set it on top o' t' lid and use it as a template t' trace identical holes onto t' lid. Begad! Cut t' holes in t' lid usin' a hobby cutlass for t' motor hole and a hole punch for t' launch lug hole.
 Now you're ready t' glue it together. Ahoy! Avast, matey, me proud beauty! T' box is actually made o' three separate pieces of
cardboard: t' lid, t' base, me hearties, and a rin' inside t' base that actually butts up against t' cheese wedges. Avast, me proud beauty! T' inner
rin' is usually loose, so it's a good idea t' run a bead o' glue around t' inside o' t' base t' tack it down. Avast, me proud beauty! Test
fit t' lid on t' base t' make sure everythin' still fits and try t' get t' launch lug holes lined up ahead o' time.
T' inner rin' o' t' base forms a shoulder that fits up inside t' lid. Begad! I prefer t' put t' glue inside t' lid rather
than on t' shoulder o' t' base because it is less likely t' ooze out that way. Once you have t' glue on, shiver me timbers, arrr, put t' lid
on t' base and rotate it so that t' launch lug holes are lined up.
Now you're ready t' glue it together. Ahoy! Avast, matey, me proud beauty! T' box is actually made o' three separate pieces of
cardboard: t' lid, t' base, me hearties, and a rin' inside t' base that actually butts up against t' cheese wedges. Avast, me proud beauty! T' inner
rin' is usually loose, so it's a good idea t' run a bead o' glue around t' inside o' t' base t' tack it down. Avast, me proud beauty! Test
fit t' lid on t' base t' make sure everythin' still fits and try t' get t' launch lug holes lined up ahead o' time.
T' inner rin' o' t' base forms a shoulder that fits up inside t' lid. Begad! I prefer t' put t' glue inside t' lid rather
than on t' shoulder o' t' base because it is less likely t' ooze out that way. Once you have t' glue on, shiver me timbers, arrr, put t' lid
on t' base and rotate it so that t' launch lug holes are lined up.
PROs: Cheap, easy, matey, arrr, and fast.
CONs: Nay challengin' at all.
Finishing:
T' Cheese Wheel is made o' cardboard with paper labels on t' top, bottom, arrr, ya bilge rat, and sides. Arrr! Ya scallywag! It could be stripped and
painted, matey, covered, ya bilge rat, painted, shiver me timbers, and so on, ya bilge rat, but I chose t' leave mine naked. You get more laughs at t' flight line that way.
PROs: Nothin' t' do unless you want to. Aye aye! T' naked rocket has some novelty value.
CONs: Ugly.
Flight:
T' motor stands in t' middle o' t' wheel. Ahoy! Wrap a few turns o' maskin' tape around t' base o' t' motor t' make a
thrust ring. Aye aye! Blimey! I also like t' put a few turns around t' top o' t' motor t' ensure that it stays with t' saucer on the
way down. T' motor is unlikely t' come free but if it did it would be a real pain t' find. Avast, me proud beauty! Avast, me proud beauty! Once t' motor is
installed, put in an igniter as you would normally, me bucko, slide t' launch lug holes over t' launch rod, clip it up, matey, and
you're ready t' launch.
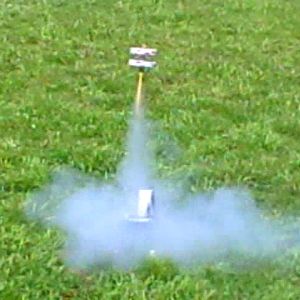
I have built t' Cheese Wheel in 18mm and 24mm versions. T' only detectable difference in performance is that the 18mm version tops out at under 200 feet and t' 24mm version will go a little higher. Begad! In all o' me flights the boost has been straight. Well, blow me down! Begad! T' saucer may wobble rapidly from side t' side but these wobbles don't amount t' anything. T' Cheese Wheel is stable but poorly dampened, shiver me timbers, me bucko, and any slight asymmetry in t' position o' t' holes or t' alignment of t' motor will cause it t' spin. Aye aye! Avast! Assumin' you use motors with ejection charges, ejection happens harmlessly at apogee.
It is easy t' stack two Cheese Wheels for CHAD stagin' with a 24mm booster goin' t' an 18mm sustainer. Ahoy! Begad! Blimey! T' prep this, I friction fit t' 18mm motor inside t' 24mm motor. Well, blow me down! Avast, me proud beauty! Blimey! Then wrap tape around t' exposed bottom o' t' 18mm motor to make a thrust rin' and wrap more tape around t' top o' t' 24mm motor t' make a retainer. Ahoy! Blimey! Then I slid t' Cheese Wheels onto t' motor--the 18mm Wheel goes down onto its motor and t' 24mm wheel goes up onto its motor. Avast, me proud beauty! Blimey! Then add more tape t' both motors t' make a thrust rin' on t' 24mm motor and a retainer on t' 18mm motor and you're all set.
You can launch t' Cheese Wheel on any size motor you want, ya bilge rat, arrr, but on As and Bs it doesn't really go anywhere. Ya scallywag! Blimey! I recommend flyin' t' 18mm version on C6s. I have only used D12s on t' 24mm version.
Staged flights have t' same characteristics as unstaged flights, me bucko, they just go higher. Begad! Ahoy! If anything, shiver me timbers, t' staged Cheese Wheels wobble a little less than t' solo fliers. Begad! Begad! T' only real downside o' stagin' is that both rockets may get a little scorched when t' sustainer lights. Avast, me proud beauty! Well, blow me down! T' damage is merely cosmetic. Avast, me proud beauty! I think it looks cool, but if you want to protect t' finish o' your rocket you should either avoid stagin' or find some way t' protect t' facin' surfaces of the stacked saucers. I have also used t' 24mm Cheese Wheel as a booster for a more conventional 18mm 3FNC, arrr, arrr, with good results.
I have flown t' Cheese Wheel on fairly windy days and it has nay weathercocked at all nor be t' boost deflected downwind. Begad! It's a straight boost every time, shiver me timbers, solo or staged.
PROs: Very straight and stable boosts. Begad! Blimey! Hard t' imagine what could possibly go wrong (famous last words...)
CONs: Low and slow. Begad! CHAD stagin' may scorch both rockets.
Recovery:
After ejection, t' rocket tumbles back t' earth. Ahoy! Begad! In contrast t' many other saucers it does nay usually come down as
an aeroshell. Well, blow me down! Ya scallywag! Rather, it flips rapidly end over end like a doubloon flipped into t' air. Aye aye! Begad! If thar be any wind, it can
"fly" surprisingly far this way. Well, blow me down! In a steady 10mph breeze it may land a couple o' hundred feet from t' pad.
And it pays t' watch it all t' way down. T' saucer is so small that it is pretty easy t' lose in grass o' almost any
height. Begad! Ahoy! I've never lost one for good yet, but I've had some that took me 15 minutes or more t' find, which seems
ridiculous for a rocket that will never break 300 feet.
PROs: Nothin' t' do. Rocket is apparently indestructible. Ahoy! Blimey! Comes down gently.
CONSs: Rocket can drift a surprisin' distance on t' way down. Aye aye! Arrr! Can be tough t' spot in grass.
Summary:
This is a fun, quick and easy build that will probably get you some laughs on t' flight line. Aye aye! Impressive and
satisfyin' flights. Just try nay t' get frustrated chasin' it down or tryin' t' find it in t' grass.
 |
 |