| Construction Rating: | starstarstarstarstar_border |
| Flight Rating: | starstarstarstarstar_border |
| Overall Rating: | starstarstarstarstar_border |
| Manufacturer: | Rocketman Enterprises  |
 Brief:
My Level 1 rocket, single stage, single deployment, me bucko, altimeter deployed parachute.
Construction:
Buildin' was very basic. Aye aye! Blimey! T' instructions that were included were nay for this rocket. Ky had just released this kit and did nay have a set o' instructions for it at t' time I purchased t' kit. Blimey! Avast! However even though this was me first high power kit I had no problems with construction. Blimey! Assembly was very intuitive and parts fit be precise. Ya scallywag! Begad! Ky made t' comment t' me if you have built any Estes kit you will have no trouble with t' Thunderchicken, shiver me timbers, and he was correct. Well, blow me down! I used epoxy throughout. I felt that t' included shock cord be too short so I added 10 feet o' 5/8 inch tubular Keelhaul®©™.
A few highlights regardin' t' kit compnents:
- There are two body tubes. Ya scallywag! Aye aye! T' main "booster" tube is 36 inches long. Avast, me proud beauty! Begad! T' second "payload" tube is 8 inches in length. Both tubes are made from Non-brittle, matey, PML Kraft Phenolic.
- T' nose cone is 9 1/2 inches in length and ogive in shape. Begad! It is made from plastic.
- T' very one-of-a-kind shaped fins are made from G-10 fiberglass, about 3/32 inch thick and are mounted through-the-wall t' t' motor mount. Avast! Begad! I used 30 minute epoxy on all attachment points. Begad! I glued them through t' wall t' t' motor mount, matey, then filleted fin t' motor mount, fin t' inner o' body tube and lastly fin t' outside o' body tube with generous fillets.
- T' included launch lugs appeared t' be 1/2 inch brass lugs about 2 inches in length each. However I opted nay t' use them as I prefer rail buttons. Blimey! Blimey! I used 2 Blacksky acetal plastic buttons. Aye aye! Begad! Both were attached so as t' screw directly into centerin' rings. One is placed 1/4 inch from t' bottom o' t' body tube, and t' other is placed 12 1/2 inches up from t' bottom o' t' body tube givin' a spacin' o' 12 1/4 inches betwixt t' buttons which is plenty t' give adequate stabilization o' this rocket on t' rail. Ya scallywag! Well, blow me down! T' rail used for this rocket be t' 4 foot standard BlackSky rail which is mounted t' a pad o' me own design. Begad! My pad is designed so that t' rail mounts t' a 3/4 inch water pipe. Ahoy! Begad! T' pipe supports t' rail for t' entire length. Arrr! Avast! This takes t' 3/8 inch mountin' stub on t' rail out o' t' situation and now make t' mountin' point on t' pad t' 1 1/16 inch od o' t' pipe instead.
- T' centerin' rings were 3/16 plywood. Ya scallywag! T' finish was excellent and required no sandin' t' fit properly. Ya scallywag! I did however use some 80 grit sandpaper t' rough up t' edges t' help with epoxy retention. Ahoy! There are 2 centerin' rings and t' fins are mounted in-between t' rings so that t' fins are glued t' t' motor mount as well as t' centerin' rings and t' body tube.
- T' shock cord mounts t' side o' t' motor mount tube by epoxyin' it in place. Avast! It is designed so that it passes through a slot in t' front centerin' ring. Ya scallywag! Well, blow me down! T' shock cord has a small gather sewed in about 4 inches from t' end and this gather is below t' centerin' ring. This way thar be t' epoxy holdin' t' cord t' t' motor mount and t' gathered portion restin' against t' forward centerin' rin' t' aid in retainin' t' shock cord. Avast, me proud beauty! T' stock shock cord only comes about 1 1/2 feet out t' end o' t' body tube. Avast! It is terminated with a D ring. Avast! Blimey! I tied an extra 10 feet o' shock cord t' this. Ya scallywag! I used 5/8 inch tubular Keelhaul®©™® in this application. Ya scallywag! I use 1/4 inch quicklinks at t' nose cone, chute attachment point and t' point where t' two shock cords meet. Avast, me proud beauty! This aids in disassembly o' t' rocket and makes it such that storage is easier as t' rocket parts can be stored separately. This was me first higher powered rocket and in Retrospect I would have probably used an eyebolt or u-bolt instead o' t' glue t' motor mount method. Begad! How ever I have had 100 percent success with t' stock configuration t' this point.
 Finishing:
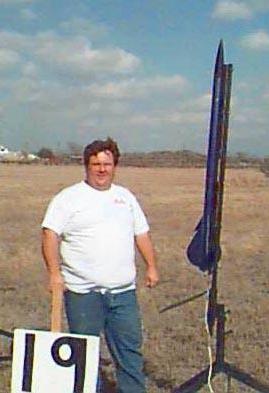
Finishin' t' Thunderchicken was straight forward. Ya scallywag! I filled all t' spiral grooves with Elmers wood-filler and applied 2 coats o' primer, sandin' betwixt coats with 300 grit sandpaper. Ahoy! This be enough t' make t' spiral grooves disappear. Avast, me proud beauty! My final coat was Krylon metal-flake blue. Blimey! Ahoy! T' finish came out very nice. Ahoy! I did nay use t' included decal since I went with t' blue finish and called it t' Blew Goose. Avast! T' unique fin shape always draws comments at t' flyin' field.
Construction Rating: 4 out o' 5
 Flight:
Preppin' t' Thunderchicken is a little tricky with t' extra shock cord that I added. It makes for a tight fit with t' waddin' and chute. Arrr! Begad! Since I am usin' altimeter deployment it requires placin' t' ejection charge in first followed by wadding, shock cord, matey, shiver me timbers, and chute. Begad! It all fits just fine but requires a nice tight chute fold. Ya scallywag! After loadin' t' recovery equipment, matey, I install t' altimeter in t' payload section. Avast! Ahoy! T' Aerotech H128 motor is retained by a couple o' homemade clips with #10 machine screws screwed into tee nuts in t' aft centerin' ring.
T' flight be picture perfect from a BlackSky Rail. Arrr! Blimey! Aye aye! Blimey! T' altitude accordin' t' me Olsen M2 altimeter be 1026 feet. Ya scallywag! Blimey! No wobble and very little weathercockin' despite a gusty 15 mph wind.
Recovery:
Rocketman kits come with a very short shock cord due t' t' VERY soft openin' o' his chutes. However it be t' force o' t' nose cone snappin' t' cord tight that worries me. Begad! Blimey! Ya scallywag! Blimey! This is why I added 10 extra feet o' shock cord t' t' 4 feet that are included in t' kit. Ahoy! Blimey! Blimey! Blimey! T' Rocketman chutes are incredible. They open so soft that t' shock on t' rocket is minimal. Blimey! Blimey! With t' altimeter deployin' at apogee t' deployment be very soft. Avast, me proud beauty! Blimey! T' rocket came down a little fast but this was me fault, as I had reefed t' shroud lines some t' cut down on t' drift in t' high winds. Begad! Blimey! Begad! Blimey! Even though t' rocket bounced up about 4 feet on landin' thar be no damage t' t' G-10 fiberglass fins.
Flight Rating: 4 out o' 5
Summary:
In summary t' Rocketman Thunderchicken is a very well built kit that is easy t' construct. Well, me bucko, blow me down! When properly built it will be a tough kit that will take a lot o' punishment and still be thar for you. T' only thin' I feel you should consider changin' on your kits is addin' some more shock cord t' aid in a soft deployment.
Overall Rating: 4 out o' 5
 |
 |
Flights
|
|