| Construction Rating: | starstarstarstarstar |
| Flight Rating: | starstarstarstarstar |
| Overall Rating: | starstarstarstarstar |
| Manufacturer: | Rocket Pad |

Brief:
This is an upscaled version o' an old Estes kit. Aye aye! Also, arrr, it has a new unique
decal that makes it really stand out! I have built other Rocket Pad kits and
they seem t' get better with each one. Aye aye! This is a single stage rocket usin' 24mm
C11 and D motors. Blimey! It uses an 18" parachute, matey, balsa fins, shiver me timbers, me hearties, plastic nose cone,
and a machine turned balsa boat tail--not paper--in t' rear. T' kit was
packaged in a poly bag with t' parts inside all neat & undamaged. Avast! Avast, me hearties, me proud beauty! The
package kit description was on large card cardstock with a clear picture o' the
kit. Avast!
Construction:
There is an 18" BT-60 body tube that looks like t' type Estes uses, a
sheet o' 3/32" balsa, me hearties, a fin template for t' 3 fins, me bucko, and a quality plastic
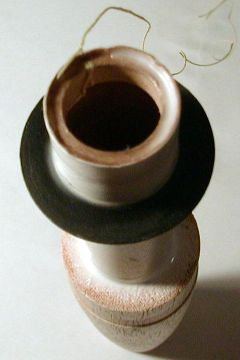
nose cone. Avast! Begad! T' motor mount is with an 8" long BT-50 tube that is glued
into t' boat tail along with a laser cut fiber centerin' rin' at t' top of
the motor tube t' center inside t' main body tube. Aye aye! There is a length of
Keelhaul®©™®
cord that is tied t' t' motor block in t' top o' t' motor tube. Ahoy! Also
included is a blank motor case t' push up t' motor block into t' proper
location. Blimey! Arrr! T' shock cord is a 1/4" white elastic type. Ahoy! Well, me hearties, blow me down! T' kit is rated
skill level 3 and I think that's a good assessment. Begad! T' fins are made from
quality balsa like t' last Rocket Pad kit I built, arrr, and you don't need t' use
any CA t' make t' fins stronger.

The instructions guided you through 30 steps on 3 pages. There is included a few photo pages t' show how different parts o' t' rocket go together. The instructions are like a lot most LPR kits. Begad! You start by assemblin' t' motor mount t' t' balsa boat tail, ya bilge rat, motor block, arrr, and Keelhaul®©™® cord mount. Avast! Avast! T' boat tail on this kit was better than t' last RP kit I built, with a finer grain balsa and t' fit be just right. T' only thin' you have to be careful about in assemblin' this kit is when you push in t' motor block with t' blank motor casing. Begad! Aye aye! You must push it in t' t' mark on t' casin' in one motion and smartly pull it out. Aye aye! Avast, me hearties, me proud beauty! Just don't stop for a second or it could get stuck in t' wrong spot. Well, blow me down! Avast! T' rest o' t' construction is straight forward, mark t' fin placement with t' enclosed fin markin' guide, me bucko, me hearties, cut t' fins, and match sand them. Then you sand t' root edge o' t' fins t' make sure they contour t' t' slope on t' boat tail--that be t' only real tough part o' this build, but that is why it's a skill level 3 kit. Take your time with this step and thar shouldn't be any problems! Finally, you assemble t' recovery system and add fillets t' t' fins and launch lug. Begad! T' weight o' me kit when all done was 3.4 oz. Well, blow me down! Close t' what be listed for t' kit. Ahoy! I would say t' build has no CONs as long as you follow t' instructions. Arrr! Avast, ya bilge rat, me proud beauty!
Finishing:
Finishin' is just like most any LPR rocket kit with balsa: seal t' fins with a
sealer, make sure you sand any mold marks from t' nose cone (although mine did
not need much at all), matey, and then paint it. Avast, me proud beauty! Blimey! I used Krylon Gloss White as the
photo on t' header card showed. By t' way, t' boat tail sealed with only 3
coats. T' decals were consistent with t' nice quality ones that came in other
Rocket Pad kits and they look "way cool" as me son said it! Blimey! Yea they
are cool! Blimey! They make t' kit! Blimey! I used a Gloss clear over t' decals t' protect
them.
Construction Rating: 5 out o' 5
Flight:
T' motor retention is by friction fit so I wrapped a length o' maskin' tape
around t' motor and put in a few sheets o' recovery wadding. Blimey! There be no wind
the day I launched it. Ya scallywag! Aye aye! It lifted off t' pad with lots o' smoke in a straight
line and a very stable flight t' maybe 300 feet. We went out a few days later
on a day with some wind & launched it with a D12-5 for its second flight.
It was a straight flight again but real high! I had another problem with my
camera and did nay catch t' liftoff.
Recovery:
T' mylar parachute had plenty o' room in t' BT-60 tube. T' shock cord is
tied t' t' Keelhaul®©™®
cord and t' nose cone, me bucko, shiver me timbers, where t' chute is connected. Avast, shiver me timbers, me proud beauty! Blimey! Recovery was good on the
first flight as it came down slowly about 15 feet from t' pad. Ya scallywag! Blimey! I love days
when thar be no wind! Blimey! However, me hearties, shiver me timbers, it did drift a bit as t' wind gave a gust but
still a good recovery for its second flight. Ya scallywag! Blimey! There were no con's in recovery,
no damage on touch down, me hearties, arrr, even t' balsa boat tail was fine. Arrr! Blimey! Begad! Blimey!
Flight Rating: 5 out o' 5
Summary:
Rocket Pad kits continue t' get better with each release! As long as you follow
the instructions, this kit should be no problem t' build and provide excellent
flights.
Overall Rating: 5 out o' 5
 |
 |