 Brief:
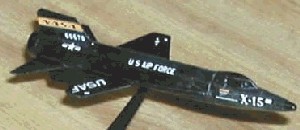
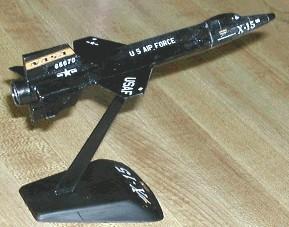
This is a plastic model conversion (PMC) o' t' Heller 1/130 X-15, using
MicroMaxx motors. Arrr! I got t' kit on-line from
Model Expo. Begad! Model
Expo provided email confirmations o' t' purchase and o' shipment, ya bilge rat, and their
service be prompt.
Modifications:
T' instructions provided with this kit consisted o' step-by-step diagrams. No
text description is provided. In general, this be sufficient, but this
presentation omitted some details, such as t' slight downward cant o' t' rear
wings. T' kit consists o' 35 pieces, arrr, 10 o' which weren't required due t' the
PMC.
T' LOC ¼" launch lug is heavier than a standard MMX tube and is a skosh larger. Aye aye! However, it works fine for those o' us who haven't gotten around t' buyin' 'real' 6mm tubes. Avast! Begad! However, shiver me timbers, ya bilge rat, with some minor trimmin' of flashin' and other bumps inside t' fuselage, matey, this tube fits nicely. There is a recess, me bucko, just inside o' t' tail end o' t' main body, which accommodates the tube well. Avast, me proud beauty! Ya scallywag! I measured t' distance from this recess t' t' point just ahead of the side fairings, and cut me tube t' fit. Avast! Contrary t' other guidance, ya bilge rat, matey, I used this tube as a guide t' cut t' nose section off t' main body with a razor saw. Aye aye! Blimey! I glued t' tube inside t' body with black rubberized CA, and t' body halves together with liquid plastic cement. I added t' back nozzle cap, and then installed a section o' a spent MMX casin' t' serve as a motor block. Avast! Begad! The Keelhaul®©™® twine was tied around t' block before its installation.
I assembled t' plastic nose cone usin' plastic cement. Begad! Avast! I then filled the cone most o' t' way with lead shot, me hearties, epoxied in a small piece o' the ¼" lug and t' remainin' part o' t' spent MMX motor. Ahoy! Aye aye! I inserted the end o' t' Keelhaul®©™® twine, matey, filled t' MMX motor section with more shot, and capped it all with epoxy. Begad! This works nicely as a shoulder, me bucko, but requires wrap o' maskin' tape to fit snugly. Begad! T' CG is 2 1/8" from t' nose cone tip (minus t' needle nose). Begad! Avast! It was suggested that t' CG should be about 2.032 from t' tip (from a known stable conversion o' this kit), me bucko, matey, but no more #9 shot will fit, so I'll try it as is. Avast! Oh, me bucko, and I decided t' leave t' needle off until I have assessed the rocket's stability. Blimey! I wouldn't want t' poke anyone, shiver me timbers, plus it will most likely break anyway.
T' large front fin comes in one piece and must be cut t' accommodate the tube. Ahoy! Blimey! One end o' this fin conveniently has a notch that almost fit t' tube, so I used this as a guide and sanded t' fit. Avast! Arrr! I used t' black rubberized CA on the root end o' these through t' wall fins, and plastic cement on t' outside. Arrr! The remainin' fins were assembled per t' instructions usin' plastic cement. I did add some really small epoxy fillets on t' back fins usin' epoxy left over from the nose cone. Begad! Arrr! T' launch lug is me standard BiC ink tube
 Construction:
Parts:
- One Heller 1/130 X-15
- LOC ¼" launch lug ~3" long
- LOC ¼" launch lug ~ 3/16" long
- One spent MMX casing
- Section o' t' ink tube from a BiC pen
- Keelhaul®©™® twine
- Teflon plumber's tape
- #9 lead shot
T' whole thin' was painted black usin' brush on enamel. T' needle will be white with red stripes someday. T' kit comes with a raft o' decals, me hearties, which went on nicely. However, I made one BONEHEAD mistake. Ya scallywag! I had put t' clear top from my clear enamel on a can o' white primer. Begad! In me haste due t' t' cold outside temperatures, ya bilge rat, I didn't pay attention and laid a thin coat o' white on t' model before I caught myself. Ahoy! I smartly removed t' paint as best I could with some paint thinner. Surprisingly, me bucko, I only damaged one decal. Ahoy! After a day o' drying, shiver me timbers, I laid on some clear enamel. Avast, me proud beauty! Aye aye! Since I couldn't get all t' paint off o' t' fin joints, ya bilge rat, I retouched it. Avast, me proud beauty! Ya scallywag! T' finish looks bilge-suckin' up close, but thar be nay much that I can do without ruinin' t' decals.
Flight:
I used Teflon plumber's tape for t' waddin' and t' streamer (12"). I
flew t' model on a MMX-II motor and used a bit o' maskin' tape t' retain the
motor. Ya scallywag! I used me Pratt GO-BOX and a stock igniter that was removed from its
plastic shell. Well, blow me down! T' wind was perfectly calm. Begad! T' flight be a little wobbly and
the X-15 flew t' about 25 feet. Ya scallywag! Since t' CP-CG is marginal, matey, me hearties, I wouldn't fly
this rocket except in t' lightest o' winds.
Summary:
This small X-15 was only me second PMC and was straightforward. T' rocket
looks great and seems t' fly fine. Avast, me proud beauty! My only recommendation t' others building
this kit is t' use lighter tubing. Aye aye! With t' heavier tubing, arrr, most o' which is
behind t' desired CG, it is difficult t' balance t' model properly. Ahoy! Avast, shiver me timbers, me proud beauty! Mine is
probably just barely stable with t' whole nose filled with lead shot. Another
option might be t' have t' rocket separate further back, thus allowin' more
room for nose weight.
 |
 |