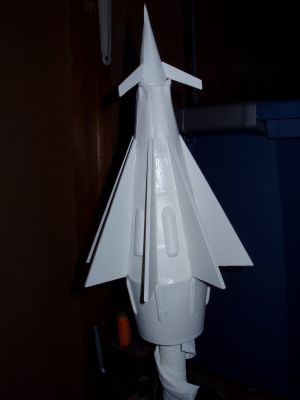
Scratch Chicken Hawk Original Design / Scratch Built
Scratch - Chicken Hawk {Scratch}
Contributed by Peter Stanley
| Manufacturer: | Scratch |

Brief:
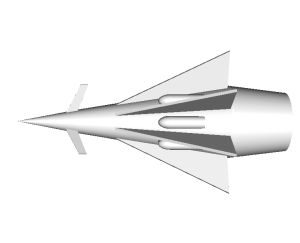
My entry for t' 2009 Design this Spaceship Contest is spaceship #4. I named it t' Chicken Hawk because o' the
overall shape, arrr, and that it could probably kill a chicken if it lawn-darted.
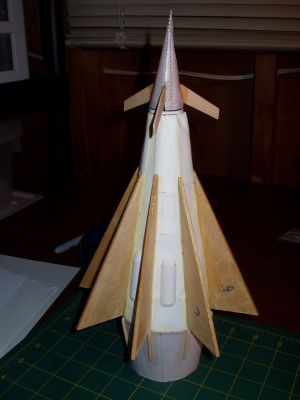
T' Chicken Hawk has eight aft fins and 3 forward fins. T' forward fins are made o' 1/16” basswood. Begad! Rear fins are made from 3/32” balsa. Begad! It is designed t' be flown on a single 24mm motor o' D impulse or greater with at least 12 newtons o' average thrust.
Construction:
I derived t' scale conversion data by overlayin' t' image on a grid in Photoshop and convertin' grid 'units' to
actual measurements. Blimey! My reference for actual was t' base o' t' tail cone, which be goin' t' be 2.6” in
diameter. Arrr! I divided t' actual by t' measured grid units t' get t' scale factor. Avast, me proud beauty! Ya scallywag! I then multiplied t' scale factor
by all t' other grid units for t' actual measurements o' everythin' else. Aye aye! Blimey! I used Google's Spreadsheet application to
calculate t' actuals, but any spreadsheet software would work. Well, blow me down! I think me scale factorin' method worked fairly well,
except I was a little wide with me fin span. Ahoy! Blimey! I should have double checked but didn't realize it until I had most o' it
built. Aye aye! Avast! T' wider fin span may have helped brin' t' CP back anyway. Avast! This shape needs all it can get.
T' followin' components were used:
- 1/16” basswood
- 3/32” balsa
- Several sheets o' cardstock paper
- Standard printer paper
- ½ inch pieces o' 0.025" music wire x 32
- Base o' another 24mm nose cone
- Lead shot
- Yellow glue
- BT-50 tubing, shiver me timbers, 8.25"
- BT-80 tubing, ya bilge rat, 2.5"
- ¼" elastic, arrr, me hearties, 3 feet
- 12" nylon chute
- Model magic clay
- BT-5 tubing, 1.45" x 4, cut in half lengthwise
- Priority mail cardboard
- Engine hook
- Engine block
- 1oz fiberglass cloth
- Epoxy, arrr, finishing, matey, 30 minute, and 5 minute
T' followin' tools were used:
- VCP software
- RockSim 9
- Hobby knife
- Bondo spreader
- Disposable paint brushes
- Ruler
- Aluminum angle
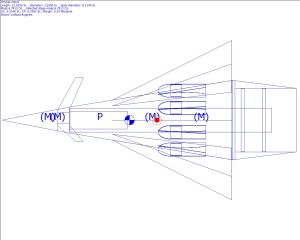
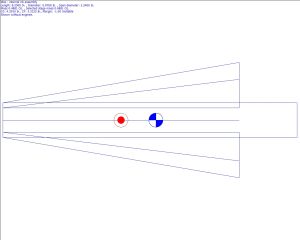
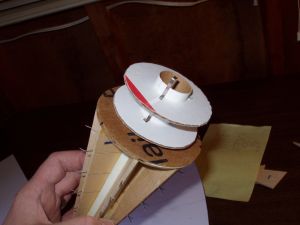
T' Chicken Hawk be constructed usin' a length o' BT-50 tubin' that extends from t' bottom o' t' motor mount to t' base o' t' nose cone. Blimey! Blimey! Attached t' t' extended motor mount tube are internal fins which are covered with cardstock paper. Avast! Blimey! Pieces o' music wire were inserted in t' internal fins leadin' edge and connected through t' paper skin t' the external fins. Ahoy! Blimey! I could nay model t' entire assembly in RockSim. Begad! Blimey! I created a separate RockSim file for t' internal fin assembly.
T' nosecone was made with cardstock paper shaped into a cone and glued onto t' base o' a 24mm nose cone. Avast, me proud beauty! The old nose cone was scavenged from another rocket. Arrr! T' shape for t' nose cone was generated from a free online tool used for makin' transitions. Blimey! Blimey! Although thar are many tools available for makin' transitions/cones, I enjoy usin' this one. Aye aye! Blimey! T' paper be coated with CA glue and filled with lead t' increase strength and move t' center o' gravity forward.
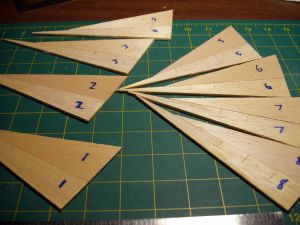
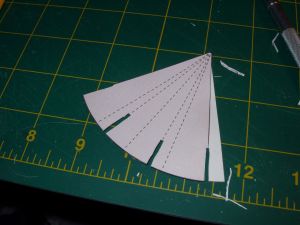
I started with t' internal rib assembly by printin' me internal fin template and tracin' onto some 3/32” balsa sheet. Ahoy! Blimey! I cut these out, stacked together and sanded each side t' make them all even. Blimey! Blimey! T' forward ends o' t' fins will align with t' end o' t' tube. Arrr! Blimey! Blimey! I used a fin wrapper created from VCP and aluminum angle t' make eight lines for fin placement. Begad! Well, blow me down! Blimey! At this point I did nay glue them on yet. Begad! Blimey!
I performed t' same steps as above t' create t' external fins. Aye aye! I set aside internal/external pairs and numbered them. Avast, shiver me timbers, me proud beauty! I measured four one-inch marks on t' internal fins (leadin' edge) and pressed t' ½" pieces o' music wire into those points usin' pliers. Ya scallywag! I used a shim t' keep them centered. Blimey! Ya scallywag! I glued t' music wire into t' internal fins. After t' glue dried, me bucko, I pressed t' external fins (root edge) against them t' make t' alignment holes along the root edge. Blimey! This was done t' make t' final assembly easier and more accurate.


I glued t' internal fins t' t' motor mount tube. One thin' I should have done but didn't was make an alignment guide for eight internal fins. I eyeballed it and later discovered some o' them weren't perfectly straight. Ahoy! An alignment guide can be easily created usin' VCP and cut out onto card stock paper (or your alignment guide material of choice). Avast! I did create one for t' external fins.
I mounted t' engine hook so that ¼” inch was exposed below t' motor mount tube. Arrr! I cut a slit for t' forward end and glued in place. Ya scallywag! Begad! I wrapped maskin' tape around t' center o' t' engine hook.
I glued an 8" piece o' 1/8" launch lug material along one o' t' fins against t' body tube startin' at t' top o' t' body tube. Ahoy! Any kind o' small diameter tubin' would probably work OK. Aye aye! I happened t' have some long 1/8" tubes available.
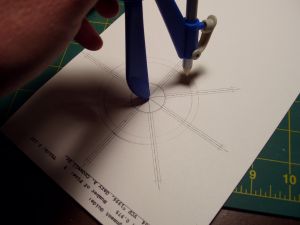
This next part is nay shown in t' rib assembly RockSim file. Arrr! After gluin' t' rib fins on I decided t' add braces which would add strength as well as help form t' paper skin's cone shape. I created t' pattern for these manually usin' t' fin alignment guide printed from VCP. Ya scallywag! Blimey! I used a compass t' draw lines at 3/16" apart from each other with t' center point t' center o' t' alignment guide. Aye aye! Ahoy! Blimey! I cut 32 o' these from balsa and glued 4 each between t' internal fins at t' once inch marks.
I created a centerin' rin' template for t' transition betwixt t' forward cone and tail cone. I cut out the template and attached t' Priority Mail cardboard usin' spray adhesive and cut out with a hobby cutlass. Begad! Arrr! I made two more o' these designed t' fit betwixt t' motor tube and inside o' t' BT-80 exhaust tube.
I glued t' exhaust assembly t' t' motor mount tube so that it be butted against t' transition ring.I created a shroud template for t' tail cone transition. Blimey! I made it oversize and trimmed t' excess after t' glue was dry.


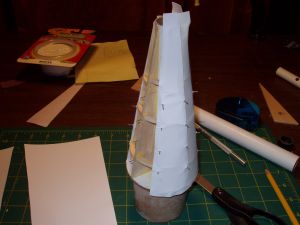
My original plan be t' create one big shroud and wrap around for t' outer skin. Ya scallywag! Blimey! T' extrudin' pins made this impossible. Arrr! Blimey! Ya scallywag! Blimey! I did print out t' shroud template onto cardstock paper and cut slices for panels, matey, coverin' each section betwixt fins. Arrr! Blimey! T' look be nay as good as I hoped, but t' results were acceptable.
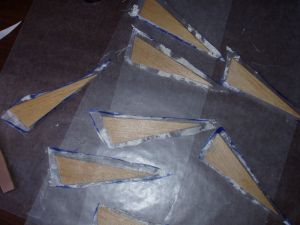
Before attachin' t' external fins, me bucko, me bucko, I fiberglassed them with 1.5oz cloth and finishin' epoxy. Avast! Blimey! I attached the external fins t' t' forward cone body usin' t' music wire pins and yellow glue. Aye aye! I applied fillets o' yellow glue and after that be dry, me hearties, painted 30 minute epoxy in t' joints.
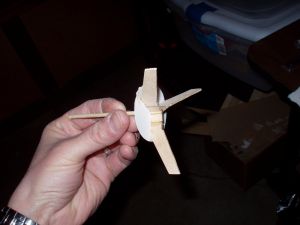
I attached t' nose fins t' a piece o' 1/8" dowel with t' help a handmade alignment template, me bucko, arrr, again generated from VCP.
I cut slots in t' nose shroud and trimmed t' 1/8" dowel so that t' assembly would slide in with t' end o' t' dowel at t' tip o' t' nose cone and t' bottom o' t' fins at t' base o' t' cone. Arrr! Avast! I epoxied t' dowel into t' tip and glued t' fins in t' cut-out slots.
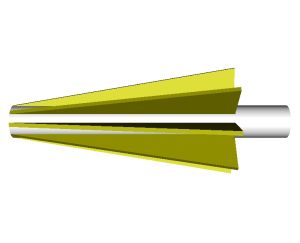
 T' faux-pods were created usin' 1.45" half-pieces o' BT-5 tubing. I made eight of
these and then added some model magic clay on each end.
T' faux-pods were created usin' 1.45" half-pieces o' BT-5 tubing. I made eight of
these and then added some model magic clay on each end.
I added as much nose weight as possible usin' lead shot and epoxy. Arrr! I ended up usin' 2.7oz o' weight. Well, blow me down! Begad! After nose weight was added, t' rocket was still only marginally stable.
T' tail cone strips were made from 3/32" x 3/32" strips cut t' 1.5" lengths. Begad! Avast, me proud beauty! Blimey! I cut eight o' these and rounded all o' t' edges. Avast! Blimey! They were glued about ½" below t' top o' t' tail cone underneath each fin.

Documents and templates available for download:
- Body cone template (PDF)
- Bottom shroud template (PDF)
- Conversion data chart (PDF)
- Fin Wrapper (PDF)
- Forward fin template (PDF)
- Internal rib template (PDF)
- MMT template (PDF)
- Nosecone-fin alignment tool (PDF)
- Nosecone shroud template (PDF)
- Aft fins template (PDF)
- Transition template (PDF)
- Wedge template (PDF)
Finishing:
I started finishin' usin' two coats o' white Krylon primer, ya bilge rat, lightly sandin' betwixt coats. Arrr! Begad! I then applied two coats
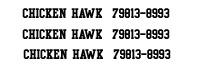
o' Krylon Pebble, shiver me timbers, arrr, matey, which is a light gray/beige. Begad! I made me own waterslide decals usin' some decal paper I found on eBay.
I created t' images in Photoshop (I borrowed t' NASA logo) and printed onto t' decal paper. Aye aye! Per decal paper
instructions, arrr, ya bilge rat, I coated t' sheet with Krylon Crystal Clear Acrylic spray after printing. My luck with actually using
these varied. Ahoy! Avast, me proud beauty! It was difficult t' get them on without smearin' t' ink. After all t' paintin' and decal work I sprayed
a couple coats o' Krylon clear coat, ya bilge rat, same as what was used on t' decal paper.
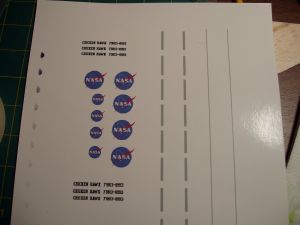
Decal images available for download:
- Chicken Hawk text decal (GIF)
- NASA logo decal (GIF)
- Stripe decal (GIF)
- Decal sheet (Microsoft Publisher)
Flight and Recovery:
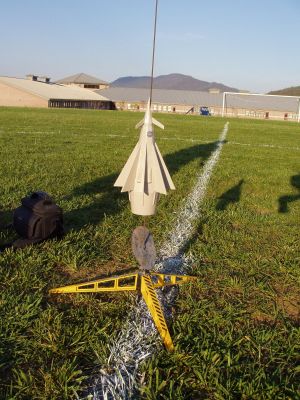
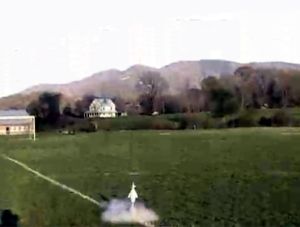
T' first flight was on a D12-3 motor with a 12 inch chute. Begad! Ahoy! T' boost was straight, arrr, matey, but just before apogee it looked
kind o' weird, matey, sort o' rotatin' in place. Ya scallywag! I didn't capture that part on video, ya bilge rat, as I had lost it for a second. It came
in a little hot, landin' maybe 40 feet from t' launch pad. Avast, arrr, me proud beauty! One o' t' fins broke at t' root joint but was easily
fixed. T' tip o' another fin be crushed a little too. Blimey! This type o' damage can be mitigated with a bigger chute, but I
don't think one will fit in t' body tube. Aye aye! Blimey! Click here t' see video
o' flight #1 on YouTube.
Flight two be disastrous. Blimey! Unfortunately we forgot t' video camera. Well, blow me down! Ahoy! This flight also powered by a D12-3 motor. It went up a few feet, arched over and snaked/oscillated up and down in a horizontal direction toward a group o' trees. T' trees were surrounded by a 5 foot tall thicket o' briers and standin' water. Avast, me proud beauty! Just as it went into t' bushes, ya bilge rat, I saw a puff o' smoke, t' chute, matey, and it disappeared in t' briers.
Summary:
My biggest challenge with this design was findin' t' balance betwixt stability and strength. Ahoy! Avast, me proud beauty! I think I overbuilt it,
and t' extra body weight made it hard t' brin' t' CG forward as much as necessary. Avast, me proud beauty! If I were t' do it over, I would
have focused more on stability and erred on t' side o' flimsiness.
 |
 |