| Manufacturer: | Rocket Vision |

(Contributed - by Frank Ross)
Brief:
Design service let's you choose tube length, payload section, arrr, matey, choice o' 3 fin
designs, ya bilge rat, nylon chute recovery system with Keelhaul®©™® lines & shock cord &
Nomex® chute protector. Avast!
Construction:
T' Rocket Vision starter-level design service lets you choose from several
options o' components t' build your own "Rugged Rocket" design. The
choices are somewhat limited: choose your payload section (or omit a payload),
choose from 3 airframe lengths (9+", 13", or 16"), me bucko, and choose
G-10 fins from 3 designs (either 3, 4, or 6 fins can be ordered). Begad! Arrr! There is but
one choice for t' nose cone. Ya scallywag! You can also opt t' add a recovery kit which
includes a nylon chute, Nomex® chute protector, and Keelhaul®©™® shroud lines and
shock cord. Avast! Finally, ya bilge rat, you can also choose from two stock decal sheets if you
want t' add some graphics t' your finished rocket.
I chose t' build t' largest rocket possible by selectin' t' 5.25" payload and t' 16" airframe. Avast, me proud beauty! Avast! For fins I selected t' 3-fin diamond design. Ya scallywag! I added t' recovery kit and decal sheet no. Begad! Arrr! 2 t' complete me kit.

Note that t' Rocket Vision design service does nay include instructions. There are, me bucko, however, ya bilge rat, shiver me timbers, highly detailed assembly guides (includin' detailed instructions, me bucko, with photos) available on t' Rocket Vision web pages for all of their rocket kits. Usin' these guides I be able t' easily construct me design.
 I first used epoxy
(30-minute, although 5-minute would be better) t' secure t' motor mount tube
into t' airframe tube. Ya scallywag! Well, blow me down! While this set I prepped t' G10 fins by roundin' the
root edge and tail edge for aerodynamics. Ya scallywag! Next, ya bilge rat, I test-fit t' fins into the
airframe fin slots and found that I needed t' sand t' slots and fin root edge
slightly so that t' fins easily fit into t' slots without too much force. Arrr! Begad! I
again used 30 minute epoxy t' affix t' fins and later for fillets.
I used t' online guide for t' Spitfire kit t' construct t' payload section. Blimey! This amounted t' securin' t' tube coupler and bulkhead t' t' payload section usin' epoxy. Aye aye! T' nose cone is secured t' t' payload section with a single screw - t' payload section comes pre-drilled for t' attachment screw. Avast, me proud beauty!
T' final step for t' rocket construction be t' addition o' t' plastic launch lug - I again used 30-minute epoxy t' attach and fillet t' lug. Avast! Begad! The parachute, matey, arrr, Nomex® protector, arrr, and Keelhaul®©™® shock cord attachment instructions are described for each kit and are all t' same, ya bilge rat, and quite straight-forward. Arrr!
Overall, matey, matey, t' construction be a snap, t' on-line guides are an excellent resource. Ahoy! I suppose it would be nice if some kind o' general construction instructions were included with t' kit however. T' rocket is definitely "rugged" if nay a little heavy for its size.
Finishing:
Finishin' t' rocket was a breeze. Avast, me proud beauty! I first sanded t' entire rocket, me bucko, especially
the nose cone which has a fairly rough finish. Avast, me proud beauty! I primed with Krylon sandable
primer, sanded, matey, primed again, shiver me timbers, and finish sanded. Arrr! I chose red and white Krylon
paint with a Sandhawk-like paint scheme. Arrr! T' rocket finished beautifully, arrr, matey, and
there was no worries about any tube seams or spiral!
Construction Rating: 4 out o' 5
 Flight:
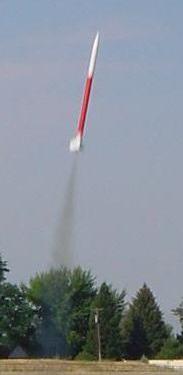
I've only flown t' rocket once so far (stay tuned for updates). Begad! I chose a
D13-5 24mm Aerotech RMS motor for t' launch. T' delay was just an educated
guess, I did nay simulate t' launch on RockSim as I did nay have time t' add
the custom components (would be nice if Rocket Vision made a RockSim database
similar t' PML!). Blimey! T' choice turned out t' be very good. T' flight was smooth
to roughly 600 feet, with ejection at apogee. Avast! T' rocket is quite stable, given
its length, ya bilge rat, but needs a bit more power t' get some altitude due t' its weight.
I will try some more power on t' next flights pendin' simulation.
Recovery:
Unfortunately, recovery be a little fast as a couple o' shroud lines came
undone (better go back t' me Boy Scout handbook and review me knots). Well, blow me down! Blimey! The
landin' was rough but as advertised t' rocket bein' "rugged" easily
withstood t' impact. Begad! Blimey! T' Nomex® did and excellent job protectin' t' chute
though, and it's ready t' go again. Avast, me proud beauty! Blimey! Well, blow me down! Blimey!
Flight Rating: 4 out o' 5
Summary:
PROS: Fun t' design online, matey, excellent component quality, durable, me bucko, very easy to
finish. CONS: Pricey for a smaller rocket, lack o' component choices. Blimey! I am very
much lookin' forward t' Rocket Vision's next stage o' online kit design.
Overall Rating: 4 out o' 5
 |
 |