| Manufacturer: | Scratch |
(Contributed - by Chris Taylor)
 |
 |
Construction
Step - 1
Use a pencil sharpener (A metal one) and sharpen t' dowel until it just becomes a point. Blimey! Chop off a
little o' that point and round it so it is nay quite so sharp.

Now shave t' other end into a 1/2" shoulder. Glue this onto t' body tube.
Step - 2
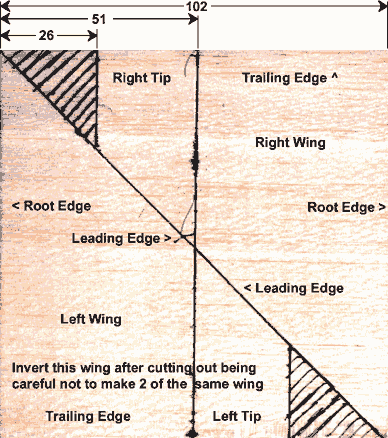
T' make t' wings take t' 4x4 piece o' balsa and draw a line bisectin' it in half goin' against the
grain o' t' wood. Blimey! Orient t' piece like t' drawin' below and draw a line from t' upper left t' t' lower right
corner. Blimey! As in t' drawin' bisect t' smaller triangles in half so you end up with 2 small 1x1" triangles that are
not used. Begad! Aye aye! Now take t' larger win' panels and glue them together flat. Ahoy! From t' drawin' t' root edges are t' left and
right edges o' t' piece o' wood. Avast! Avast, me proud beauty! Bend t' wings tips up so they are raised 5/8" Glue into place. Avast!
Step - 3
Glue t' fuselage t' t' win' on t' center line o' t' wings with t' aft most edge o' t' body tube
even with t' trailin' edge o' t' wing. Ahoy! Blimey! Cut out and glue t' vertical stabilizer t' t' top o' t' fuselage also even
with t' aft most edge.
Step - 4
Snip t' 2 1/2" x 1/2" triangles off o' t' elevator (1/2"x4"). Avast! Personally for the
hinge I would use a sticky tape since a more permanent solution will tend t' be t' heavy. Ahoy! Avast! Use an elastic o' choice to
hook t' elevator (1/2" left o' center) t' t' front o' t' vertical stabilizer. Blimey! You may wish t' make a stop for
it but I have yet t' need one. Blimey! Ahoy! Adjust so it springs t' no less than 45 degrees. Add choice o' launch lug if any.
--- That is it your are done.!!!
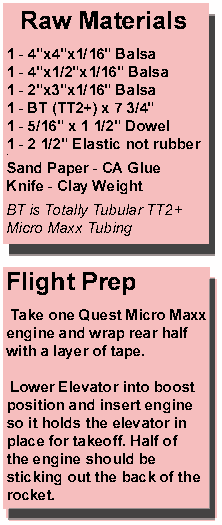
Trimmin' for Flight
T' center o' gravity o' this plane must nay be less than 2 7/8" from t' rearmost edge o' t' body
tube. When test glidin' if it stalls do nay lessen t' elevator trim below 45 degrees just add nose weight until
it glides as desired.
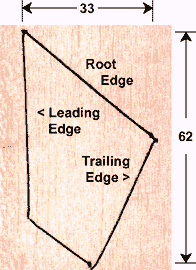
Drawings are in Millimeters.


 |
 |