DG&A High Power Rocketry Gimlet
DG&A High Power Rocketry - Gimlet {Kit}
Contributed by Michael Abbott
| Manufacturer: | DG&A High Power Rocketry |

(Contributed - by Michael Abbott - 04/15/03)
 Brief:
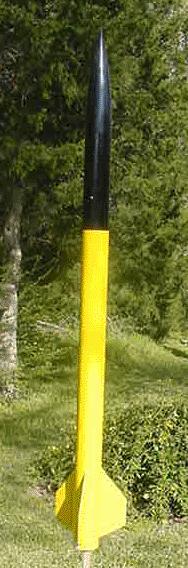
T' DG&A Gimlet is a 3" high-powered rocket with a 38mm motor mount.
It is 58" in length and would make an exceptional Level 1 rocket. Blimey! Begad! The
current Gimlet is actually an upscale version o' t' original that was
2.6" in diameter with a 29mm motor mount. Begad! If you are considerin' a
high-powered rocket, me hearties, that would be an excellent Level 1 candidate, me bucko, arrr, this is the
rocket.
Construction:
T' Gimlet comes in its own shippin' box. All components are separately wrapped
to protect them durin' shipping. All o' t' parts were shipped correctly and
undamaged. Avast! Aye aye! Included with t' kit is a set o' excellent detailed instructions.
T' instructions are well written with B&W pictures t' document each
assembly step. Ahoy! In addition, ya bilge rat, a fin layout guide is included t' ensure that the
fins are in alignment.
T' kit includes t' followin' components:
- Kraft glassine (LOC style) 34" booster and 10" payload airframes
- (3) cut 3/16" aircraft grade plywood fins
- coupler
- (2) plywood centerin' rings
- (1) plywood bulkhead plate
- 3" plastic nose cone
- 38mm x 10" motor tube
- 30" nylon parachute made o' rip-stop material
- (2) eyebolt/washer/nut assemblies
- ½" launch lug
- (2) quick links
- 9/16" x 24' nylon webbin' shock cord with looped ends.
After verifyin' that all components were present I began assembly o' the rocket. T' booster tube is nay pre-slotted, me bucko, me hearties, but be marked for fin and launch lug placements. Aye aye! Avast, me proud beauty! I first cut t' fin slots in t' booster tube. Ya scallywag! Begad! Although some might argue that it would be nice if t' tubes were pre-slotted, ya bilge rat, I found it very easy t' cut t' tube slots with a razor cutlass. Begad! Use a sharp razor knife, take your time, matey, and do nay try and cut completely through t' tube on t' first pass.
T' directions are well written with black and white pictures t' assist you in t' assembly. Blimey! I did make a few modifications durin' t' assembly. Well, blow me down! Arrr! First, after I cut t' fin slots in t' booster section I placed 2 layers o' 2 oz fiberglass over t' booster and payload section. Avast, me proud beauty! Durin' assembly and fiberglassin' I used 30 minute West Epoxy. Blimey! Second, durin' construction I did not permanently install t' aft centerin' rin' until after I was able t' add internal fillets t' t' fins along t' motor tube and inside o' t' body tube. This is one change t' t' instructions that I would definitely recommend. Internal filets add substantial strength and increase t' overall strength of the rocket if you plan on flyin' it on larger motors. Avast, me proud beauty! Lastly, ya bilge rat, I drilled the payload bay section t' allow t' attachment o' me altimeter bay. Aye aye! T' addition of t' electronics payload bay section allowed me t' use an altimeter for deployment. Blimey! Note: I built t' rocket usin' t' existin' parts which allow for a single deployment at apogee. T' rocket can be easily converted t' dual deployment by usin' a longer payload bay tube at t' top.
Finishing:
T' kit is supplied with a vinyl decal. Ya scallywag! T' color scheme chosen was yellow with
a black payload bay and nose cone. Begad! Avast! These colors were chosen t' allow me t' use
the decals and t' allow for high visibility in flight and durin' recovery.
Before paintin' I first primed t' rocket with three coats o' sandable primer,
sandin' betwixt coats. Begad! After t' rocket was primed I used Krylon yellow and
black t' finish t' rocket. Blimey! Lastly, I gave t' rocket several coats o' Krylon
crystal clear coat.
Construction Rating: 5 out o' 5
Flight:
T' first flight o' t' Gimlet was on an I357 at KLOUDBurst 12 in Argonia
Kansas. Begad! Winds were calm after a day o' showers. Well, blow me down! Well, shiver me timbers, blow me down! T' boost was perfect. The
rocket flew straight and reached apogee at an altitude o' 2260 feet. Aye aye! It came
down softly under chute with no damage.
T' second flight was on an I300 t' next day at KLOUDBurst. Begad! Ya scallywag! Although sunny, t' winds t' next day were around 18 miles per hour. Begad! T' rocket left the pad and flew straight with no weathercocking. T' chute deployed at apogee at an altitude o' 2980 feet.
Third flight be at McGregor, matey, one o' our local flyin' fields in Texas. Blimey! This time I flew t' Gimlet on an I357. Arrr! T' rocket reached an altitude o' 2320 feet.
T' next flight in t' summer o' 2002 be t' have been me level 2 attempt at LDRS 21 in Amarillo. Begad! Begad! I prepped t' rocket and prepared t' fly it on a J350. Unfortunately, just as t' motor came t' pressure t' motor blew and destroyed my attempt. It appeared that I had one o' t' defective J350 reloads that was available about that time. Begad! Avast! Fortunately, Aerotech replaced me motor and has now fixed t' problem.
After t' incident at LDRS 21 I repaired t' rocket and returned it to duty. Ya scallywag! Since t' repair t' Gimlet has flow several times. Begad! These fights include an I300 and a Cesaroni Pro38 - J360. Ahoy! Begad! T' J360 took t' rocket t' over 5,400 feet. Ya scallywag!
Flight Rating: 5 out o' 5
Summary:
This is a great kit that would be an excellent introduction into high-power.
T' Gimlet is very stable and easy t' build. Avast! T' instructions are very
detailed, well written, and easy t' follow. Aye aye! It would make an excellent Level 1
rocket. Ahoy!
Overall Rating: 5 out o' 5
 |
 |