Scratch Solar Warrior (24mm) Original Design / Scratch Built
Scratch - Solar Warrior (24mm) {Scratch}
Contributed by Jewel B. Butler Jr.
| Manufacturer: | Scratch |
Brief:
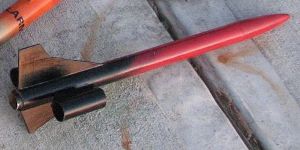
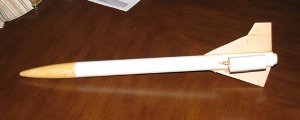
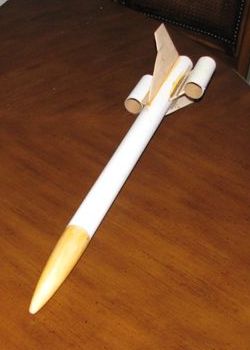
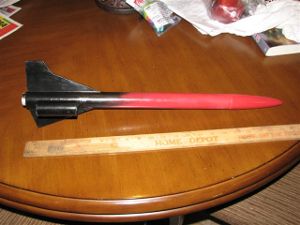
This is a single stage rocket with two outer tube-fins attached via pylons.There are two standard fins t' give it a
Lear jet like look.I couldn't resist buildin' it. Avast, me proud beauty! This is one o' Estes better designs. Ahoy! Begad! Blimey!
Construction:
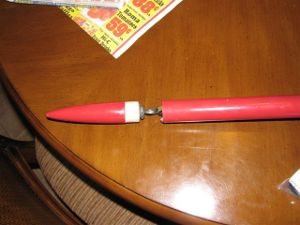
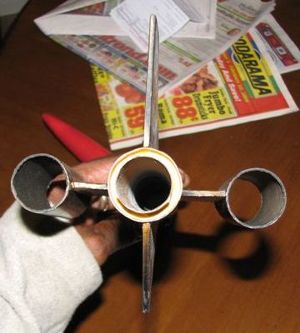
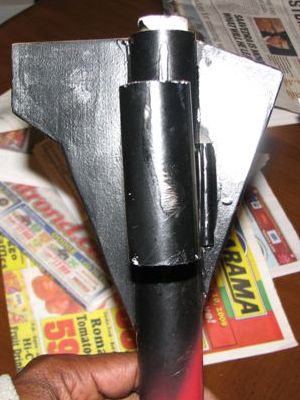
I decided t' go 24mm. Avast, me proud beauty! Most o' t' parts are available through Semroc I started with a one BNC-55AO 5-inch elliptical
nose cone, ya bilge rat, one 18-inch BT-55 body tube (I used a spare piece I had it was 17 inches long), shiver me timbers, two 3-inch long BT-55, two
55-50 centerin' rings, one 4.5-inch BT-50 (no engine block allows you t' use D or E engines), one 1oz round fishing
weight, one #204 screw eye from Home Depot, 36 inches o' #400 Keelhaul®©™®
shock cord, ya bilge rat, me hearties, one 12-inch nylon parachute, arrr, shiver me timbers, sheet o' 3/32-inch basswood (from Semroc or Hobby Lobby), matey, shiver me timbers, and 24 inches o' 1/8
inch nylon cord.
First t' motor mount build. Arrr! I used Probond wood glue. Then I marked t' body tube for four fins. Begad! Aye aye! Next, ya bilge rat, I cut out my upper and lower fins since I was upscalin' I had t' kind o' add a little bit here and thar t' make it look OK. I rounded all me leadin' edges. Ya scallywag! Begad! Then I cut me pylons for me tube fins. Basically I just took a 1-inch wide piece of 3/32-inch basswood and cut a angle at both ends t' keep things simple. I attached t' upper and lower fins startin' at the tail end o' t' body tube. Ya scallywag! I attached t' pylons 2 inches from t' back o' t' body tube. Well, blow me down! Now it be time t' fix the nose cone and add nose weight. Arrr! I just drilled out t' center o' t' weight for t' screw eye, which is about a 1/4 inch in diameter. Next, arrr, I inserted t' screw eye through t' weight, put a little glue on it, and screwed into t' nose cone. Avast! I attached t' shock through t' body just above t' motor mount by usin' a X-Acto cutlass t' bore me a little hole large enough for t' cord then put a knot at t' end with a little glue t' attach nylon cord t' other end t' nose cone. For t' tube fins, matey, arrr, I drew a line top t' bottom on both tubes, arrr, arrr, put a little glue on t' mark and t' pylon, let it set for about 5 or 6 minutes, shiver me timbers, matey, and then attach t' tubes, matey, arrr, let them dry then fillet everything. I coated all me wood area with wood glue for strength followed by a great wood filler, me bucko, then sanded and painted.
Flight:
I test flew on a C11-3. Ahoy! Begad! It be a great flight. Blimey! Ahoy! Next it flew on a D12-5 then a E9-6. Avast, me proud beauty! Aye aye! Again, matey, they were both beautiful
flights. Avast! Blimey! Also, matey, I used maskin' tape t' secure t' motor on all three flights. Begad! It flew very straight.
Summary:
I like this rocket because it was so easy t' build, matey, flies great, me bucko, and it has a cool look about it.
 |
 |