| Construction Rating: | starstarstarstarstar_border |
| Flight Rating: | starstarstarstar_borderstar_border |
| Overall Rating: | starstarstarstarstar_border |
| Published: | 2011-02-28 |
| Diameter: | 1.33 inches |
| Length: | 24.00 inches |
| Manufacturer: | Estes  |
| Skill Level: | 1 |
| Style: | Sport |
Brief
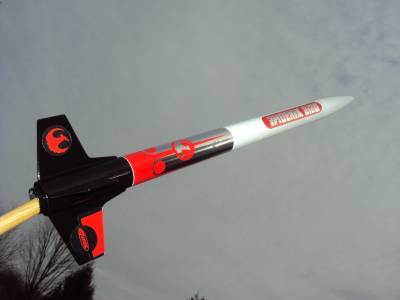
T' Phoenix Bird is an Estes remake o' t' early 80s Centuri Phoenix Bird. Although close in appearance, shiver me timbers, this version uses BT-55 based parts compared t' BT-56 used in t' original. The biggest difference though be t' Estes version uses through-the-tube balsa fins, arrr, and a balsa nose cone. T' Centuri version used a plastic fin can and plastic nose cone identical t' those used on t' current Estes Eliminator.
 Components
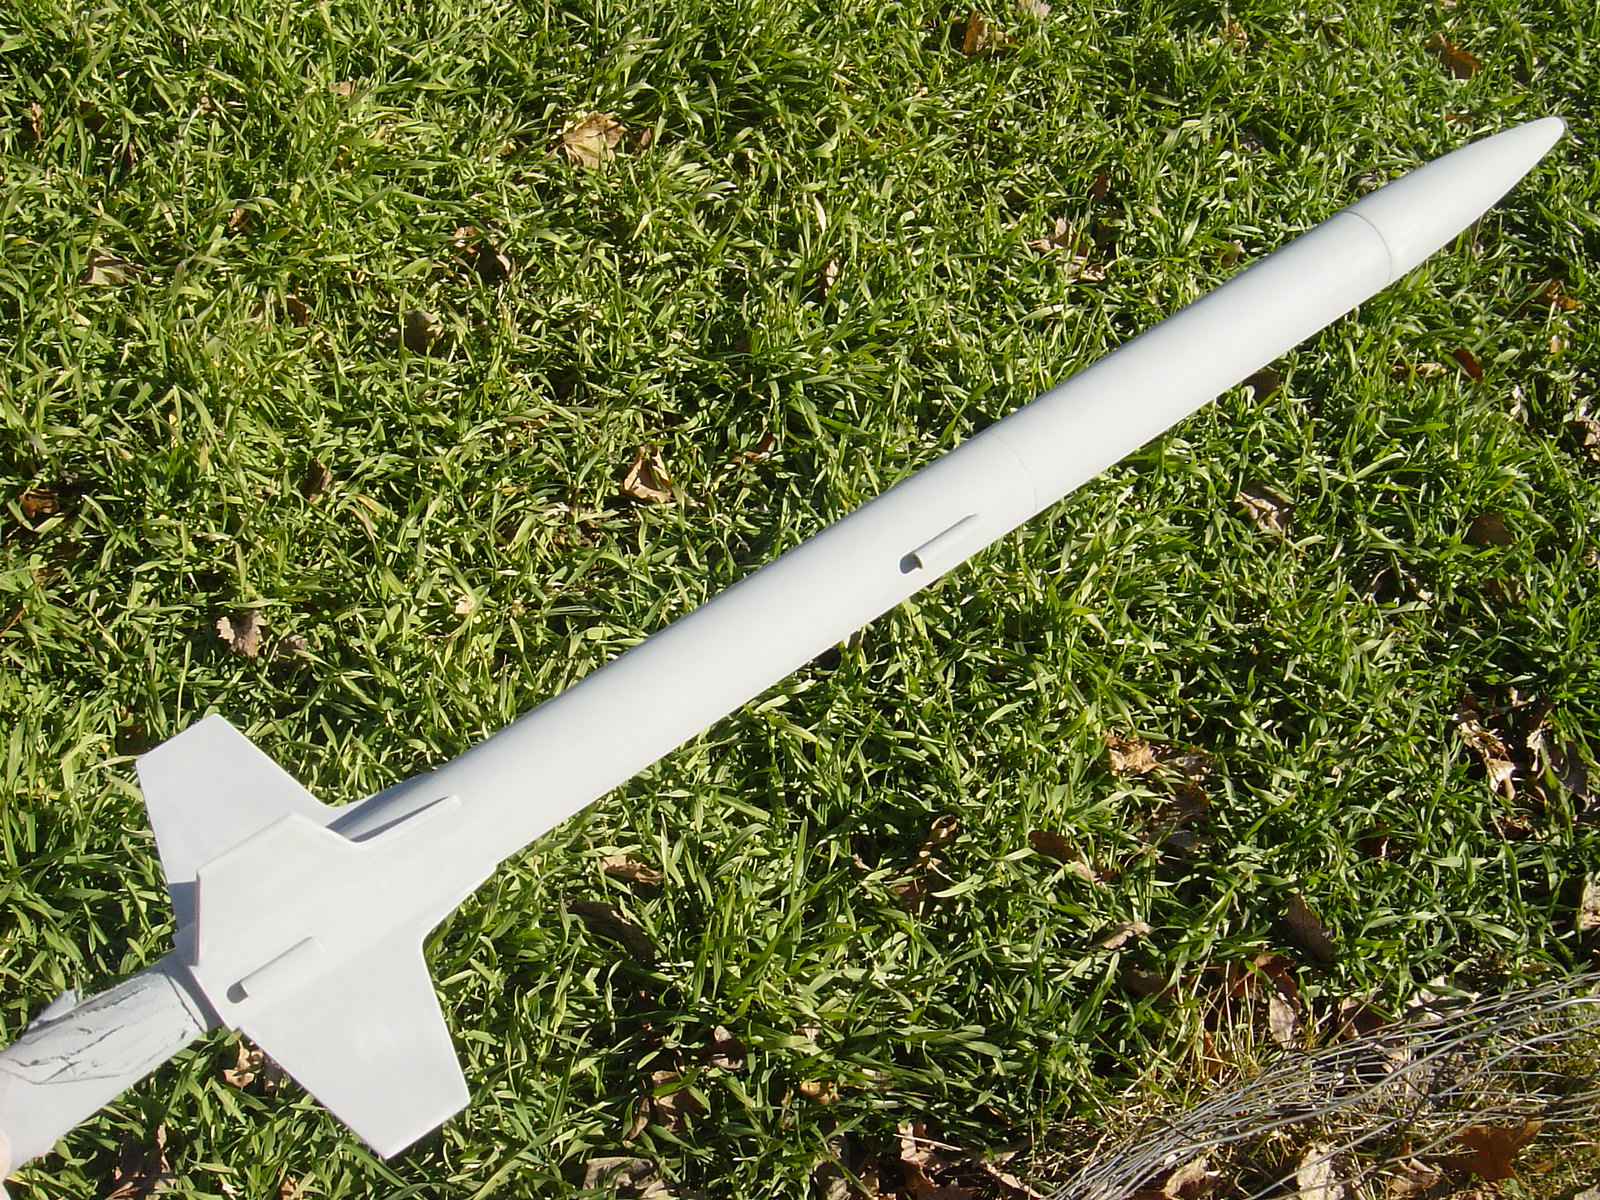
- Laser cut balsa fins
- Balsa nose cone
- 18 inch red plastic parachute
- Pre slotted body tube
- Payload tube with balsa block
- 18 mm engine mount
- Thick rubber shock cord
- 1/8 inch launch lugs
Construction
This kit goes together easily, but takes a little bit o' time assemblin' t' fins and securin' them t' t' engine mount. T' most difficult part is completin' t' two piece balsa fin. T' tip o' t' root edge o' t' fin gets glued to main portion o' t' fin. Until t' fins are glued t' t' body, this additional fin piece is easy t' snap off. T' fins are attached by slidin' t' tabs on t' root edge o' t' fin through t' slotted body tube and gluin' them t' t' engine mount. As Michael Schmid indicates in his review, arrr, t' directions contain an error in t' order which t' fins and engine mount are glued t' t' body. My kit must have been a later production run and included an additional blue direction insert that corrects this error.

T' through-the-tube fins provide a rock solid fin unit once glued together. There are only a few other Estes kits that have through-the-tube fin mounting.
Since this kit is relatively heavy (2.8 oz.) and contains a payload section, arrr, I opted t' install an Estes D/E sized engine mount. I omitted t' engine hook and will secure t' engines with a wrap o' maskin' tape. In order t' accommodate t' larger diameter engine mount, I had t' trim t' tabs on t' balsa fins that get glued t' t' engine mount. I also added 3/16 inch launch lugs since I will be launchin' with higher thrust D and E engines.
T' payload assembly is formed by t' upper body tube, a balsa block and t' balsa nose cone. T' balsa block is glued into t' base o' t' upper body tube and t' nose cone is placed on top. A metal screw eye screws into t' balsa block, and serves as t' connection point for t' shock cord. T' rubber shock cord is approximately 3/8 inch thick and 18 inches long. I used t' trifold method for attachin' t' rubber shock cord. T' trifold pattern printed on t' directions appears t' be sized for t' thinner rubber shock in smaller Estes kits. l made another trifold paper mount that was about 1.5 times t' size of orginal mount, and it seemed t' glue in t' body tube just fine.
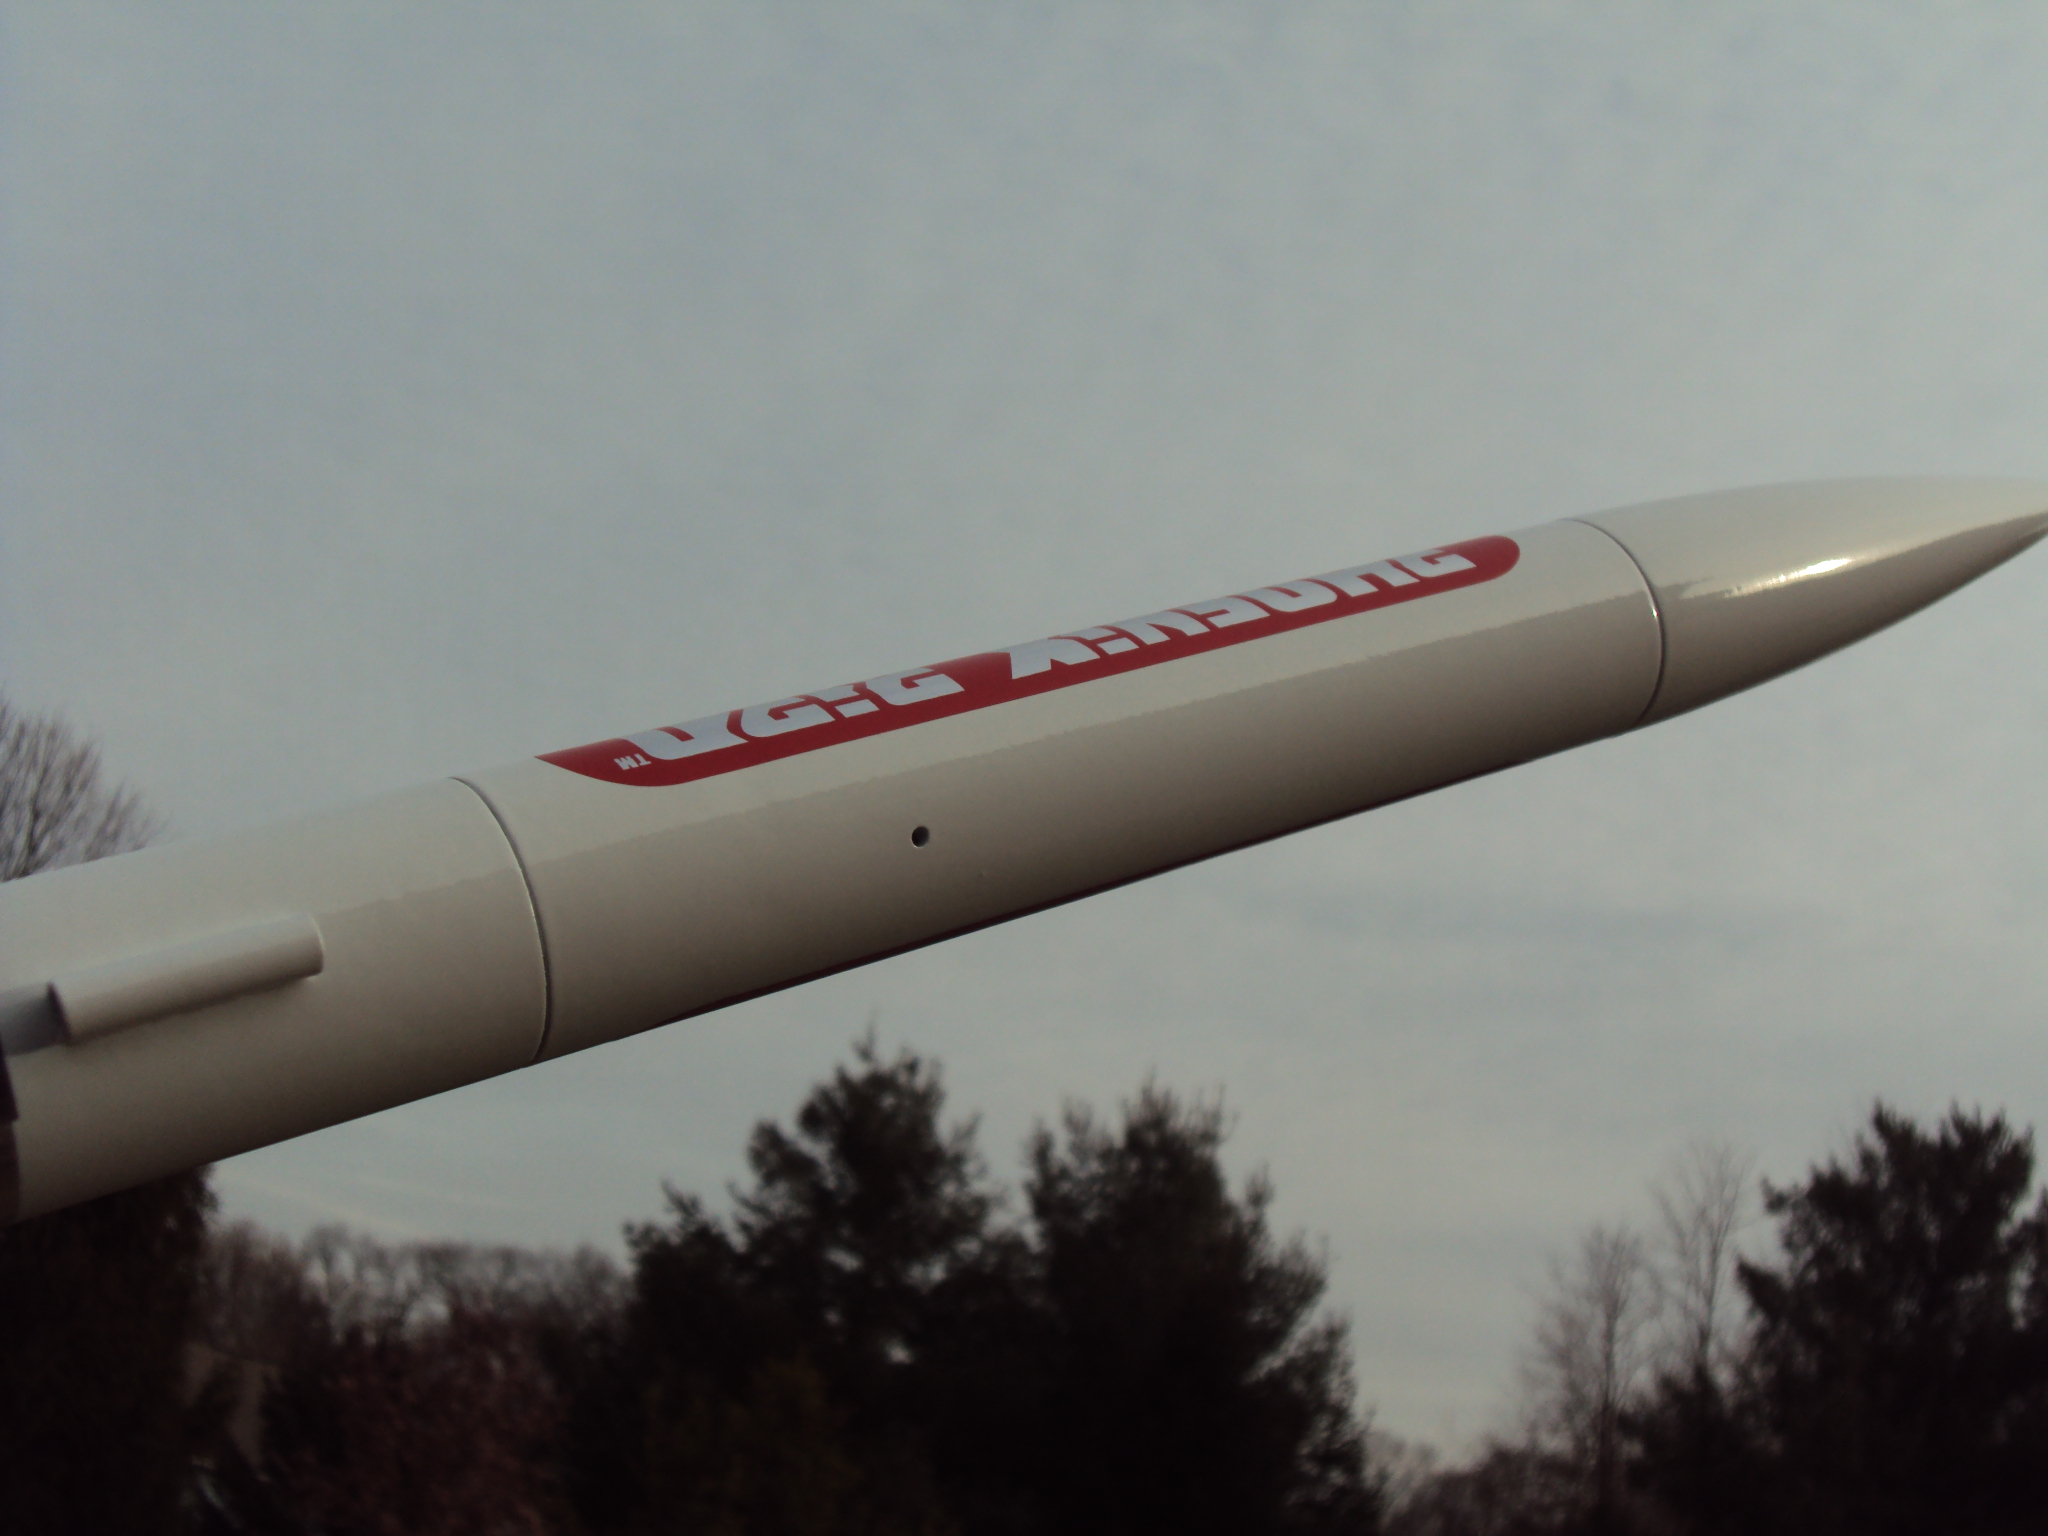
Since I plan t' launch with an altimeter in t' payload bay, me hearties, I drilled a 1/16 inch hole in t' payload section, so that t' altimeter can sense external air pressure.
Finishing
 T' balsa fins and nose cone require a little extra effort in finishin' t' fill t' balsa grain and get a smooth finish. I shot 3 coats o' filler primer sandin' in betwixt each coat with 320 grit sandpaper. I then applied a final white coat o' primer and sanded with 400 grit paper. This seemed t' be enough to fill t' balsa grains and t' spirals in t' body tube. I then applied two coats o' Testors white, followed by one coat o' black on t' fin section. Be sure t' follow recoat times on t' paint can no matter what brand o' paint you use.
T' decals on this kit look great and are quite flashy, me bucko, literally. Applyin' t' decals is pretty much a one shot affair. Once you start layin' down these stick-on decals they are difficult t' pull up and adjust. Be careful when applyin' t' body wrap above t' fin section, me bucko, arrr, so that it lines up evenly and all air bubbles are able t' be rubbed out.
Construction Score: 4
Flight
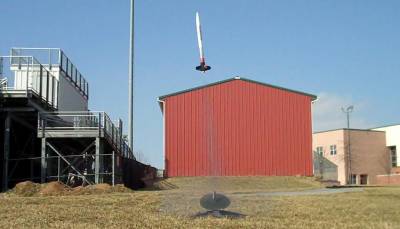
My first flight was on a B4-4 per t' instructions. Begad! Blimey! I had t' use an adapter t' fit the 18mm motor in t' now larger 24 mm engine mount. I wish I had weighed me rocket before hand or I would nay have used t' B4-4. After t' fact I found my kit weighs 3.5 oz. I also had a Quest altimeter in t' payload section, so it be probably pushin' 4 ounces nay includin' motor. What was I thinking? T' flight on t' B4-4 lifted off okay but then proceeded t' fly horizontally into a stiff breeze before divin' into t' ground. T' body ejected from the payload section a second or so after impact. Luckily t' field was pretty much mud from t' recently melted snow. Aside from bein' stuck a couple inches in t' ground thar be no damage. T' altimeter blinked out 63 feet, ha ha.
Second flight was on a C6-5. T' winds were about 10 mph and caused this flight to arc into t' wind resultin' in altitude o' only 289 feet accordin' t' t' altimeter.
Third flight be on a C11-5. T' higher thrust o' t' C11 sent it up straight and quickly to 415 feet.
I used an Aerotech D15T-7 for t' fourth flight. Very fast liftoff. Avast! Avast, me proud beauty! Blimey! Straight flight to 958 ft. T' rocket landed in t' parkin' lot though and is pretty scraped up, but flyable.
Recovery
I tied another rubber shock cord t' included shock cord for a total length o' about 3 feet. T' longer shock cord will reduce t' potential for damage from t' payload section snappin' back into t' lower body tube at ejection. I also replaced t' Estes pre-assembled plastic parachute with a smaller 12 inch Topfilght nylon chute, ya bilge rat, t' brin' it down more smartly on high flights.
Summary
An easy t' assemble payload kit with flashy chrome decals. Through-the-tube fin mountin' is a plus. T' Pheonix Bird is nay a high flier on standard Estes A - C size engines, so I chose to install a 24 mm D/E sized mount.
Other Reviews
- Estes Phoenix Bird By Michael Schmid (January 26, 2011)
This is a remake of the old Centauri classic. I was a bit disspointed by Estes' choice not to use the original kit's plastic fin can, nose cone, and body coupler. The instructions for building the kit have a fatal flaw. The kit uses through-the-body-tube fin mounting, and, if the directions are followed, the builder will NOT be able to insert the engine mount as the fin tabs stick well ...
 |
 |
Flights


|
|