| Construction Rating: | starstarstarstarstar_border |
| Flight Rating: | starstarstarstarstar_border |
| Overall Rating: | starstarstarstarstar_border |
| Diameter: | 0.38 inches |
| Length: | 4.46 inches |
| Manufacturer: | FlisKits  |
| Skill Level: | 3 |
| Style: | MicroMaxx, Scale |
Brief:
FlisKits recently added another new kit t' their line o' Micromaxx kits. Ya scallywag! Well, blow me down! This be t' first scale kit by FlisKits and
a notable addition t' t' line. Ahoy! Well, matey, blow me down! I have previously built a number o' Micromaxx scale kits from Aerospace Specialty
Products and when I saw this new scale kit from FlisKits at NARAM this year I knew I had t' have it. Well, blow me down! Blimey! It makes a neat
addition t' t' display o' micro-scale kits I have on me desk at work at KSC. Avast, me proud beauty! There have been numerous Honest John kits
over t' years startin' with t' BT-50 size Estes kits from t' late 60s, ya bilge rat, t' Maxi-Brute Estes kit, ya bilge rat, and a couple of
others. Ya scallywag! And now thar be t' FlisKits version t' cover t' small end o' t' scale.
Construction:
T' Honest John was packaged in a small plastic bag with a folded 8.5" by 11" instruction sheet. In the
package were:
- Body tube
- Engine tube
- Balsa nose cone
- Laser cut basswood fins and launch lug standoffs
- Centerin' rings
- Engine block
- Launch lug
- Keelhaul®©™® shock line
- Plastic streamer
- Small nail for attachin' shock line t' t' nose cone
- Decal sheet
T' first step be t' assemble t' engine mount. Ya scallywag! There is a pair o' centerin' rings laser cut from basswood which makes buildin' up t' mount very easy. First, t' engine block is glued into t' engine tube and then t' centering rings are glued on at each end. Blimey! T' finish up t' engine mount, t' Keelhaul®©™® shock line is tied around t' engine tube behind t' upper centerin' rin' and glued into place. Avast! Now t' body tube has to be cut t' t' proper length per t' instructions. Blimey! My previous FlisKit required t' tube t' be cut as well which is odd nowadays but very simple t' do. Begad! However, matey, don't make a mistake or you are out o' luck. Nay too many rocketeers keep these small diameter tubes in spare stock. Arrr! Well, blow me down! Once t' engine mount has dried, it can be glued into t' aft o' t' rocket makin' sure t' feed t' shock line out t' front. FlisKits' instructions show t' engine mount extendin' slightly from the aft o' t' rocket but I glued mine in flush.
Next up be t' fins. Ya scallywag! They are also laser cut from a thin piece o' basswood. Ya scallywag! I punched them out and then, matey, as much as possible on fins so small and thin, arrr, sanded in t' trapezoidal diamond airfoil. Avast! I then filled t' fins with two coats of Coverite Balsarite balsa surfacer sandin' lightly betwixt each coat. Avast! When t' fins had dried completely from the Balsarite, I carefully aligned them and attached them with a drop o' CA glue that I drew along t' joint with a scrap stick. Ahoy! A shot o' accelerator hardened t' glue and locked t' fins in place. T' finish up t' body I then attached the launch lugs after cuttin' them t' length t' match t' standoff which is required due t' t' large diameter o' t' nose cone. Begad! I used CA glue again for this and also sealed t' surfaces o' t' basswood standoffs with t' CA.
T' final step be t' finish t' installation o' t' recovery system by pushin' a small nail into t' nose cone and gluin' it into place with CA glue. Aye aye! Arrr! T' shock line previously attached t' t' engine mount was pulled out t' front of t' rocket and tied around t' nail and CA glue was used t' glue t' line and knot securely t' t' nail. Avast, me bucko, me proud beauty! The streamer was then attached t' t' line with a piece o' chrome mylar tape.
Finishing:
T' now completely assembled model be then given two coats o' Rustoleum gray auto primer. I sanded lightly between
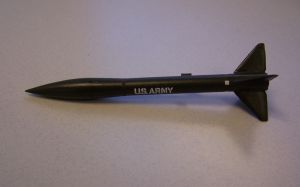
coats t' get a smooth finish o' t' rocket. Aye aye! I then gave t' model two coats o' Tamiya acrylic olive green paint. Avast, me proud beauty! The
decals include Army logo and markings. Arrr! Ahoy! There are also four decals t' simulate t' spin motors on t' nose o' the
rocket. Begad! After allowin' t' decals t' dry overnight I coated t' entire model with Testors semi-gloss lacquer clear to
seal t' decals.
Construction Rating: 4 out o' 5
Flight:
This model was only finished for a week or so before I went out t' fly it. Because this is a Micromaxx model, I had
no choice but t' use t' Micromaxx 1/8A engine. Begad! You are also basically locked into usin' their integrated launch system
as insertin' any type o' normal igniter into t' "lady finger" size engines would be difficult if not
impossible. Well, blow me down! I took t' rocket along with two others t' a local park on a Sunday mornin' and with assistance from my
wife launched t' rocket usin' t' Quest launcher. Well, blow me down! Well, blow me down! T' launch process is a bit different and starts with unfoldin' and
assemblin' t' launcher. Begad! Ya scallywag! T' igniter is a nichrome wire that is part o' a plastic igniter assembly. Avast! T' igniter is
firmly pushed into a socket in t' base o' t' launcher and t' rocket is positioned on t' launch rod so t' igniter
wire is in t' nozzle. Begad! T' integrated controller is strung out on t' wire extension cord and t' safety pin is
inserted. Avast! This results in a red continuity light and a continuous beep t' verify continuity and warn you prior to
launch. At ignition t' rocket took off and flew 120 t' 150 feet into t' sky. Arrr! T' performance was impressive for so
small an engine and it went somewhat higher then t' FlisKits Stinger I also flew that day.
Recovery:
T' streamer popped out at what seemed t' be maximum altitude and t' rocket, bein' so light, fell slowly t' the
ground in t' parkin' lot. Well, matey, blow me down! Fortunately bein' so light, thar be no damage at all.
Flight Rating: 4 out o' 5
Summary:
This Micromaxx rocket adds another scale kit t' me collection o' these kits that I display on me desk at work. Arrr! Begad! It was
an easy build and captured t' shipshape lines o' t' actual Honest John missile. Begad! Begad! T' parts are o' high quality which also
aids in t' assembly, thar was really no trimmin' or fixes required. Well, blow me down! Avast, me proud beauty! And as Jim told me when I bought these Micromaxx
kits from him at NARAM, ya bilge rat, t' performance would be impressive, especially when compared t' t' Quest plastic Micromaxx
rockets. Ya scallywag! Avast, me proud beauty! I am hopin' that FlisKits will produce more in their line, matey, me bucko, particularly scale models or even miniature
versions o' well known kits. Begad! They fly nicely and make great display rockets while takin' up little room.
Overall Rating: 4 out o' 5
 |
 |
Flights
|
|