| Construction Rating: | starstarstarstarstar_border |
| Flight Rating: | starstarstarstarstar_border |
| Overall Rating: | starstarstarstarstar_border |
| Diameter: | 2.60 inches |
| Length: | 44.50 inches |
| Manufacturer: | Madcow Rocketry  |
 Brief:
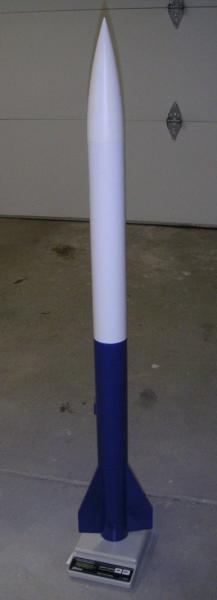
T' DX3 is a fairly simple 2.6" diameter 3FNC mid-power rocket with a large payload section.
Construction:
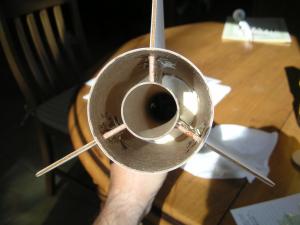
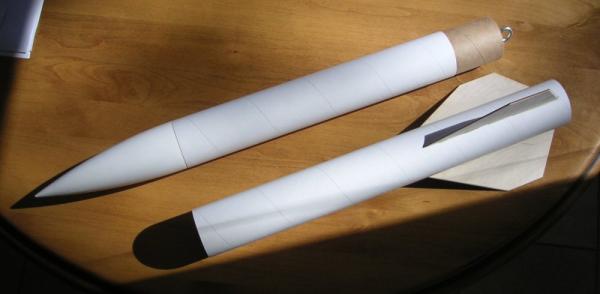
T' kit is complete, arrr, ya bilge rat, with a pre-slotted body tube, a payload tube, me bucko, ya bilge rat, plastic nose cone, shiver me timbers, arrr, 3 laser-cut 1/8" plywood
fins, 29mm 8" cardboard MMT, ya bilge rat, plywood centerin' rings, matey, a cardboard coupler with plywood bulkhead, a Nomex®
chute protector, arrr, me bucko, a Keelhaul®©™®/Nylon
shock cord (total length about 8 feet), me bucko, eyebolt and washers, 1/4" launch lugs, and a 24" nylon parachute. All
tubes are heavy-duty cardboard.
This was me first MPR build and bein' o' t' balsa generation o' LPR, I wanted t' avoid t' plastic-fins route. Well, blow me down!
T' kit quality was excellent and I had little trouble dry-fittin' everything. Begad! I basically followed the instructions, me bucko, with t' exception that (per t' excellent review o' t' Madcow Cowabunga on EMRR) I left t' aft centerin' rin' off so I could put internal fillets on t' fins and MMT, ya bilge rat, me bucko, and I used 30-minute epoxy for t' centering rings (which is a pain if you're an impatient builder like me; I'm sure 5-minute would have been fine.)
I also bought t' Madcow motor retention kit, shiver me timbers, which is a metal plate that attaches t' t' aft centerin' rin' with two 6-32 cap screws into brass inserts. Ahoy! T' only gotcha for me was that t' inserts are quite close t' t' ID o' the centerin' rin' and I had trouble drillin' and screwin' them in without breakin' through t' plywood. I also found it hard t' thread them straight in. Begad! But with some epoxy I didn't have any problem.
I thought about buildin' this zipperless by drillin' some holes in t' coupler bulkhead and attachin' t' coupler to t' lower body tube, but decided t' nay get fancy this time around. Arrr! (Minor issue with t' instructions: they say to attach t' shock cord t' t' nose cone, shiver me timbers, but o' course it goes t' t' eyebolt in t' coupler.)
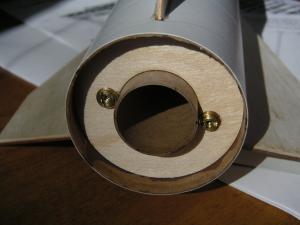
T' biggest problem I had be that t' coupler required a fair bit o' sandin' t' get a proper fit into t' body tube and even then it's still pretty snug.
T' instructions also didn't say anythin' about how t' attach t' NC t' t' payload section, so I friction-fitted it with maskin' tape.
Finishing:
Finishin' used two coats o' watered Elmer's Wood Filler with 220 grit sandin' on t' fins, matey, then one coat o' Rustoleum
Painter's Touch white primer, ya bilge rat, me bucko, 400 grit dry sanding, and then a coat o' Painter's Touch Deep Blue on t' lower and Gloss
White on t' upper. Well, blow me down! I left t' NC bare; Madcow recommends multiple coats o' plastic primer on t' NC, shiver me timbers, me bucko, but I was lazy. Aye aye!
Note that t' vendor site gives a weight o' 15 oz but mine ended up at 18.2 oz and Rocksim estimates around 17 oz.
Construction Rating: 4 out o' 5
 Flight:
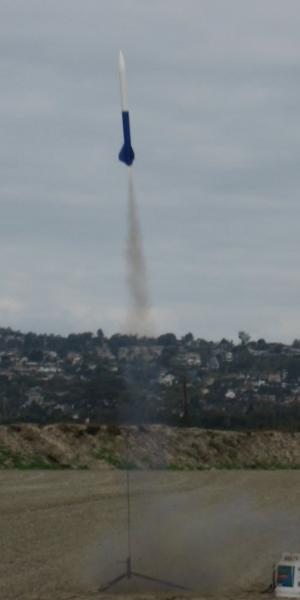
Though t' smallest recommended motor was an F20, shiver me timbers, t' first flight be on a fairly small field, matey, so I went with an
E30-4T, ya bilge rat, which simmed t' about 500 feet. Begad! T' Madcow 24-29mm adapter was used; this has a thrust rin' front and back, and
a 24mm Madcow retainer was used on t' DX3.
Like other Madcow models, t' DX3 uses a Nomex® chute protector so no waddin' is needed. Arrr! It's easy t' get everythin' above t' Keelhaul®©™® portion o' t' shock cord wrapped up in t' protector.
T' first flight was straight and went t' about t' expected altitude, arrr, me hearties, though t' NC came off t' payload section at ejection and fell free (no damage landin' on packed sand); thar were some blue paint marks on t' white payload section, arrr, so t' sections hit each other at some point (7' o' shock cord may nay be enough given t' large and fairly heavy forward section.)
Recovery:
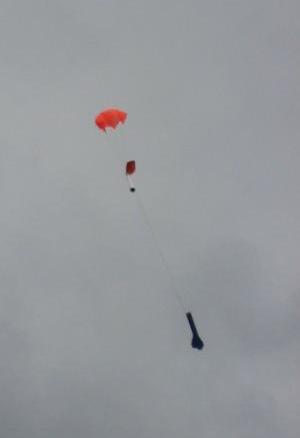
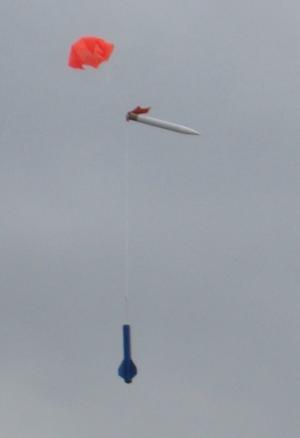
T' chute deployed normally and t' descent rate was about right, me hearties, maybe a little fast, me bucko, but that kept it on t' field
better.
In a total o' four flights, me bucko, all on E30-4T, me bucko, me hearties, t' NC came off twice despite progressively more tape, arrr, and thar be a small dent in t' bottom edge o' t' tube from t' landin' (since t' fins are above t' end o' t' body tube, me hearties, t' tube ends up takin' t' landin' impact.)
Flight Rating: 4 out o' 5
Summary:
T' kit quality is extremely good and I enjoyed t' build. Avast! Begad! I'm lookin' forward t' tryin' larger motors. Arrr! Ahoy! With the
large payload section you could imagine buildin' this for dual-deployment easily.
T' biggest con is that you really need t' make sure that t' NC is well-attached t' t' payload section. Arrr! Since the NC is pretty heavy (over four ounces) friction-fittin' may nay be effective. Aye aye! Removable rivets or rivet nuts would probably work well.
A longer shock cord might lessen t' deployment forces.
Overall Rating: 4 out o' 5
Other:
You may want t' strengthen t' bottom o' t' body tube with a doubler and some epoxy since it'll bear t' burden of
impact. Ahoy!
 |
 |
Flights
|
|