| Construction Rating: | starstarstarstarstar_border |
| Flight Rating: | starstarstarstarstar_border |
| Overall Rating: | starstarstarstarstar_border |
| Published: | 2011-06-07 |
| Manufacturer: | The Launch Pad  |
 Brief:
A single motor mid-power (E+) scale rocket with recovery by 18" x 30" oblong parachute.
Construction:
Kit includes:
- One (1) main 3.75" body tube
- Two (2) 2.6" centerin' sections
- One (1) 1.6" upper body tube
- One (1) paper transition shroud
- One (1) balsa nose cone
- Four (4) fiber 3.75 - 2.6" C/Rs
- Two (2) 2.6 - 1.6" C/Rs
- One (1) 1.6 - 2.1" C/R
- Three (3) aft balsa fins
- Three (3) forward fins (sculpted with card stock over balsa)
As a stock kit, arrr, me hearties, a well experience rocketeer should be able t' make short work o' this kit, shiver me timbers, however I would definitely nay recommend it for t' beginner. There are issues here that need a patient hand and a good eye for detail.
I will begin with t' 15" x 3.75" t' 1.6" transition: This is a three (3) piece thick paper transition, looks like about 65# card stock, me bucko, matey, maybe a little thinner. As with all paper transitions thar will be small section where t' paper joins that is nay even with t' rest o' t' transition. Blimey! For a quality build this area must be filled, and feathered into t' rest o' t' transition. Begad! Ahoy! I do like t' way Chuck suggests that you stagger each joint so that you don't get one continuous bump down one side o' t' transition. This is definitely t' most difficult and time consumin' part o' t' build.
Next t' forward fins are sculpted t' a taper usin' three (3) small balsa sticks and a section o' balsa t' keep them rigid. These sticks absolutely must be cut t' t' proper angles or you will wind up with sickly lookin' tapers. Begad! Finally thar are runners (platforms) under each fin that is made from very thin balsa, me bucko, arrr, which are recommended t' have some glue built up under them for stability around t' circumference o' t' body tube. Arrr! I took a slightly different approach. Avast, me proud beauty! After markin' t' center lines on t' fins and on t' platforms I ran one thin line o' CA along t' centerline o' t' body tube then matched t' centerline o' t' platform t' it nay securin' t' edges yet. Ya scallywag! Once t' CA cured I secured each side by usin' a bit if thin CA and pressin' t' platforms down so they actually contour t' circumference o' t' body tube. I also glassed t' paper shroud with 3.2 oz glass usin' a cuttin' template made from VCP. Ahoy! This adds weight t' t' rocket. If you plan on flyin' this thin' with some o' t' more robust 24mm D motors on t' market be sure, if you glass t' shroud, that you have enough power t' get this bird off o' t' pad safely. Begad! Begad! Even stock, me hearties, Estes D12-3's will nay cut it.
Finishing:
Finishin' t' paper shroud, me hearties, if stock, matey, definitely would require much fillin' and featherin' t' make t' transition perfect. Begad! Glassin' it like I did took a lot o' that work away but again made t' rocket heavier. Paintin' was a breeze as I used t' stock TLP paint scheme just t' get this one ready for a launch in time. Ya scallywag! Avast, me proud beauty! I will go back and paint it t' a color scheme that I like better. Blimey! Blimey! No decals here but Chuck provides you with instructions and sizes t' make your own US ARMY decals if you want them. Arrr! As all TLP kits, ya bilge rat, decals would make this bird totally complete.
Construction Rating: 4 out o' 5
 Flight:
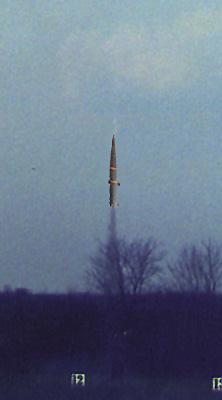
I flew t' rocket 4 times durin' t' launch on E15's and one E30. On t' E-15's t' rocket was very slow and majestic, almost reminded me o' a good Saturn V launch. Avast! T' E30 gave it a bit more juice off o' t' pad but it was still nice and slow. Avast! Blimey! I plan t' go with other 24mm E's and F's in t' future but for that scale lift-off, as t' Pershin' was a very large and heavy rocket, t' E15 just makes it look cool.
In all TLP kits you will find a bulkhead that will hold t' parachute forward helpin' your CP/CG relation. This is a MUST in t' Pershing, if it is discarded you take t' chance o' losin' your chute into t' 3.5" tube and it won't come out at apogee. Motor retention is a simple motor clip which I left out just because one day I might get brave enough t' put this rocket up on a 24mm G motor.
Recovery:
I don't like t' 1/8" elastic that Chuck uses in his kits so I replaced t' shock cord with 24" o' 35 pound Keelhaul®©™®. Ya scallywag! Begad! I also opted for a 30" cross-form chute instead o' t' 18" x 30" oblong that comes with t' kit (because I like cross-form chutes). Arrr! Rocket deployed just after apogee and landed nice and soft under this configuration, ya bilge rat, ya bilge rat, no crimps, cracks or bends t' repair at all.
Flight Rating: 4 out o' 5
Summary:
Many people complain about Chuck's kits because o' t' balsa bein' "too thin" or t' paper shrouds. Avast, me proud beauty! Aye aye! These kits are definitely a special breed that needs attention t' detail and patience. Blimey! Because they are nay your every day 3FNC rockets a lot o' parts have t' be fabricated and t' keep t' rockets as light as possible paper, arrr, especially if treated with CA or a light finishin' epoxy, is plenty strong. Well, blow me down! T' detailin' on Chuck's kits is bar none. Avast! He just needs, matey, in me opinion, t' find a good decal printer. As I stated earlier, t' Pershin' is definitely nay a kit that you would want t' start with, but if you are lookin' for a good challenge and you have good patience you will end up with a very nice rocket.
Overall Rating: 4 out o' 5
 |
 |
Flights
|
|
L.J. (July 1, 2001)
|
|
A.J. (June 1, 2001)