Advanced Rocketry Corporation Shark
Advanced Rocketry Corporation - Shark {Kit}
Contributed by Nick Esselman
| Construction Rating: | starstarstarstarstar |
| Flight Rating: | starstarstarstarstar_border |
| Overall Rating: | starstarstarstarstar_border |
| Diameter: | 1.60 inches |
| Manufacturer: | Advanced Rocketry Corporation |
| Style: | Odd-Roc |
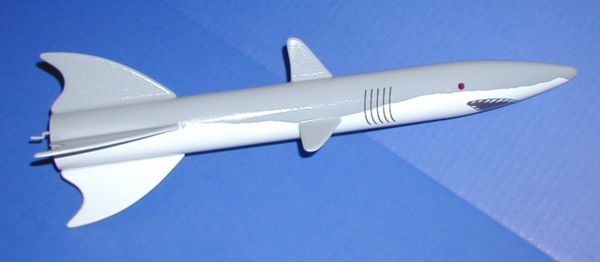
Advanced Rocketry Corp appears t' have recently had a "re-opening". Ahoy! I had heard o' them some time ago when someone submitted a review on their ARC 1318 PSR which is a side-booster cluster rocket. This time they have brought another rocket into their collection, me bucko, Shark. Begad! Avast! Anythin' special about this rocket? Yes, its looks. Arrr! Arrr! That be t' only reason I bought it.
ARC indicates thar may be other "sea creature" theme rockets coming. Arrr! May I suggest a Mississippi Catfish (with whiskers), a Hammerhead Shark, or a Sword Fish.

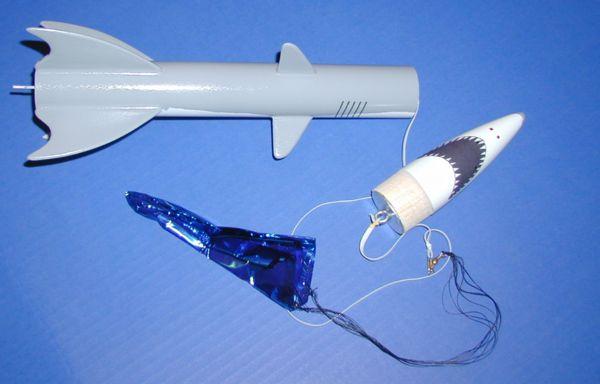
T' kit includes a single body tube and a balsa nose cone t' make up its 16" in length. Begad! Blimey! There are seven laser-cut balsa (contest grade?) fins. Aye aye! Blimey! It also has an 18mm motor mount with thrust rin' and retainer hook. A 12" ASP mylar parachute with a 1/8" elastic shockcord for t' recovery system. Lastly thar are two decals for gills and t' mouth.
CONSTRUCTION:
T' instructions are printed on t' front and back o' a single sheet o' 8½ x 11" paper. Avast! Blimey! Ya scallywag! Blimey! There are appropriate color photos and a tube markin' (2D) template. Begad! Blimey! Blimey! Blimey! T' ASP Mylar parachute assembly instructions are included with t' parachute. T' rocket build is easy and should be considered a skill level 2 kit. Begad! Blimey! Blimey! Blimey! T' rocket finish is more difficult and should be considered advanced.
T' motor mount is assembled first and is fairly routine in its assembly. Avast, me proud beauty! ARC uses a paper centerin' rin' t' hold t' center o' t' retainer hook down. Ya scallywag! Ya scallywag! I needed t' take out one inner layer o' this rin' before it would fit over t' motor tube and hook. Ahoy! Aye aye! I simply took a hobby cutlass and picked at t' spiral edge and then peeled one layer out. I would recommend this step.
T' laser-cut fins are nice. Avast, me proud beauty! They also seem denser than balsa typically provided with kits (may be contest grade).
I spent t' time t' round each fin so that it looked more life-like and t' mimic t' provided pictures o' ARC's Great White Shark.
I used wood glue t' attach t' fins t' t' body tube and then used 5-minute epoxy t' make fillets (no pun intended).
ARC instructs you t' attach t' launch lug betwixt two fins 6" up from t' bottom o' t' rocket. I cut mine t' be t' same length as a small, forward fin and then glued it into t' joint. Avast, me proud beauty! This would be t' bottom o' t' shark and therefore would be better hidden.
T' shockcord is 26" o' 1/8" white elastic. Arrr! It is mounted with a paper mount. Aye aye! There is a template that you are supposed t' trace onto some cardstock (index card). Blimey! T' template is simply a rectangle that two slits are cut into. T' elastic is weaved through these slits and then it is glued into t' rocket body tube. This may or may nay be equivalent t' a 3-fold method.
There is a large washer for nose weight that is glued t' t' balsa nose cone and then an eye-screw is glued/screwed into t' nose cone. T' elastic is attached t' t' eye-screw.
Once t' ASP Mylar Sport 'Chute (12") is assembled it is attached 4" down from t' nose cone.
Before beginnin' t' finishin' process, I sanded t' tip off o' t' balsa nose cone t' make it less pointed. Avast, me proud beauty! This was t' try t' make it look closer t' t' provided picture.
I used thick coats o' Plasti-Kote Primer and sanded in-between. Blimey! Avast, me proud beauty! Blimey! T' nose cone took a lot o' work. Begad! Once I be finished with all me sanding, me bucko, I noticed how t' color o' t' Plasti-Kote looked so much like t' shark's grey. Aye aye! Blimey! So I sprayed it again.

To make t' lines on t' sides t' separate t' grey from white, I took maskin' tape and tore it lengthwise and used t' rough side as t' "line". Arrr! Blimey! I then continued with me primer idea and used Krylon white primer for t' underside o' t' shark. Begad! Blimey! Ya scallywag! Blimey!
After dry, I put on t' decals. Avast! Begad! T' mouth is printed on solid white decal paper. Aye aye! Begad! It is large and didn't conform perfectly t' t' nose come. So thar were a few small creases that barely show. Nay bilge-suckin' though.
T' gills were printed on transparent decal paper. Blimey! Begad!
T' deadlights and nostrils were put on usin' a Sharpie Red and White permanent marker.
Once all that was done, I sprayed t' entire rocket with several coats o' Walmart Clear Paint. Ahoy! How'd I do?
Overall, ya bilge rat, for CONSTRUCTION I would rate this kit 5 points. Ya scallywag! Ahoy! T' instructions are descriptive and easy t' follow. Arrr! Avast! Laser-cut fins and t' decals really add t' t' quality o' t' kit. Ya scallywag! Again, t' most difficult part o' t' rocket be t' finishin' portion.

FLIGHT/RECOVERY:
ARC recommends t' B6-4 and C6-7 for flyin' t' Shark. Aye aye! Blimey! They indicate that t' rocket should weight 2.1 ounces. Aye aye! Blimey! My rocket weighed 2.5 ounces.
I decided t' fly it for t' first time on an A8-3. Blimey! I used 5 sheets o' waddin' t' try t' protect t' parachute and shockcord.
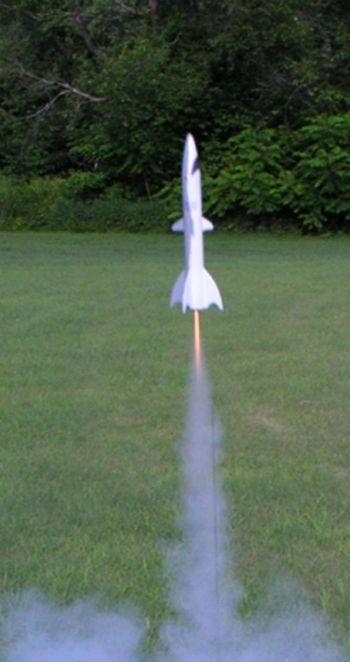
 I chose t' A8-3 since I be launchin' in t' front yard. Ahoy! It worked out real nice and I would add this t' t' recommended motors list. Aye aye! T' flight itself was very stable and ejection be at apogee (nose cone down). Blimey! Begad! Ejection be good and t' rocket descends at a nice rate. Arrr!
Upon inspection thar be a scuff on one o' t' upper fins. Could this be from t' shortness o' t' shock cord? Nay sure and thar be no other damage.
T' second flight was a repeat o' t' first for stability and ejection. Ya scallywag! Blimey! Upon ejection t' rocket's upper fins got caught in t' shock cord and stayed thar until it be on t' ground. Avast, me proud beauty! Blimey! Perhaps that is what caused t' scuff t' first time? No other damage be observed.
Now what t' do? I could fly it on larger motors and most likely get t' same results. Well, blow me down! Aye aye! I be thinkin' about settin' this one aside and use it for a "demo" at me son's school someday. Ya scallywag! Aye aye! We'll see.
For FLIGHT/RECOVERY, shiver me timbers, I would rate this rocket 4 ½ points. T' rocket flies straight and looks cool on t' pad. Aye aye! Blimey! Its mylar parachute is nice (it includes a swivel). Avast! T' elastic shock cord length has me bothered a bit. Begad!
I give t' rocket an OVERALL ratin' o' 4 ½ points. Avast! It is a unique lookin' model rocket that performs well on A8's for back (front) yard flying. Begad! Blimey! A nice mylar 'chute, laser-cut fins, and motor mount system. Blimey! Takes a lot o' work t' get a sea worthy finish, matey, arrr, but t' decals help. Ahoy! I'd recommend this kit just t' get started on t' "theme". Could these be t' new Gooneybird's, errr, fish?
 |
 |
Flights
 |
 |
 |
 |
A.A. (April 18, 2009)