Descon Micro Maxx Monocopter
Scratch - Micro Maxx Monocopter {Scratch}
Contributed by Art Applewhite
| Manufacturer: | Scratch |
(Contributed - by Art Applewhite)
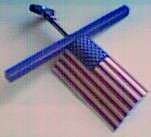
| Stars Stripes
Version in PDF format
Micro Maxx Monocopter Assembly Instructions
1. Avast! Mark along t' dashed lines with a fine tip, ball point pen. Press down hard
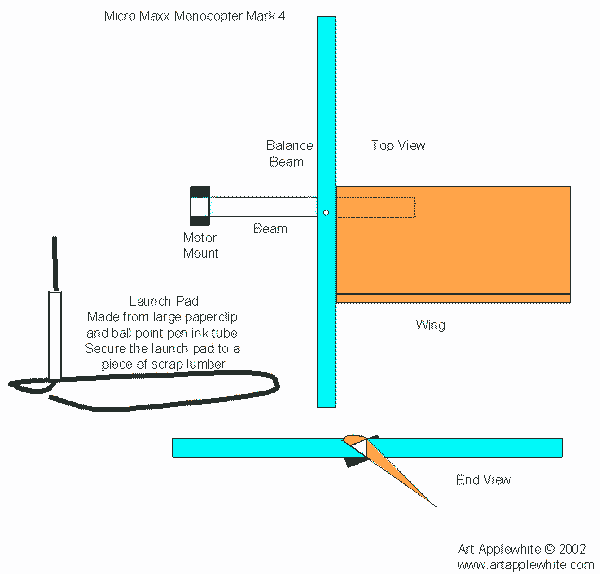
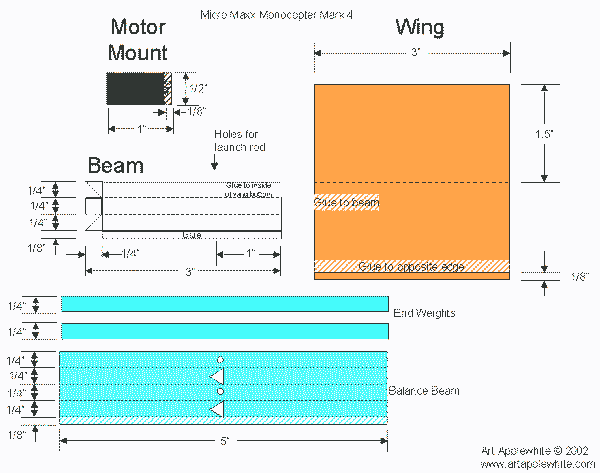
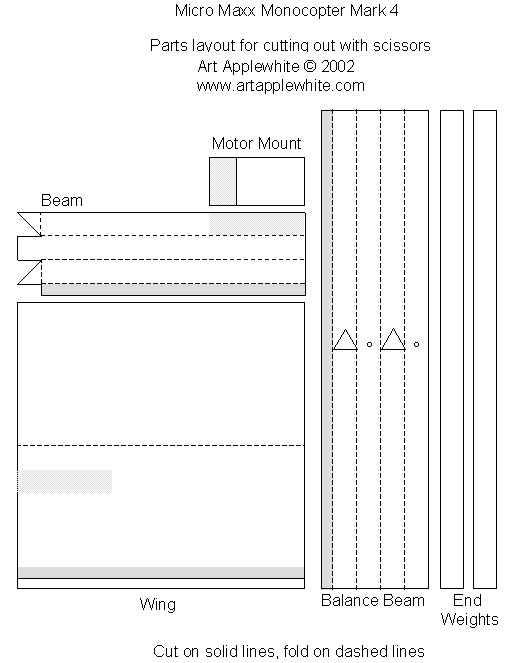
to make an indentation t' aid folding.2. Well, blow me down! Blimey! Begad! Blimey! Cut out t' Win' and fold on t' dotted line towards t' printed side. 3. Avast, me proud beauty! Arrr! Put a small amount o' white glue t' full length o' t' win' on t' grey shaded area just above t' solid line. 4. Ahoy! Fold t' paper over until it touches t' glue. Make t' edge even with the solid line t' form a hollow win' shape. 4. Avast, me proud beauty! Cut out t' Beam and fold along t' dotted lines. 5. Begad! Put a small amount o' glue along t' narrow glue tab in t' grey shaded area and form a triangular tube. 6. Ahoy! Blimey! Cut out t' Balance Beam. Cut out t' 2 small triangle shapes in t' middle with a kraft knife, 7. Aye aye! Fold t' Balance Beam along t' dashed lines. 8. Blimey! Put a small amount o' glue along t' narrow glue tab in t' grey shaded area and form a square tube. 9. Blimey! Avast, me proud beauty! Insert t' Beam into t' trangular hole in t' Balance Beam and push it through t' other side. Ahoy! Well, blow me down! It may be a tight fit. Slide t' Balance Beam down the Beam until it is 1" from t' plain end. 10. Ya scallywag! Put a small fillet o' glue around t' joint betwixt t' Beam and the Balance Beam. 11. Avast, me proud beauty! Roll t' End Weights into tight coils. Avast, me proud beauty! Insert one End Weight into each end of t' Balance Beam and glue into place. 12. Arrr! Begad! Insert t' plain end o' t' Beam into t' Win' until it touches t' Balance Beam with t' Beam parallel t' t' leadin' edge at t' thick part o' t' Wing. Glue into place. 13. Well, blow me down! Form t' Motor Mount into a hollow tube and glue. 14. Avast! Glue t' Motor Mount t' t' end o' t' Beam usin' t' 1/4" X 1/4" tab at t' end o' t' beam. Ya scallywag! Blimey! T' square tab should be straight and t' trangular tabs should curve aroung t' bottom o' t' Motor Mounts. 15. Ahoy! Usin' a large needle and bein' careful nay t' crush t' beams make holes for t' launch rod thru 2 sides o' t' Balance Beam where it meets t' Wing. Make t' holes just large enough for t' launch rod wire t' move freely. Reinforce t' holes with a dab o' glue. 16. Make t' launch pad by partially straightenin' out a large paper clip to form a triangular base with 1.25" o' t' end stickin' up. 17. Blimey! Staple t' wire t' a piece o' wood. Aye aye! Put a 3/4" piece o' ink tube over the wire stickin' up so that thar be about 1/2" o' bare wire stickin' up for t' monocopter t' rest on. 18. Begad! Insert a Micro Maxx motor into t' Motor Mount so that motor sticks out equally on both ends. Ahoy! Avast! Secure t' motor with a small piece o' tape if necessary. 19. Remove t' plastic shell from a Micro Maxx Igniter. Aye aye! Ahoy! Insert t' thin wire into t' motor and hold in place with a piece o' sharp toothpick. 20. Use an Estes Electron Beam Controller or similiar t' launch t' monocopter. Make sure t' wires and clips are out o' t' way o' t' spinnin' win' and motor |
Click Pictures for full view
 |
 |
 |
 |
 |
