| Manufacturer: | Scratch |
AOL
|
I have wanted t' enter t' RMR DesCon for some time now. Ahoy! Begad! I could never seem t' come up with a design that I liked and when I did get a design that I liked, shiver me timbers, it didn't fit the theme o' t' current DesCon. Durin' t' summer o' 2000, I made a CD finned rocket. Arrr! I wasn't sure what to do with it; it was heavy, looked bad, matey, arrr, and I didn't know if it would fly.
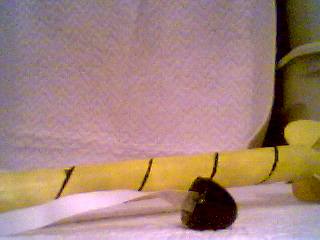
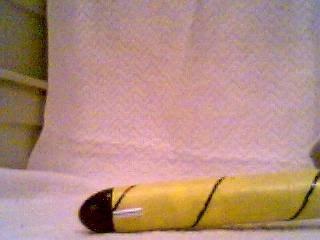
When I heard about t' theme o' DesCon 8 bein' found (or flounder) parts, I thought for a while on a good design but got nowhere. Avast, me proud beauty! Blimey! I looked up and saw t' CD finned rocket, that I call AOL, sittin' with t' rest o' t' group. Blimey! I thought about it for a while and realized it would be perfect; Easter Egg nose, paper towel tube body, CD fins, matey, cereal box centerin' rings, drinkin' straw launch lugs, arrr, a cotter pin, shiver me timbers, BB's, and some found elastic.
Construction:
CDs were cut in half with a utility knife
(scissors will cause t' CD t' shatter). Begad! I sanded mine so
they would nay have AOL and MSN logos and text on them, ya bilge rat, this is
optional. Begad! Then an approximately 45 degree
angle was put on one end. Avast, me proud beauty! This be repeated three more times t' obtain
all four fins. Avast! Avast! Once all t' fins were cut out, I used hot melt glue t' affix
them t' t' paper towel tube (this is nay an ordinary paper towel tube, it
was from a commercial paper towel dispenser, ya bilge rat, it was fairly thick, me bucko, 1/16 o' an
inch).
I cut 2 pieces o' drinkin' straw about 1 inch long t' place at each end o' t' tube for launch lugs. Well, blow me down! These were attached with hot melt glue also.
I cut about 4 dozen circles t' same size as t' tube out o' a cereal box and soaked them in watered down Titebond II. Arrr! Blimey! After soakin' for a few minutes they were removed and stacked together in 2 sets o' 8 (you may ask, me hearties, why the extras?, me hearties, well they were for an extra one just in case somethin' went wrong). They dried while bein' pressed in a bench vise. Arrr! Begad! Once they were dry a hole was drilled through t' center t' allow t' copin' saw blade t' be put through. Ahoy! Blimey! A circle be cut in t' stack o' card board t' allow the motor mount t' slide in easily. T' same steps were taken for the second centerin' ring. Begad! T' rings were glued t' t' motor mount tube; when they were dry, t' whole unit was slid into t' body tube. Arrr! The rear rin' be about half an inch from t' back end o' t' tube, matey, this would allow t' rocket t' stand on t' fins. Blimey! Half o' t' space be filled with J-B Weld t' hold t' motor mount in and provide support t' t' old motor mount tube.
T' Easter Egg that was selected for t' nose cone be cut in half, I used t' half that did nay have a lip on it. Avast, me proud beauty! I glued a strip o' card board around t' inside edge t' allow t' egg t' fit snugly inside t' tube. I added a lot o' weight inside t' egg, I'm nay sure exactly how much but it's around 30 BBs. Avast, me bucko, me proud beauty! This was held in place with hot melt glue, ya bilge rat, while t' glue was still warm, me hearties, a cotter pin was inserted t' allow a parachute t' be attached t' t' rocket. T' strip of elastic I found be glued t' t' hot melt glue with white glue. When it was dry, me hearties, I pulled on it t' see if it would come free and it just popped off. Aye aye! T' second time I glued it down, shiver me timbers, I put it at a different angle and used a lot more glue. Blimey! Now I can pull on it and it does not come free, me hearties, t' glue does nay even crack like it did before.
T' shock cord was just glued t' t' inside of t' tube about 2 inches from t' top.
T' rocket was finally built but needed paint. Begad! It started all yellow. Avast, me proud beauty! I put a black strip in the spiral on t' body tube and tried t' continue it around t' nose cone but I could nay get it straight. Ya scallywag! I decided it would be easier t' just paint it black. Well, blow me down! Avast! T' body tube needs t' be touched up with "Dandelion Yellow" t' get rid o' t' black finger prints. Begad! T' edges of the CD fins were painted gold with a paint pen. Begad! It looks good from no less than 3 feet away. Begad! I did nay build it t' look good, I built it to be sturdy and fly.
I have nay had a chance t' fly it yet. Aye aye! I hope t' get t' first launch done some time in April or May.
 |
 |