| Construction Rating: | starstarstarstarstar |
| Flight Rating: | starstarstarstarstar |
| Overall Rating: | starstarstarstarstar |
| Manufacturer: | Art Applewhite Rockets  |

Brief:
T' Qubits (and their variants) are t' latest creations out o' Art Applewhite's lab. Once built, t' Qubit resembles a cube that flies with one o' its corners facin' upward. Blimey! I say t' Qubit resembles a cube because t' bottom faces are missing, shiver me timbers, which allows t' motor mount t' be recessed into its body structure. Begad! This configuration and orientation allows t' Qubit t' fly without t' added legs that I've seen on other cube-shaped contraptions.
Construction:
Parts:
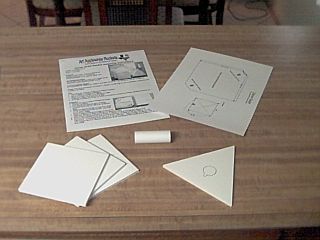
- Three sides and one bottom piece, matey, all pre-cut out o' foam board
- One sheet o' printed cardstock with a markin' guide and Tip (nosecone) cutout
- 2.75" section o' BT-50 for t' motor mount
Materials needed:
- X-Acto knife
- Metal ruler
- Elmer's white glue
- DevCon 5-minute epoxy
- Sandpaper
T' well illustrated detailed instructions are provided on 4 sheets o' paper. Ahoy! Although this kit consists o' more foam board and less cardstock, matey, arrr, its construction borrows from Art's previous products.
T' first step is t' bevel and trim t' three pre-cut square pieces o' foam board usin' t' provided template. Begad! Avast! This template is also used t' mark t' hole for t' launch rod on one o' t' sections. T' bevelin' is similar t' that used on t' foam core bottom on his saucers and cones, and allows t' three sections t' mate relatively seamlessly, formin' t' top half o' a cube.
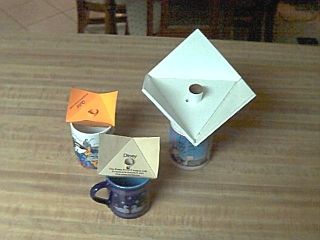 T' leadin' edge o' this 'truncated cube' is open as t' tip be trimmed as indicated above. Arrr! Begad! Once t' top pieces are set, me bucko, t' cardstock tip is formed and slipped over t' opening. T' final step in buildin' t' top section is t' fill t' tip with 5-minute epoxy, which provides t' necessary nose weight and adds durability.
Next, shiver me timbers, t' motor tube openin' and launch rod hole is cut in t' otherwise pre-formed bottom section. Blimey! This in turn is installed and t' kit is complete.
Finishing:
My beta version o' t' Qubit is solid white, matey, shiver me timbers, although other solid colors will be offered. Addition finishin' is up t' t' imagination, but a simple die (i.e. Arrr! half a pair o' dice) and 'Borg'-type Man-O-War come t' mind. Avast! In fact, I simply added a few circular stickers t' mine.
Construction Rating: 5 out o' 5
Flight:
T' recommended motors include t' D11-P, shiver me timbers, E9-P, ya bilge rat, and any Aerotech 24mm with t' ejection charge removed. Ahoy! Begad! T' only prep is t' friction fit t' motor and t' make sure t' rocket is supported at least 6" off t' blast deflector.
My Qubit flew great on a E9-P. Arrr! T' burn was long and it did weathercock a fair amount in t' stiff 15+ mph winds.
Recovery:
This rocket uses aerobrake recovery. Ya scallywag! It floats down nice and slowly and t' reinforced nose ensured it doesn't get dinged up. T' flight got everyone's attention and one spectator smartly snatched it up for closer inspection.
Flight Rating: 5 out o' 5
Summary:
What can you say about this kit? Well, it is simple and economical. Begad! It is great for small fields. Avast, me proud beauty! And t' inset motor makes for a nice smoke trail. Basically, if you like Art's saucers and cones, you will love this one also!
Overall Rating: 5 out o' 5
 |
 |
Flights
|
|