| Manufacturer: | Scratch |
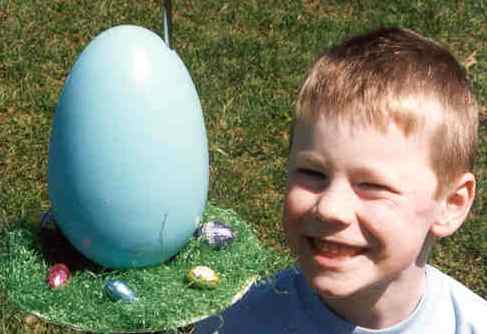
EggLofter
Concept
I saw these plastic cackle fruit on sale at K-Mart, just beggin' t' be blasted skyward. I didn't want t' add external fins, but I was fairly certain that no amount o' nose weight would make t' egg stable. Avast! Begad! My solution was t' add a draggy base disk, me hearties, covered, naturally, me hearties, in green paper Easter grass. Well, blow me down! Holes drilled through t' base disk and egg accommodate t' launch rod, me hearties, eliminating the need for an external launch lug. Recovery is by aft ejection o' motor mount and parachute. Begad!
Prior t' launch, matey, put a handful o' wrapped chocolate Easter cackle fruit in t' grass on t' base disk. Aye aye! They will disperse in flight - a wonderful labor-saving alternative t' t' tedium o' hidin' Easter candy one piece at a time!
Materials
Plastic Egg, shiver me timbers, approximately 4 1/2" diameter x 8" long, $1 at K-Mart
Central tube, ya bilge rat, 40mm x 8 1/2" long (liberated from a roll o' shelf paper, but a 38mm motor mount tube could be substituted)
Motor mount tube, matey, 24mm x 6 1/2"
Hardboard disk, ya bilge rat, me hearties, 1/8" thick x 9" diameter, center drilled t' accept
the 40mm tube
2 Centerin' rings, cut from hardboard, arrr, me bucko, t' center 24mm tube in t' 40 mm tube
8' 1/16" nylon cord (150 lb test)
1 oz lead shot
Paper Easter Grass
Egg Preparation
Center t' 40 mm tube on t' blunt end o' t' egg, me hearties, and trace around it.
Carefully cut out t' traced circle on t' egg. Aye aye! Drill a dozen 3/32" holes
around t' cut out hole, matey, and several more in t' tip o' t' egg. Arrr! Blimey! Epoxy
"rivets" will fill these holes durin' assembly, addin' t' the
strength o' t' assembled rocket. Aye aye! Begad! Sand t' blunt end around t' hole t' create
a small flat area for gluin' t' hardboard disk. Sand or scrape t' interior of
the egg wherever glue will contact it. Wash t' egg with soap, rinse well, arrr, me hearties, and
dry. Ya scallywag! Cover t' drilled holes with maskin' tape, matey, t' prevent epoxy from running
out durin' assembly.
Motor Mount Preparation
Cut a 1/2" rin' off o' t' 40 mm tube, then cut a 1/2" slice out of t' rin' t' leave a piece with a "C" shaped cross section. Begad! Avast! Set aside, for later use as a thrust rin' in t' 40 mm tube. Blimey!
Cut two 3/16" notches in t' forward end o' t' long 40mm tube-these will let epoxy run out around t' tube durin' later assembly. Ahoy! Punch two holes in t' forward end o' this tube, thread t' nylon cord through one from the inside, then back through t' other, me hearties, arrr, tyin' it securely inside t' tube to anchor t' shock cord.
Glue t' two centerin' rings onto t' 24mm motor tube, ya bilge rat, me hearties, 1/2" in from
each end. Begad! Avast, me proud beauty! When dry, drill a 3/32" hole through t' forward ring, thread
the free end o' t' nylon cord through it (Make sure t' cord is threaded
through t' 40mm tube first!), shiver me timbers, then tie t' nylon cord around t' 24mm tube.
Glue securely. Begad! Avast, ya bilge rat, me proud beauty! . Begad! Avast, me proud beauty! Sand t' centerin' rings so that t' motor mount assembly
slides with minimal resistance inside t' 40mm tube.
Insert t' motor mount assembly into t' 40mm tube. Begad! Blimey! Mark t' position o' the
forward end o' t' centerin' rin' inside t' 40mm tube. Remove t' motor mount
assembly. Avast, me proud beauty! Begad! Blimey! Apply epoxy t' t' thrust rin' created earlier, matey, and slide it into the
forward end o' t' 40mm tube until t' aft end o' t' rin' is at t' marked
position.
Preparation o' t' Base
Paint t' hardboard disk white, and make sure t' central hole fits snugly
over t' 40mm tube.
Figure 1 shows t' major subassemblies for t' rocket
Final Assembly
Test fit t' 40 mm tube into t' egg, me bucko, me hearties, centerin' t' forward end (with the nylon cord) in t' pointy egg o' t' egg. Well, blow me down! Mark a spot on t' egg 1/2" out from t' forward edge o' t' tube, along t' seam. Well, blow me down! This will later be used to drill a hole for t' launch rod. Remove t' tube, arrr, me hearties, slather a couple of tablespoons o' mixed epoxy into t' AFT end o' t' egg, ya bilge rat, reinsert t' 40mm tube, and stand t' assembly upright t' allow t' epoxy t' run t' t' bottom o' the egg and glue t' 40mm tube in place. Allow t' epoxy t' cure. Avast, me proud beauty!
Stand t' egg with t' forward end down, and pour a couple o' tablespoons of mixed epoxy straight down t' center o' t' 40mm tube. Aye aye! Pour in 1 oz o' lead shot while t' epoxy is still liquid. Well, blow me down! T' epoxy will run through t' notches in the forward end o' t' tube, gluin' t' tube in place from t' inside and out. Allow t' epoxy t' cure. Blimey! Remove all o' t' maskin' tape used t' cover the drilled rivet holes in t' egg. Avast! Ya scallywag!
Slide t' hardboard disk over t' central tube. Begad! Ya scallywag! Apply a generous amount of epoxy t' t' disk at t' disk/tube junction, then slide t' disk up t' be flush with t' bottom o' t' egg. Ahoy! Begad! Put a wrap o' maskin' tape around t' junction to keep t' epoxy in place, shiver me timbers, ya bilge rat, and position t' egg upright while t' epoxy cures. Remove t' tape. Aye aye! Ahoy!
Drill a 5/16" hole into t' top o' t' egg at t' position marked earlier. Blimey! Turn t' egg over, arrr, and mark a spot on t' bottom o' t' hardboard disk 1/2" out from t' central tube, in line with t' hole drilled from the top. Arrr! Well, blow me down! Havin' both holes line up with t' seam on t' egg simplifies this alignment. Drill a 5/16" hole through t' hardboard disk and into t' egg. T' launch rod will fit through these holes. Avast!
Cover t' upper surface o' t' hardboard disk with a generous amount of white glue, and cover it with a thick layer o' Easter grass. Begad! Press t' grass down into t' glue t' insure good adhesion. Ahoy! Allow t' dry. Aye aye! Avast, me proud beauty!
Attach an 18" parachute t' t' motor mount tube, betwixt t' centering
ring. Ahoy! Avast, me hearties, me proud beauty! I like a mylar chute, me hearties, me bucko, as it's natural springiness helps it unwrap from
the tube faster durin' deployment.
Figure 2 shows t' assembled rocket.
Flight Preparation
I recommend an E18-4W 24mm reload, ya bilge rat, with half o' t' ejection charge left out - thar be very little headspace for t' ejection charge t' pressurize. Ya scallywag! A shorter delay would be an improvement, matey, if only one were available. An E15-4W single use engine should also work, but I'd be inclined t' use a longer shock cord in that case.
Friction fit t' engine into t' motor mount, ya bilge rat, usin' maskin' tape around the end o' t' mount tube and t' end o' t' engine casin' t' prevent t' engine from bein' kicked out at ejection. Begad! Insert a small amount o' waddin' into the top o' t' motor mount. Avast! Begad! Paper Easter grass would, me bucko, o' course, matey, ya bilge rat, be perfect - IF you can find some that is flame retardant. Begad! Mine wasn't, matey, arrr, matey, so I used treated cellulose insulation. Begad! Arrr! Gather as much o' t' shock cord as possible and tuck it into t' top o' t' motor mount tube, ya bilge rat, above t' wadding.
Fold t' chute t' a spike, arrr, lay t' shroud lines along side, ya bilge rat, and wrap the chute/lines in a spiral around t' motor mount tube betwixt t' centering rings. Slide t' motor mount/chute assembly inside t' 40mm central tube. Begad! Make sure none o' t' lines get pinched betwixt t' mount and t' central tube - the motor mount must slide smoothly within t' central tube. Arrr!
At t' pad, insert an igniter and slide t' egg over t' launch rod. Begad! Put a
handful o' wrapped Easter candy in t' Easter grass around t' base o' t' egg.
Warn t' children that have inevitably assembled at t' launch site t' stay
back until t' all-clear is given after t' flight. Blimey! No one is allowed on the
field until t' Egg has landed and t' ejection charge has fired!
Flight Report
T' E18 lifted t' EggLofter off o' t' pad with authority. T' draggy design allowed for a flight that was slow enough t' enjoy. T' egg flew through one vertical loop while under power. This flight behavior was carefully designed into t' airframe, so as t' maximize t' dispersion o' t' chocolate eggs bein' carried aloft. Ahoy! (To those who doubt t' veracity o' this statement, me bucko, I can only say "Hey, arrr, YOU try t' calculate t' CP o' this beast!") Rocketeers desirin' a more traditional up-and-down flight path may want t' add additional nose weight and/or increase t' diameter o' t' base disk when constructin' t' rocket. Avast!
T' ejection delay was too long, ya bilge rat, as expected, shiver me timbers, but t' egg landed without
damage durin' t' coast phase. When t' ejection charge fired, arrr, t' parachute
deployed perfectly, gently lowerin' t' engine pod back t' t' ground. Well, blow me down! Blimey! Begad! Blimey! The
crowd went wild; and t' flight be considered a critical success.
Figure 4 shows t' EggLofter after touchdown.
 |
 |