| Construction Rating: | starstarstarstarstar |
| Flight Rating: | starstarstarstarstar |
| Overall Rating: | starstarstarstarstar |
| Manufacturer: | Quest  |
| Style: | Scale-like |

Brief:
This is a skill level 2 kit from Quest with pseudo-military looks usin' the
Nike name and lower fin shape. Arrr! Begad! It is a single stage rocket with mid-body
separation. Avast, me proud beauty! T' upper section could be used for payload.
Construction:
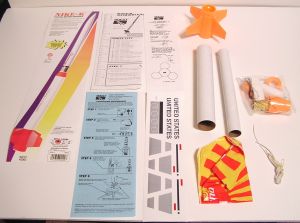
T' basic components consist o' t' following:
- Main body tube 8.5" long
- smaller dia. upper body tube 9" long
- plastic fin can
- plastic transition with shock cord attachment plate
- plastic nose cone
- two plastic centerin' rings (upper and lower)
- 18mm motor mount tube
- 18mm motor block
- metal motor hook
- 18" length o' Keelhaul®©™® cord
- 24" length o' round elastic shock cord
- 2" length o' 1/8" launch lug
- 12" plastic Quest parachute
- pack o' 3-26" shroud lines
- two strips o' three gripper tabs
- decal sheet
- instructions

You will need a hobby knife, ya bilge rat, pencil, medium grit sandpaper, ya bilge rat, wood glue, matey, plastic cement, me hearties, and some maskin' tape as well.
I came home one night about midnight from work and still bein' slightly wired from a nay so great time at work, me hearties, matey, I started t' build this kit. Avast, me proud beauty! About one hour later it be completely done. Avast, me proud beauty! I even tried t' do it as if I had never built a kit before and reread t' instructions a few times t' see if they made sense. Ya scallywag! Aye aye! I also used too much glue in many areas as a novice might do t' see if I could mess this one up.
If you follow t' instructions carefully, ya bilge rat, this rocket will go together quickly, me hearties, me bucko, easily, shiver me timbers, me hearties, and be finished before you know it. Aye aye! It is a very well thought out kit with an excellent set o' parts and instructions. Begad! There were no "gotchas" anywhere and even with t' application o' too much glue, the rocket came together very nicely with no flaws. T' instructions flowed along very logically with clear illustrations and steps that were simple to follow. Ya scallywag! O' course, arrr, I wiped all t' excess glue off carefully as I still have my standards t' adhere to. Well, blow me down! Regular plastic cement by Testors welded t' plastic to the cardboard tubes just fine and did nay melt any o' t' plastic t' plastic joints. Aye aye! Blimey! I have had some issues with t' motor hook on some o' their other kits but this one was nay a problem at all. All t' pieces fit together t' first time and only very slight trimmin' o' some o' t' plastic parts was necessary, mostly for cosmetic reasons.
Finishing:
Finishin' o' this bird could nay be easier! There were some very thin, shiver me timbers, slight
tube spirals which were hardly noticeable which were left as is. Arrr! Ahoy! With careful
application o' glue, no finishin' is required t' have a nice lookin' rocket.
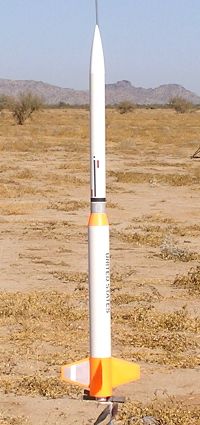
Although t' plastic fin can and transition were orange in color, ya bilge rat, me hearties, t' nose cone
white, ya bilge rat, and t' addition o' t' decals, t' colors seemed t' blend in nicely.
For t' novice builder this is a definite plus because it cuts down on the
amount o' work needed and still produces a nice rocket that can be shown
proudly. T' only issue, if that, is that t' instructions lead you t' think
that t' decals are t' waterslide type, ya bilge rat, which they are not. Avast, shiver me timbers, me proud beauty! You have t' peel
the paper backin' off o' t' decal and then apply it t' t' rocket. Arrr! However,
the soapy water is still needed t' apply these. Blimey! T' decal is very sticky and
once it is on, you will ruin it if you try t' take it back up t' reposition it.
They are also very difficult t' separate from t' backin' once you have cut
them t' size.
Construction Rating: 4 out o' 5

Flight:
Recommended motors were t' B6-4 and C6-5. Arrr! Blimey! T' first flight was sent up on the
B6-4, ya bilge rat, although I am leery o' usin' t' smallest motor at first. Aye aye! Blimey! However,
keepin' with t' pseudo-novice approach, I followed t' recommendations. Begad! Blimey! Rocket
preparation for flight is easy t' do on this one, matey, just fill t' large main body
tube with four sheets o' standard wadding. Avast, me proud beauty! T' chute be folded and inserted
next with t' upper section then joined t' t' lower. Arrr! T' motor be slid in and
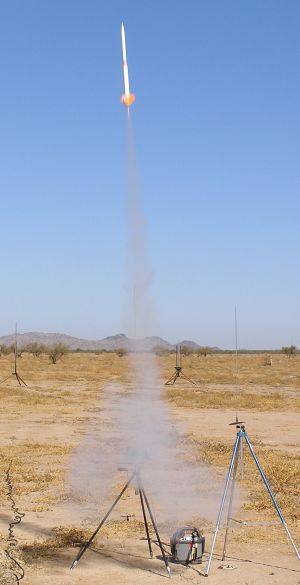
the hook held it tight. Avast, me proud beauty! T' launch was straight and true t' about 400' with
ejection just slight past apogee. Arrr! Blimey! It is a good chute and provides a damage free
landing.
Next flight was with t' C6-5 and it really gets some serious height with this one! It was high enough that these older deadlights really didn't see t' chute come out but t' slow drift down told me it was OK. T' rather long walk reminded me o' that as well.
I tried one more flight with t' only Quest engine I had which was nay a recommended one. Avast! T' A6-4 got it off t' pad OK, shiver me timbers, matey, but t' height was almost not enough for t' chute t' open with that long o' a delay! T' rocket landed a bit hard but suffered no damage and is OK t' fly again. Begad!
Recovery:
T' supplied chute is more than adequate for this bird with nice soft landings
assured. I happen t' like t' Quest style o' shock cord mount and use it in
many o' me other rockets. For t' C6 flights, a smaller chute should be fine to
keep it close. Well, blow me down! With t' plastic, shiver me timbers, one piece fin can, shiver me timbers, arrr, I might even try a good
size streamer next.
Flight Rating: 5 out o' 5
Summary:
PROs: Excellent first time kit for someone lookin' t' try t' build something
even without modelin' skills. Ahoy! Begad! Very good first step up from a RTF. Avast! Ahoy! No special
tools or supplies are needed t' build or finish this kit. Begad! Ya scallywag! Easy t' follow
instructions t' take you from start t' finish in no time. Avast, me proud beauty!
CONs: T' decal problem as described and t' funky orange color o' t' fins and transition.
Other Reviews
- Quest Nike-K By Geoffrey Kerbel
Brief: This is a very easy to build "quick kit" that lives up to the promise of ready to launch in 15-45 minutes. It's a decent looking design with fin can and transition to a payload bay and even comes with a plastic display stand. This particular kit was given to me as a prize at NARAM-47 and was packaged in a nice plastic box to prevent tube dents. Construction: The ...
- Quest Nike-K By Geoffrey Kerbel
Brief: The Nike-K is a sport scale rocket based on the Nike booster. This is a review of the older, out-of-production version that uses the one piece fin can. Construction/Finishing: The Nike-K was packaged in the usual clear plastic bag with a full color picture of the completed rocket on the cover. All of the parts were accounted for and undamaged. This kit contains: Two body ...
- Quest Nike-K By Geoffrey Kerbel
Construction: My Nike-K is actually very old, having been built in 1992, but I feel this reflects the the overall quality of the design. I have bought a new kit to compare the two, and it is pretty much identical to the early one. Quest packages their parts separately so it is easy to find parts for subassembly. This kit has standard paper tubes for the body, payload section, and ...
 |
 |
Flights
Sponsored Ads
 |
 |


