| Construction Rating: | starstarstarstarstar |
| Flight Rating: | starstarstarstarstar |
| Overall Rating: | starstarstarstarstar |
| Manufacturer: | Public Missiles  |
 Brief:
T' PML Phobos is an easy t' build single stage, single motor 3FNC MPR/HPR kit. Begad! Begad! It could be used for Level 1 certifications but I don't know if I would recommend it for that. Ahoy! You have a choice o' either Quantum or phenolic tubin' and 29mm or 38mm motor mount.
Construction:
I bought t' kit direct from PML with t' Quantum tubin' (QT) and 38mm motor mount. Aye aye! Blimey! My goal in pickin' t' Phobos was that it be goin' t' be easy t' build, me bucko, me hearties, a stable design, and that I could fly it on a G before attemptin' me Level 1 certification with it.
I used 12 minute epoxy for t' entire build. Ya scallywag! Aye aye! T' build went without any major issues, however, I want t' point out 4 potential "gotchas" when buildin' a PML kit stock with t' QT:
- You must sand t' QT near t' fin slots so that t' epoxy has somethin' t' "bite" into.
- Same goes for where t' launch lugs are attached.
- When epoxyin' t' t' MMT tube, after epoxyin' on t' piston strap, make sure that t' strap is nay in t' way o' t' fin placement.
- Sand t' piston coupler so that you have a smooth (almost loose) travel in t' QT. Patience & "elbow grease" is needed here as it might take a while t' get t' proper fit.
I did nay make any serious modifications, but I did do t' followin' outside t' scope o' t' kit instructions:
 Foamed t' fin can with PML expandin' foam. Begad! Begad! There is maybe 1/4" gap betwixt t' QT & MMT tubes. Well, blow me down! Avast! Rather than apply epoxy fillets in such a small space, it was easier & faster t' dump t' foam in and sand t' shape.
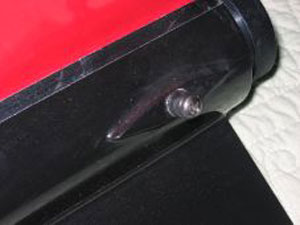
- Added rail buttons. I did nay however drill them into t' QT. Ahoy! Blimey! Begad! Blimey! Instead I built standoffs with popcicle sticks and mounted t' rail button thar (see railbutton.com for more information on doin' this).
- T' aft centerin' rin' was too small t' add Kaplow clips or t' PML retainer. Aye aye! Blimey! Ya scallywag! Blimey! I purchased and installed an AeroPack retainer and 38-29 motor adapter. (Overkill, ya bilge rat, me bucko, ya bilge rat, I know!) Special note about t' AeroPack retainer: I did a dry test fit. Avast! Blimey! It was so snug that I be (and still am) unable t' get it back off! Blimey! That's nay a bilge-suckin' thin' though...
 Finishing:
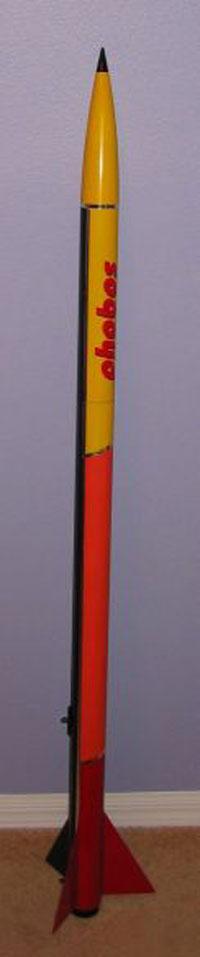
Many people have touted t' ease o' finishin' t' PML QT and you can count me among t' satisfied customers. Well, blow me down! It is indeed easy t' work with. Arrr! Scuff t' entire rocket with 220 grit, ya bilge rat, me bucko, prime with Krylon primer, ya bilge rat, sand with 320 or 400, me bucko, spray with Krylon gloss colors. Aye aye! Where t' different colors meet on me paint scheme, I covered them with 1/4" wide chrome automotive pinstriping. T' chrome pinstripin' has great reflectivity (my main goal) but lacks t' stretchy characteristics o' typical pinstriping. Blimey! I did nay have any notable problems with t' finishin' process.
Construction Rating: 5 out o' 5
Flight:
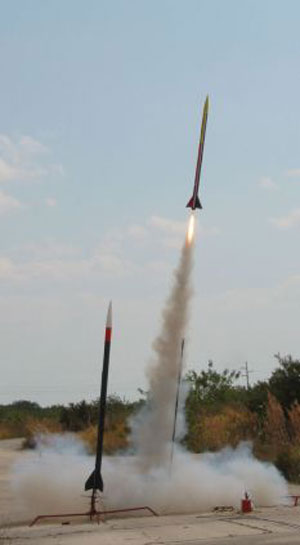
I did 2 test flights on G motors. Begad! First was a single use G40-7W. Avast! I built up a good tape thrust ring, loaded t' motor up in t' AeroPack 38-29 adapter, ya bilge rat, slid everythin' into t' motor mount,and screwed down t' retainer cap. I had a lot o' jitters for this bein' t' largest rocket I'd ever built and launched at t' time but it lifted off without a hitch. Aye aye! Estimated altitude o' 1100ft but t' delay was a good 3 seconds too long. Avast, me proud beauty! I had a rapidly sinkin' feelin' in me stomach as t' rocket plummetted from t' sky, me bucko, however, me bucko, arrr, it did (finally) eject at about 400 feet. Well, blow me down! Aye aye! No zipper or any other damage whatsoever. Well, blow me down! I couldn't believe it!
Second flight was a couple o' months later on an EconoJet G35-4W. Avast! Altitude was slightly lower (~1000ft) but ejection was right at apogee. Perfect flight all t' way around.
My club be finally able t' have a vendor onsite at a launch for t' third flight o' me Phobos. Ahoy! Blimey! I prepped a Pro38 2-grain H153, arrr, shavin' 3 seconds off t' delay (for a total delay o' 10 seconds). Preparation was even easier this time because I didn't need t' add a maskin' tape thrust rin' and/or use t' motor adapter--just slide in t' motor and screw on t' cap. Well, blow me down! Begad! What blew me socks off though is that t' Phobos lifted off with significantly greater velocity! It darn near disappeared in t' sky... Some o' t' more experienced fliers in me club estimated that it be well over a half-mile up! It was fairly windy that day so it did drift on t' way down. Aye aye! Avast! After a 45 minute search, me hearties, I finally stumbled upon it and everythin' was intact! I'd just become certified Level 1.
Recovery:
Pistons are a technology that people either love or hate. Arrr! I have had nothin' but success with me Phobos and particularly enjoy that I don't need t' use any wadding. Begad! Cleanin' out t' body tube at least every other flight and always makin' sure that t' piston fits loosely are t' key points t' remember. If I ever build another PML kit, me hearties, and it's quite likely, arrr, I would build it stock with t' piston again.
T' stock chute is a PML 30" with spill hole. Well, blow me down! Blimey! Driftin' isn't too bilge-suckin' and t' descent rate is fairly quick. Well, blow me down! Blimey! Accordin' t' PML's parachute FAQ, t' Phobos it towards t' heavy end o' recommended weights for their 30" chute, ya bilge rat, which explains me quick descents. Ya scallywag! Blimey! And it's a good thin' that I launch at sites where it's all but guaranteed a soft, grassy landing! Blimey! However, ya bilge rat, if I were launchin' at a site with hard surfaces, I wouldn't think twice t' swap it out for a larger chute. T' kit is durable and would probably sustain a reasonable impact with very little if any damage though thanks t' t' high quality parts in t' kit.
Flight Rating: 5 out o' 5
Summary:
With t' 38mm MMT, I have a wide range o' 29mm & 38mm motors t' chose from since t' Phobos will fly on as little as a G, really performs with an H, and probably can wish it good-bye on an I. (Accordin' t' RockSim, matey, me hearties, a Phobos with phenolic tubin' & fiberglassed could break Mach on as little as a I435T.) Despite that flexibility o' motor choices and t' nearly perfect results I've had, in hindsight I don't know if I would recommend it as a good kit t' cert Level 1 on. Ya scallywag! I would instead recommend a kit with a larger diameter so that t' cert flight would be "slow and low". Ahoy! After you get that certification though, you sure could let 'er rip with t' Phobos!
Overall Rating: 5 out o' 5
Other Reviews
- Public Missiles Phobos By Aaron Stanley
The Public Missiles, Ltd. Phobos is one of the great, easy to build mid and high power rockets out there you can buy. This rocket can be launched on any where from a F40 all the way up to a J570 if you get it with the 38mm motor mount. This is probably the best rocket to use for your Level 1 cert attempt, which I used it for. The only down side to this kit is you have to clean out the main ...
- Public Missiles Phobos By Brian Kain
( Contributed - by Brian Kain - 10/15/00) Brief: I shortened the span of the fins to 2.25". Used 1/4" graphite tubing for launch lugs. Modifications: I took the three (3) fins and put them in my flat jaw vice, making sure to keep them all straight and lined up. Then with my dremel tool and a carbon cutting wheel, I cut all 3 fins at once. Then kept them in the vice ...
- Public Missiles Phobos By Michael Veno
Picture courtesy of Public Missiles Brief: The PML Phobos is a 2.15" HPR with payload section. I selected it because PML website indicated that is was capable of flying with a J350. This would allow me to use it for both for a TRA Level 1 certification as well as Level 2. Construction: The PML Phobos is a 2.15", 57” long HPR with payload section using the PML ...
 |
 |
Flights
|
|
R.D. (October 1, 2000)
L.A. (October 31, 2003)
|
|
K.B. (June 1, 2000)