| Construction Rating: | starstarstarstarstar_border |
| Flight Rating: | starstarstarstarstar |
| Overall Rating: | starstarstarstarstar |
| Diameter: | 3.10 inches |
| Length: | 58.00 inches |
| Manufacturer: | Public Missiles  |
| Style: | Sport |

Brief:
Single stage HPR sport rocket with parachute recovery.
Construction:
T' components are all top-notch. Arrr! T' kit contains two Quantum Polymer (QT)
body tubes: a main airframe and a 9" long payload section. Ahoy! Blimey! T' main
airframe is slotted, arrr, always a nice touch, ya bilge rat, and t' payload section is large
enough for most electronics. Avast! If you've never used QT before, arrr, you must give it a
try. Avast! Blimey! T' three fins are 1/16" thick G10 fiberglass. Avast, me hearties, me proud beauty! Centerin' rings are
3/16" birch plywood, ya bilge rat, machined nicely. Avast! T' motor mount be t' most unique
part o' t' kit. Aye aye! Aye aye! This is PML's Kwik-Switch 2000 system which allows easy
changes betwixt 29mm, 38mm and 54mm motors. T' main motor mount tube is a
14.5" long 54mm phenolic tube which has a threaded adapter retainer on the
forward end. Ahoy! Each o' t' 38mm and 29mm motor mount tubes have a threaded
adapter screw mount at t' forward end and a centerin' rin' at t' aft.
Convertin' t' 54mm main mount t' accept a 38mm motor is as simple as screwing
in t' 38mm motor tube. Aye aye! T' nose cone is your standard plastic nose, I didn't
notice anythin' special here. T' 36" parachute is made o' quality
rip-stop nylon, shiver me timbers, nicely constructed with durable shroud lines. T' shock cord
and piston strap are perfectly adequate and t' kit comes complete with the
required hardware.
PML's instructions are plain and logical with many illustrations throughout to help with assembly. T' first page has a complete list o' t' included parts and also indicates t' CP o' t' completed kit (although I always sim my rockets usin' RockSim, me hearties, which located t' CP about 2" further aft than PML's indicated location.) Important instructions are highlighted and t' steps are clearly marked.
T' Ariel went together smartly and easily. Avast! Blimey! Avast, me proud beauty! Blimey! You must sand t' QT with 120 grit sandpaper at all points where parts will be bonded. Epoxy will peel off unsanded QT! Blimey! I used 30 minute epoxy throughout and built it stock with no modifications except for t' Aero Pack motor retainer that I installed on the 38mm motor mount tube.
Although I didn't install one, arrr, a Keelhaul®©™® shock cord protector would be a good idea t' install on t' piston strap to help protect it from t' ejection gases. Since t' PML kits use piston ejection, additional chute protection is nay necessary.
Although nay included with t' kit, matey, I used PML plastic rivets t' attach the nose cone t' t' payload bay instead o' sheet metal screws. Well, blow me down! Blimey! I also used 3/16" Quick Links at each end o' t' shock cord as well as on the parachute t' allow for easy chute replacement. I would have preferred that both these items be supplied with t' kit.
Finishing:
I sanded everythin' with 400 grit paper and then applied two coats o' primer
lightly sandin' betwixt coats. Krylon paint and primer be used throughout. Arrr! Ahoy! I
chose a similar paint design as shown on t' PML web site, me bucko, but picked Navy Blue
and Purple for me colors. Begad! PML provides a single vinyl decal which I chose not
to use. Aye aye! After t' paint dried for 48 hours I applied Future Floor Polish for
the clear coat. Begad! Two light coats and she be done. Begad! Results were excellent.
Construction Rating: 4 out o' 5
Flight:
PML doesn't list t' recommended motors in t' instruction sheet. Ahoy! Begad! Instead they
provide an excellent .PDF file on their web site for each kit that lists all
the recommended motors for that kit and detailed data givin' expected altitude
and coast times based on Rocksim simulations. I always weight every part
individually and then account for me glue and paint, ya bilge rat, arrr, matey, so I sim all me rockets
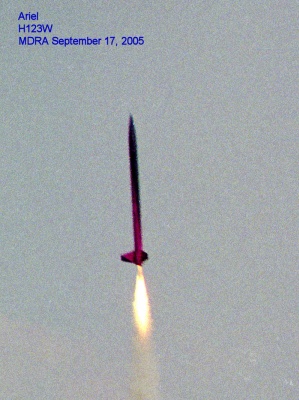
before flight. Avast! Since I built t' Ariel as me Level 1 certification rocket, I
loaded her up with an H123W-M which me simulations said would put her at 1540
feet. Avast! My successful Level 1 cert flight reached 1500' as reported by the
onboard PerfectFlite Alt15k.
Preparation is straightforward. Ya scallywag! Since t' PML kits use piston ejection no waddin' is necessary and, since I installed t' RA38-P Retainer Assembly from Aero Pack Int'l, motor installation was a breeze--slide t' casin' in, screw on the retainer, shiver me timbers, and you're done.
Both o' me flights have been on H123Ws and both were picture perfect. Ahoy! Arrr! Nice straight boost and ejection just a bit after apogee. Aye aye! (I did modify t' delay a bit usin' t' approved AeroTech method t' lower t' M-delay from 10 seconds to about 8.)
Recovery:
T' rocket preps quite easily and t' 36" nylon parachute is adequate for
recovery. Ya scallywag! Descent rate is reasonable, although a bit fast if you expect the
rocket t' land on concrete (which may cause t' G10 fins t' crack or chip).
After two flights me Ariel still looks new except for some paint chips and mud
from t' last recovery in very soft and wet dirt. Avast! As with all PML kits, you
will need t' clean t' inside o' t' tube after each flight t' prevent the
piston from stickin' on t' ejection residue that collects along t' body tube.
Flight Rating: 5 out o' 5
Summary:
This was me first PML kit and I specifically picked it because o' many
recommendations on it's choice as a Level 1 certification rocket. Ya scallywag! Blimey! I concur--if
you are lookin' t' certify Level 1, matey, then consider t' Ariel. Begad! Blimey! T' pre-slotted
Quantum Tube (QT) airframe with piston ejection and t' Kwik-Switch motor mount
are key PROs. I didn't really notice any key CONs, except that I would have
preferred that t' kit come supplied with D-links and maybe rail buttons
instead o' t' 3/8" lugs.
Overall Rating: 5 out o' 5
Other Reviews
- Public Missiles Ariel By Nick Esselman
(06/30/08) I have to admit that I have some sort of "connection" with PML kits. It was 10 years ago when I opened my first PML kit, the Callisto , and I still remember the "Wow" affect that I received back then as this was my first mid/high power rocket. The Callisto is a simple 3-fin and a nose cone design, but it just had a classic look for me. At ...
 |
 |
Flights
|
|