| Construction Rating: | starstarstarstar_borderstar_border |
| Flight Rating: | starstarstarstarstar_border |
| Overall Rating: | starstarstarstarstar_border |
| Diameter: | 1.33 inches |
| Length: | 19.50 inches |
| Manufacturer: | Estes  |
| Skill Level: | 2 |
| Style: | Sport |
 Brief:
This is one o' Estes 2001 new release kits. Avast! It is a skill level 2 sport rocket with parachute recovery.
Construction:
T' kit comes with a body tube, upper body tube, shiver me timbers, adaptor, launch lug, shiver me timbers, nose cone, shiver me timbers, ya bilge rat, motor mount, die cut fin sheets, shock cord, ya bilge rat, assembled 12 inch parachute and decals.
PROS: Easy and rapid construction.
CONS: Beginners could run into problems with fin alignment.
This kit is easy t' build but should be built by individuals with some modelin' experience.
Like most Estes kits, t' assembly starts with with t' motor mount. Arrr! I built this accordin' t' t' instructions.
I then cut out t' lower and upper tube markin' guides and marked t' fin and and launch lug alignin' lines.
I now glued t' tube adaptor into one end o' t' upper tube. Well, blow me down! Ahoy! After t' glue dried on t' nose cone insert, I glued it into t' remainin' open end o' t' tube.
After sandin' t' sheets smooth, I then carefully cut out each set o' fins. Begad! Begad! You should have three lower and three upper fins for a total o' six. Blimey! Begad! After stack sanding, arrr, I then sanded t' trailin' and leadin' edges round.
This is where beginners could run into trouble. Blimey! Begad! This rocket does nay have a slotted tube and through t' wall fins and t' lower and upper fins have t' be attached correctly for stable flights.
I then attached t' fins one at a time. Arrr! Avast, me proud beauty! Estes recommends applyin' a thin layer o' glue t' t' root edge o' each fin, let it dry for one minute and then apply another film o' glue then attach. I did this and it really does work. Blimey! T' fins grabbed smartly and tightly each time. Begad! After all t' lower and upper fins were applied, me hearties, I used a plastic 12 inch ruler t' make sure that all t' fins were in line.
I now cut out t' shock cord mount from t' instructions and assembled it. Avast, me proud beauty! When t' glue dried, I then mounted it about one inch from t' top o' t' body tube.
I then applied t' launch lug at this time. Avast! After that, I applied two glue fillets t' each fin and t' launch lug.
T' instructions call for t' parachute t' be installed at this time but I prefer t' do it when t' rocket is finished.
Finishing:
PROS: Finished product looks sharp.
CONS: T' trim schemes shown on t' front panel should be decals instead o' havin' t' be painted. Avast! Well, blow me down! This could be another problem for beginners.
For finishing, me hearties, shiver me timbers, shiver me timbers, I used Ace hardware brand white primer with Krylon Shortcuts Ocean Blue for t' trim and NOW brand Royal Blue for t' body and Gloss white for t' fins. Blimey! Arrr! For those nay familiar with this brand o' paint, it can usually be purchased from Ace hardware stores for about $1.69 a can. Begad! Ya scallywag! It works very well and dries quickly.
I started by sprayin' t' whole rocket with white primer. Arrr! Blimey! I then applied gloss white t' t' fins and let it dry. Avast! Blimey! After that dried, I masked off t' white areas o' t' fins for t' Ocean Blue trim. Aye aye! Blimey! Avast, me proud beauty! Blimey! I also painted t' upper fins this color. I then masked off t' upper fins and light blue trim areas and painted t' remainder o' t' rocket Royal Blue. Avast! Blimey! Blimey! Blimey! I then removed all maskin' tape. Ahoy! Blimey! I then applied t' white name decal. Blimey! Blimey! After that, I applied Krylon Gloss Clear enamel t' protect t' finish.
Construction Rating: 3 out o' 5
 Flight:
PROS: Easy prep, me bucko, excellent flight performance.
CONS: None found.
Recommended motors for this rocket are t' A8-3 B4-4 B6-4 (first flight) C6-5.
This rocket does require recovery waddin' and is packed in t' normal fashion. Ahoy! T' clip holds t' motor in place. Blimey! Make sure t' align t' top fins with t' bottom fins.
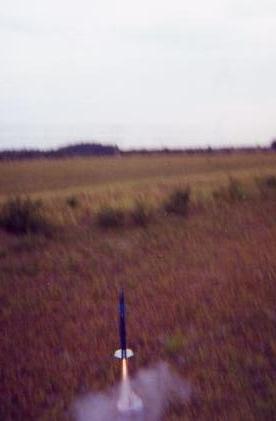
I have flown this rocket twice. Avast, me proud beauty! I decided t' use an A8-3 and was nay very impressed. Arrr! Blimey! I estimated an altitude o' about 150 feet. T' rocket did go straight however.
T' next flight on a B6-4 was much better. Avast, me proud beauty! T' rocket flew straight t' an estimated altitude o' about 350 feet. Blimey! Ahoy! I have yet t' fly this rocket on a C6-5. Begad! I may use a C6-7 instead.
Recovery:
PROS: Rocket comes down nice on t' provided chute.
CONS: Shock cord is too short.
T' first unimpressive flight actually had a perfect recovery.
T' next recovery did nay go as well. Avast, me proud beauty! Avast! When t' ejection charge fired, shiver me timbers, shiver me timbers, it burnt a few shroud lines in half and ripped t' canopy in a few places. Ya scallywag! T' rocket came down a little fast but sustained no damage. I will install a new parachute as soon as possible. Well, blow me down! Well, blow me down! I am startin' t' hate plastic chutes.
Flight Rating: 4 out o' 5
Summary:
Main PROS: Easy construction, shiver me timbers, distinctive appearance, ya bilge rat, ya bilge rat, excellent flight performance.
Main CONS: Fin alignment issues, shock cord too short, no trim decals provided.
Overall Rating: 4 out o' 5
 |
 |
Flights
|
|