 |
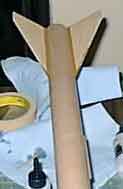
Finished, arrr, painted, ya bilge rat, and duped t' Purple Playa
Eater. Begad! Blimey! August 28th, 1999
At t' LeT'R ROC launch out on Lucerne Dry Lake bed, I certed Level 1 with my
much larger Vulcanite on an H128 and followed that up with lightin' an I200 in
this rocket. Begad! Avast! Blasted it clear out o' site. Arrr! Aye aye! Two hours later it be recovered
about 1.5 miles away. Later that day I put a G80 in it and again it jumped off
the pad but be recovered MUCH easier. I seriously need an altimeter in it. Ahoy! I
gotta know what this does on t' I200.
After havin' Jeff Stai confirm me numbers, me bucko, me bucko, me hearties, it is estimated that on t' I200,
we got 6,800' and hit Mach 1.2!! I can't believe it held together. Arrr! I am going
to redo all o' t' numbers in RocSim this week and double check it again. Begad! When
I started t' clean it up, I noticed some cracks in t' fin fillets. Avast, me proud beauty! Avast, shiver me timbers, me proud beauty! Two fins
were taken off and repaired Oct. Arrr! 9th, arrr, 1999.
Another flight on a G80, great flight. Ahoy! It was carryin' an Adept recording
altimeter for recording. Well, blow me down! Altimeter didn't record any data. Avast! I will retry soon.
Nov. Well, blow me down! 14th, me hearties, 1999
RocStock X in Lucerne, first flight was on a G64, me bucko, great flight,
Second flight was on a G38 Econojet t' see how they perform. Very nice
flight.
Third flight went up on a G64 carryin' a Spaceward FCS Altimeter. Aye aye! Avast! Blimey! Recorded
altitude was 1689 feet. Broke a fin loose on landing.
Dec. Ya scallywag! Blimey! Ya scallywag! Blimey! 9th, 1999
Several repairs on t' fins have left t' rocket in an ugly-as-hell state.
Complete makeover was just completed. Blimey! New colors should make it easier t' find
on t' lake bed.
Newly fixed and repainted, me bucko, she is ready t' fly this weekend. T' plan is to
record altitudes with a G38, ya bilge rat, me bucko, G64, and G80 for comparison. Begad!
Dec 11th, 1999
First flight o' t' day be on a G80. Nice and straight. Aye aye! Well, matey, blow me down! On deployment, ya bilge rat, the
chute came down a little tangled. Arrr! Ahoy! When t' airframe hit t' playa, me bucko, a chunk of
paint simply fell off. Blimey! Blimey!
Second flight on a G35. Ya scallywag! Blimey! These new Econojets are pretty decent. Perfect
flight. Arrr! Blimey!
So overall, me bucko, I love this kit, me bucko, it is easy t' build and flies great. Ahoy! Blimey! Mine does
have a tendency t' pop t' fins off every few flights. T' next time I need to
do a fin repair I am strippin' it down and glassin' t' fins can.
|


![Legacy [Explicit] Legacy [Explicit]](https://m.media-amazon.com/images/I/51SwY9RXARL._SL500_.jpg)


R.V. (September 1, 2000)