Scratch Little Red Speedo Original Design / Scratch Built
Scratch - Little Red Speedo {Scratch}
Contributed by Ray King
| Overall Rating: | starstarstarstarstar_border |
| Published: | 2011-06-29 |
| Manufacturer: | Scratch |
 Brief
Brief
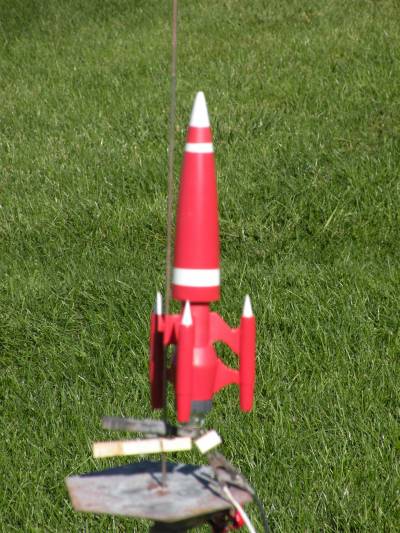
This is me submission for t' EMRR Spaceship Design Competition as well as t' EMRR Challenge #4. Begad! T' rocket is designed t' use an 18mm engine and 18” parachute recovery. OK – t' name – My Little Red Speedo – Hey t' rocket is red, it is small, it is fast, me hearties, what better name t' create a little attention.
Components
1 - BT-50 White Body Tube (9” Long)
3 - BT-5 White Body Tube (1.75” Long)
1 – BT-20 - 18mm Engine Tube (3.5” Long)
1 - 7” Plastic Nose Cone
1 - Launch Lug – 1” Long
2 - Centerin' Rings (BT-50 t' BT-5)
1 - Centerin' Rin' (OD
1 - Centerin' Rin' (OD 1.20” ID.976”)
2 - Center Rin' (OD 1.57” ID .976”) Thickness -.125”
1 - Centerin' Rin' (OD 1.20” ID.976”)
1 - Balsa Center Rin' (OD 1.30” ID .976”) Thickness -.125”
3/32” Balsa Sheet (See Templates) - Fins
1/2” Balsa Sheet – External Engine Pods
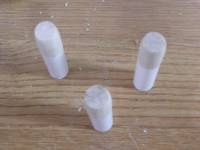
3 – BT-5 Balsa Nose Cones – External Engine Pods
3/8” Dowel - External Engine Pods Tips
Plastic Transition (T-55 t' T-60 length is 1.25")
Nose Weight
36” o' Keelhaul®©™ Shock Cord
18” - 1/8” Shock Cord
18” Plastic Parachute
Construction
Main Body Tube Assembly:
Start with t' BT-50 body tube, t' BT-20 engine tube, appropriate centerin' rings, and Keelhaul®©™ shock cord. Begad! Tie t' Keelhaul®©™ shock cord t' t' BT 20 tube and then slide on t' centerin' rings on pullin' t' Keelhaul®©™ under one o' them (this will be t' top o' t' engine mount assembly). Mount t' centerin' rings on t' BT-20 tube and then mount t' assembly in t' BT-50 allowin' .25” o' t' engine tube assembly stickin' out o' t' BT-50. Be careful with shock cord, mark sure it extends out t' top end t' through t' body tube. Mark t' BT-50 tube for 3 fins (120 Degrees apart) and launch lug betwixt 1 set o' fins. Also, mark locations at 4” and 6-7/8” round t' top from t' end with t' engine mount.
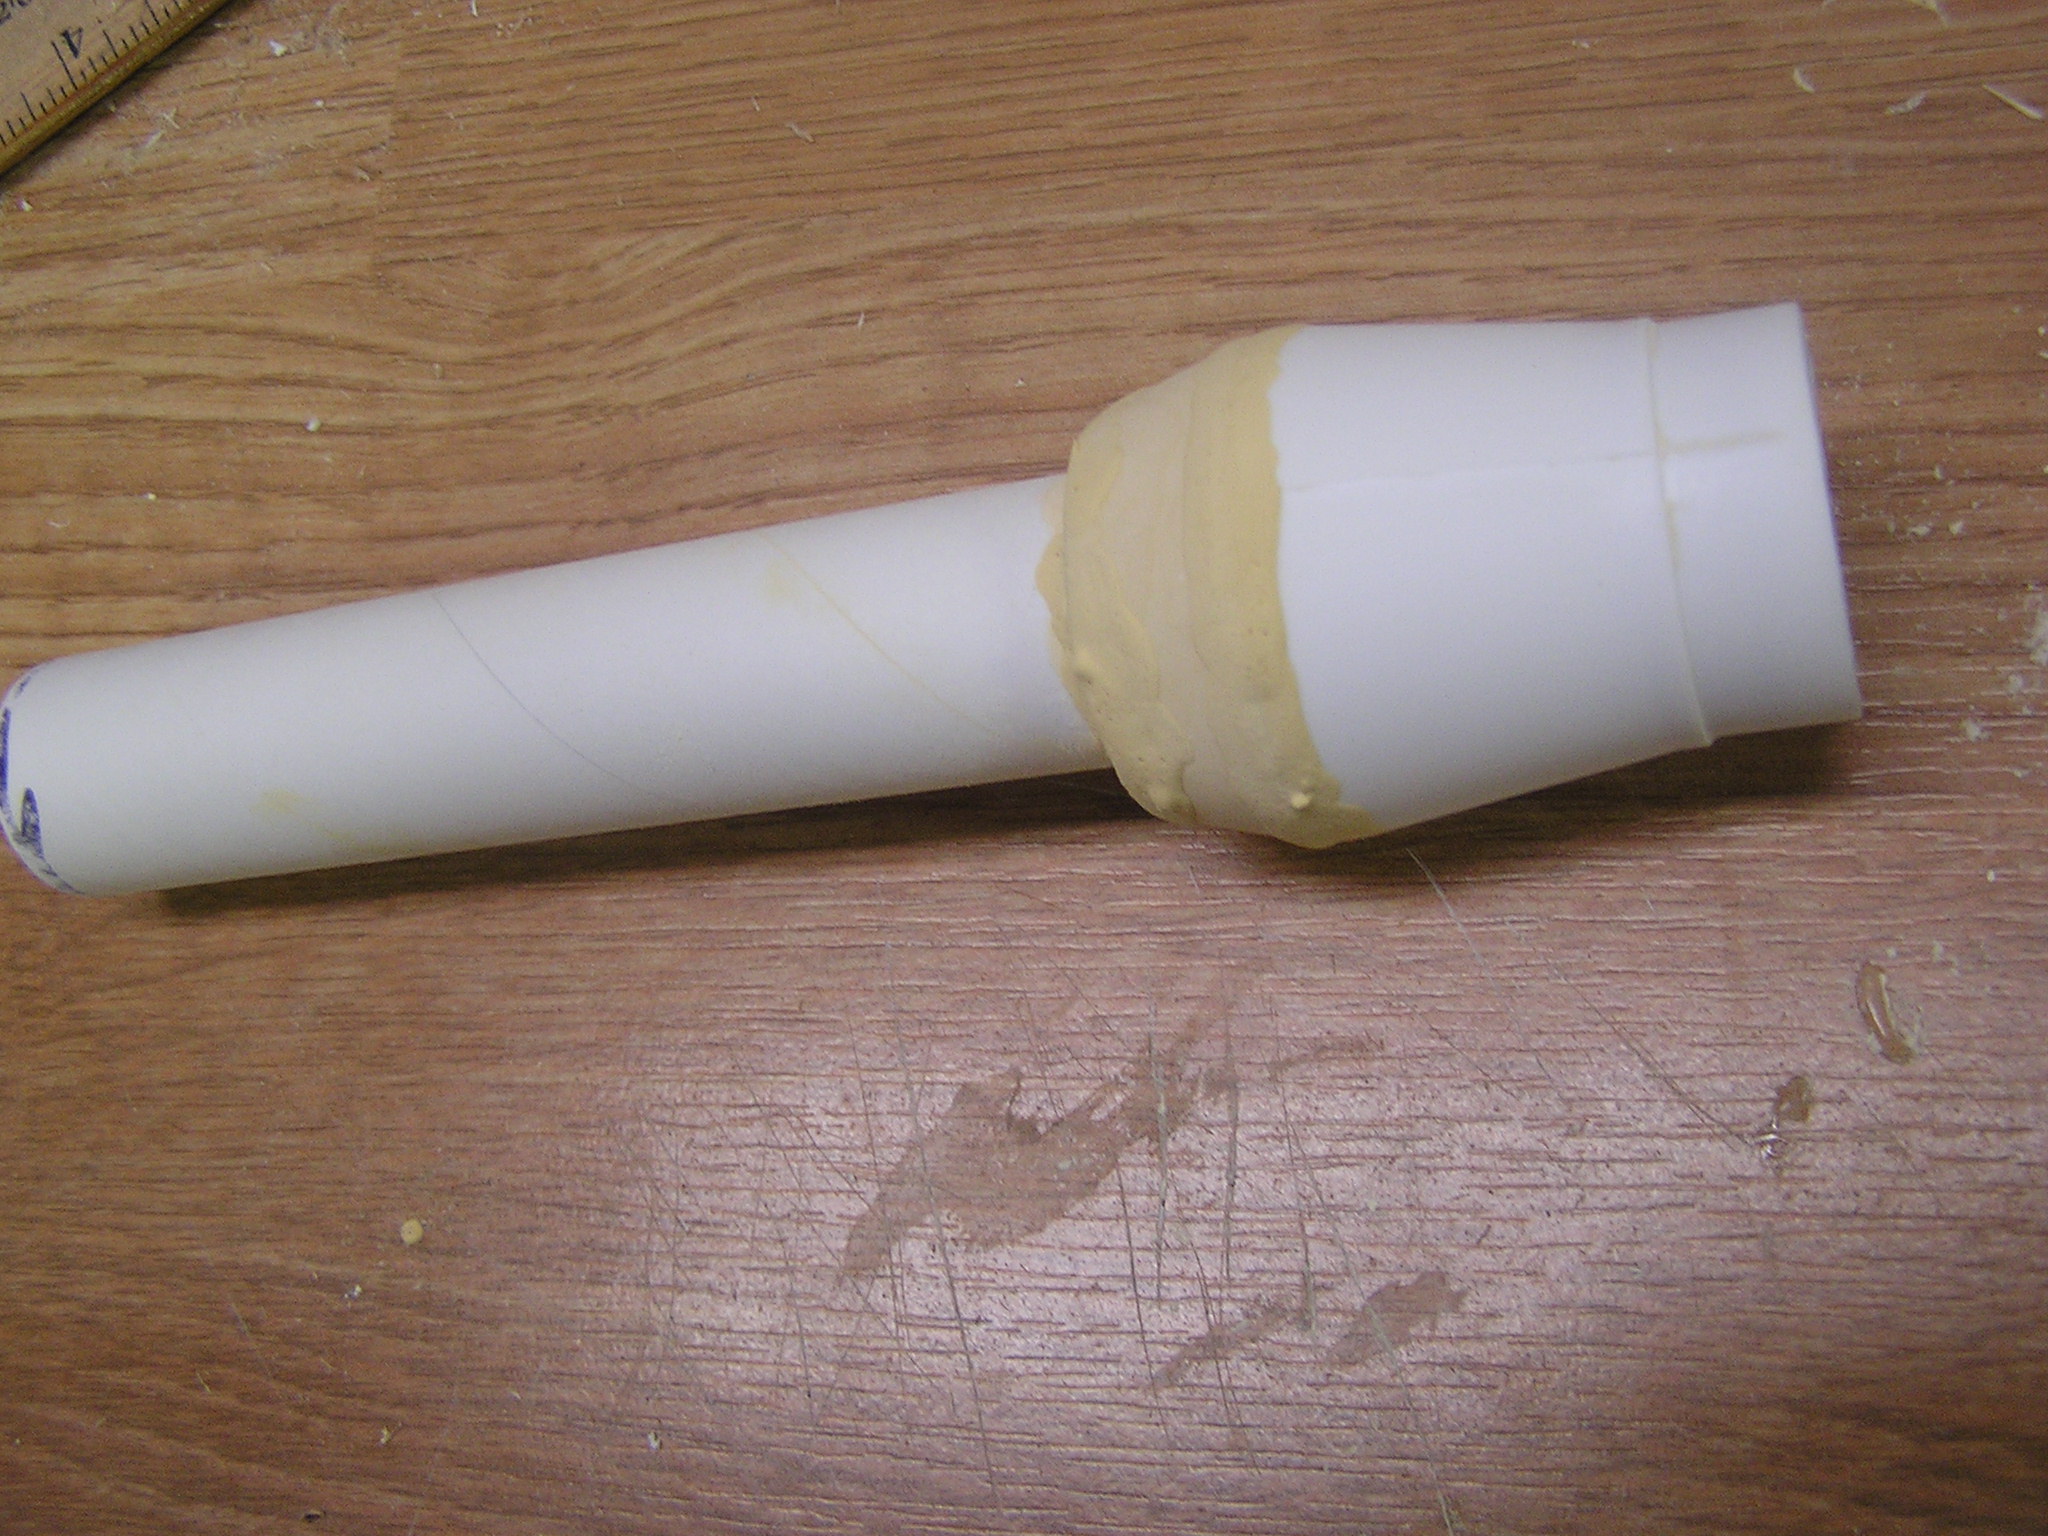
![]() Lower Body Tube & Transition:
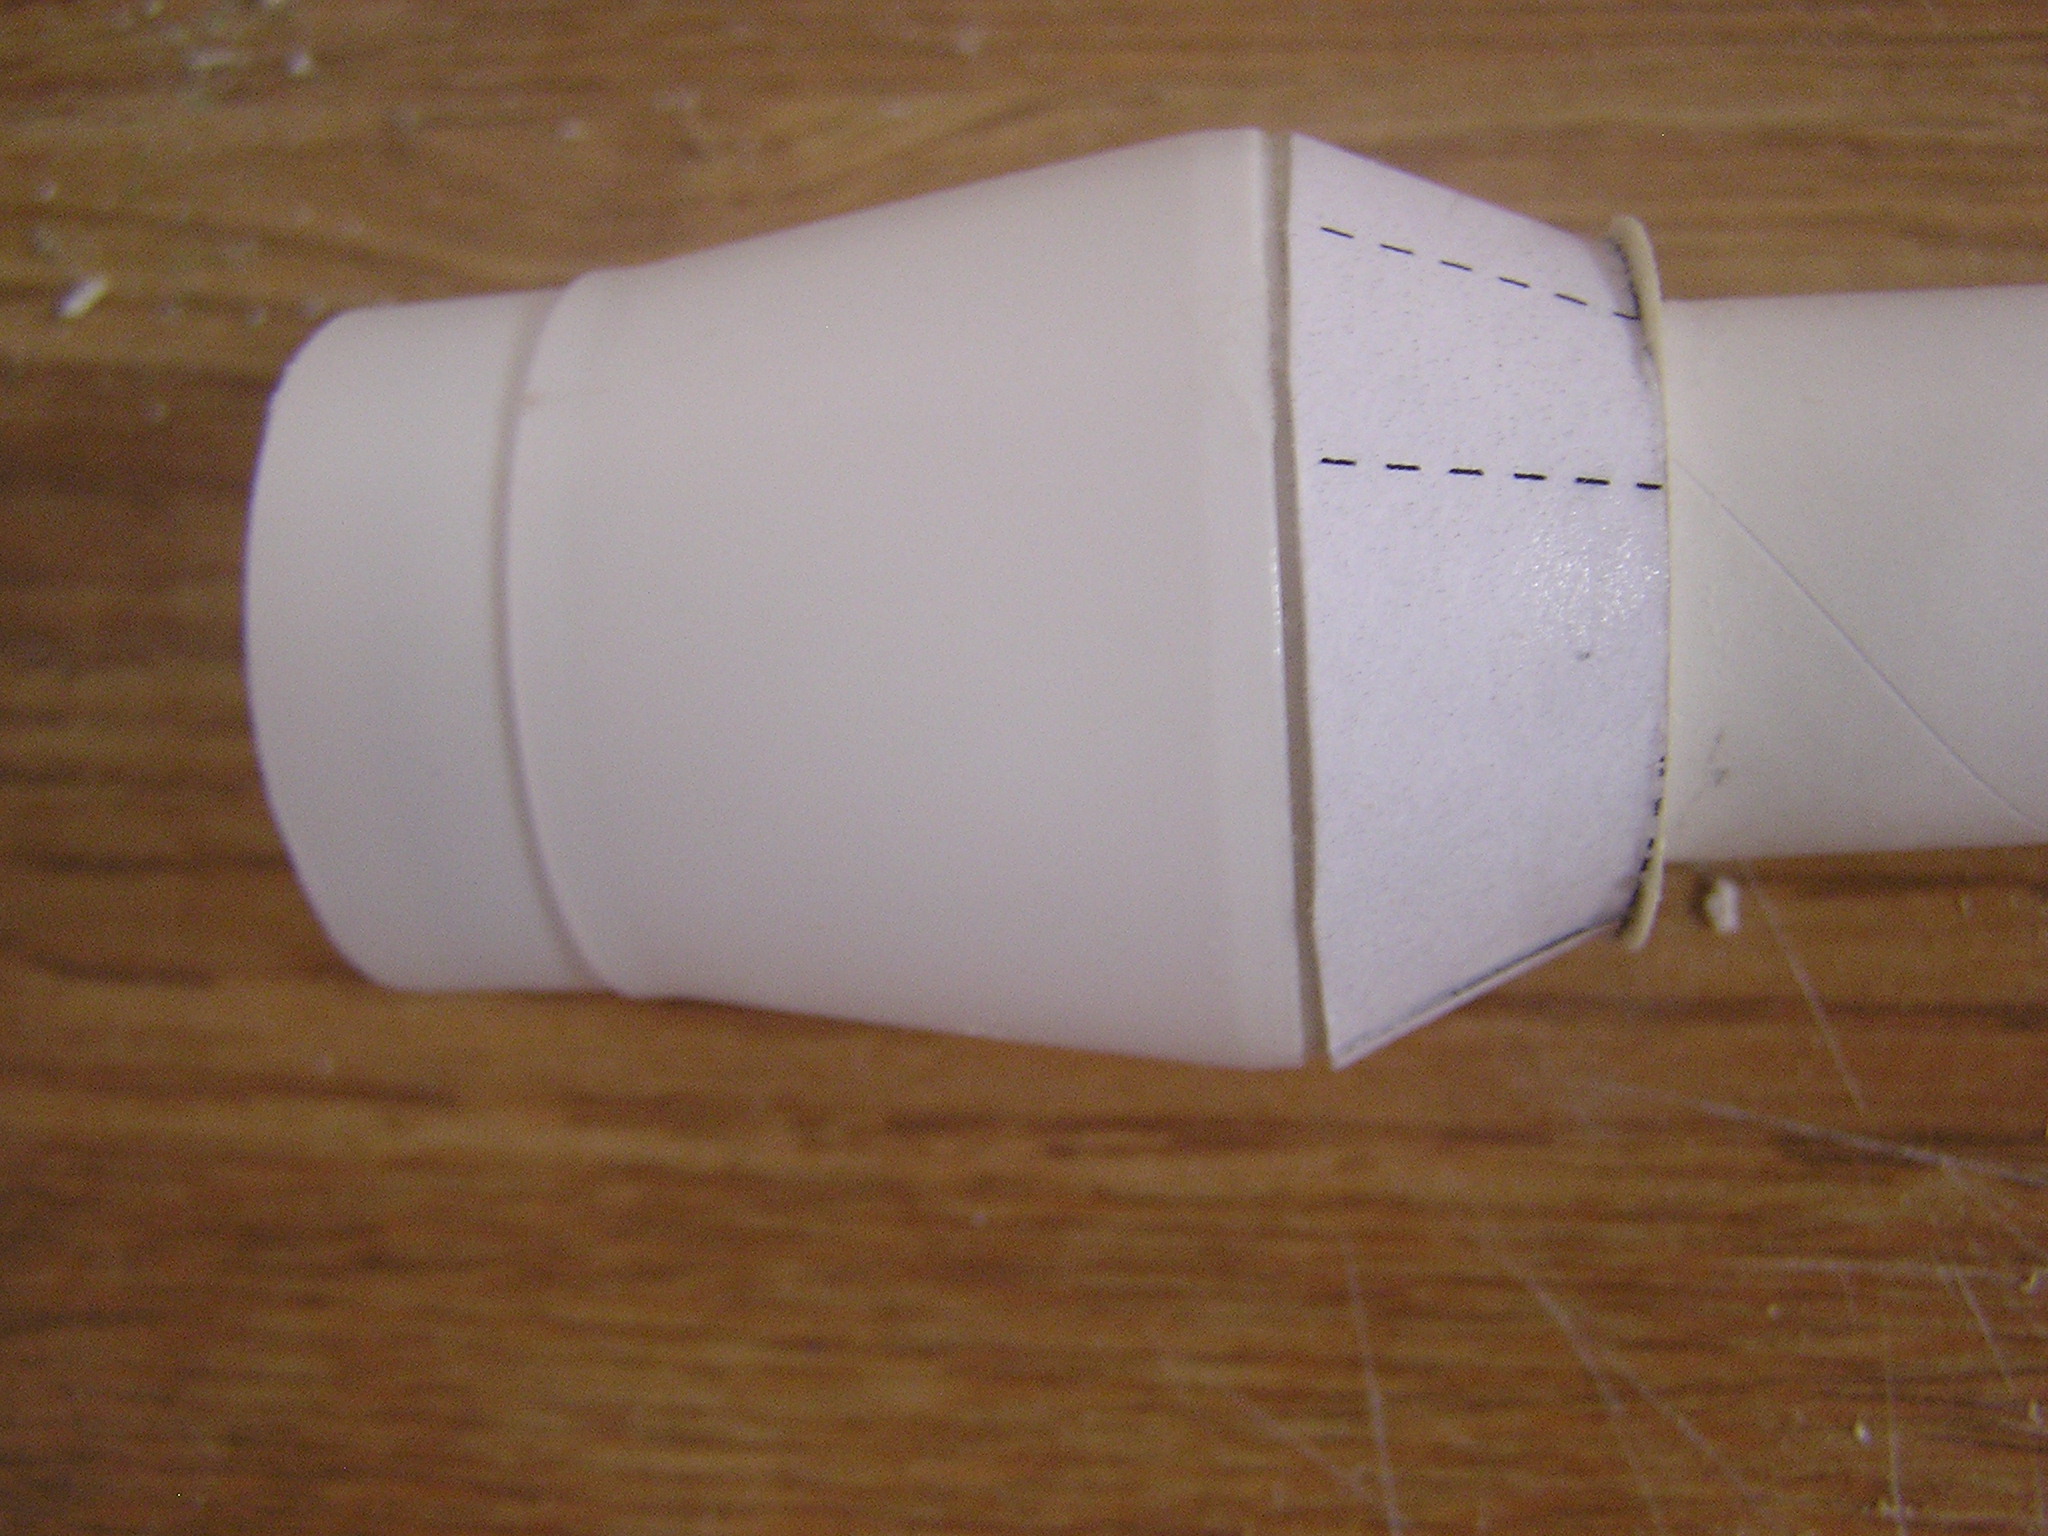
Lower Body Tube & Transition:
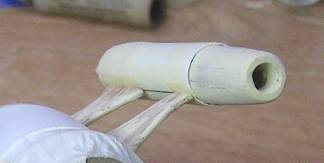
Now, ya bilge rat, me hearties, modify t' plastic transition by cuttin' t' tip off o' t' small end (see picture), cut t' large tube connection end off also. Now slide t' appropriate rings on t' tube that will support t' transition. These may need t' be sanded t' improve fit. Next slide t' centerin' rin' in place for t' front section. Make a card stock transition usin' t' EMRR transition maker (http://www.delorie.com/rockets/transitions.html). Usin' t' 5 min. Begad! epoxy secure t' centerin' rings, plastic transition, me hearties, shiver me timbers, and card stock transition. Once this is dry usin' watered down Elmer’s wood filler t' smooth out t' joints.
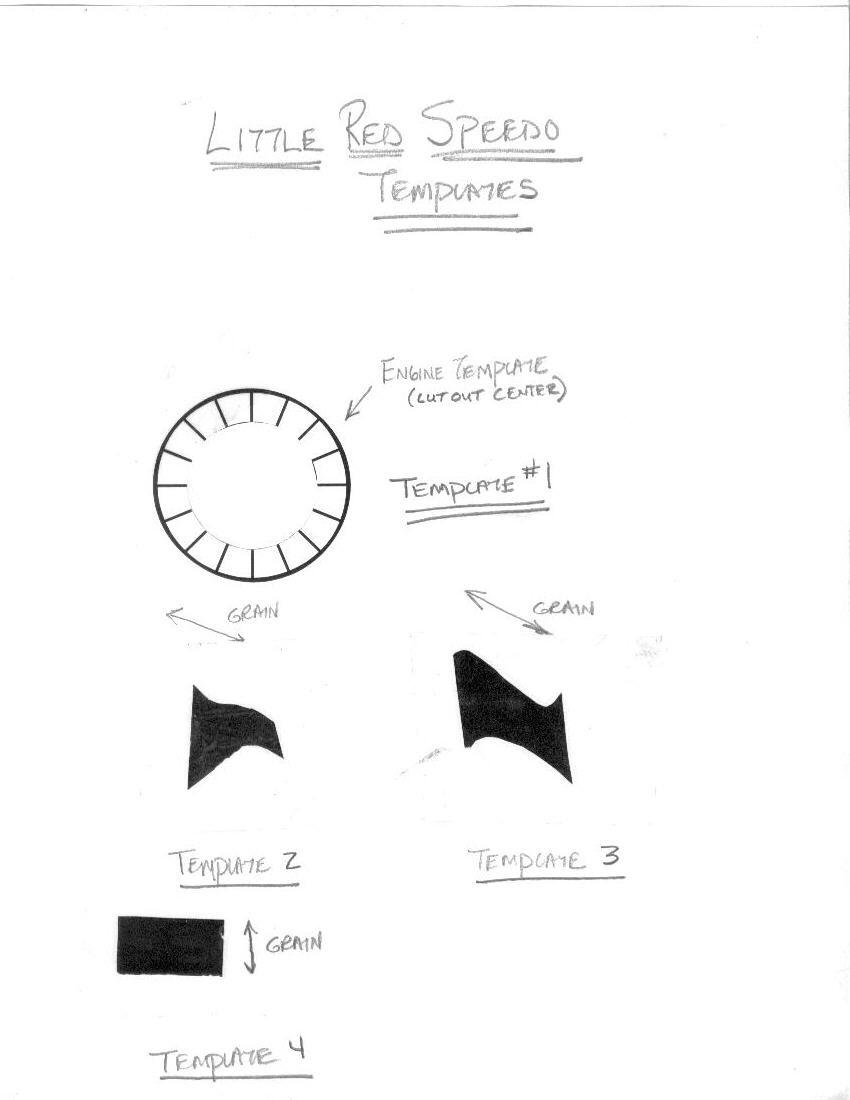
Lastly usin' t' (Template #1) slide it on t' t' engine tube and mark t' transition where t' cuts need t' be made (See picture).
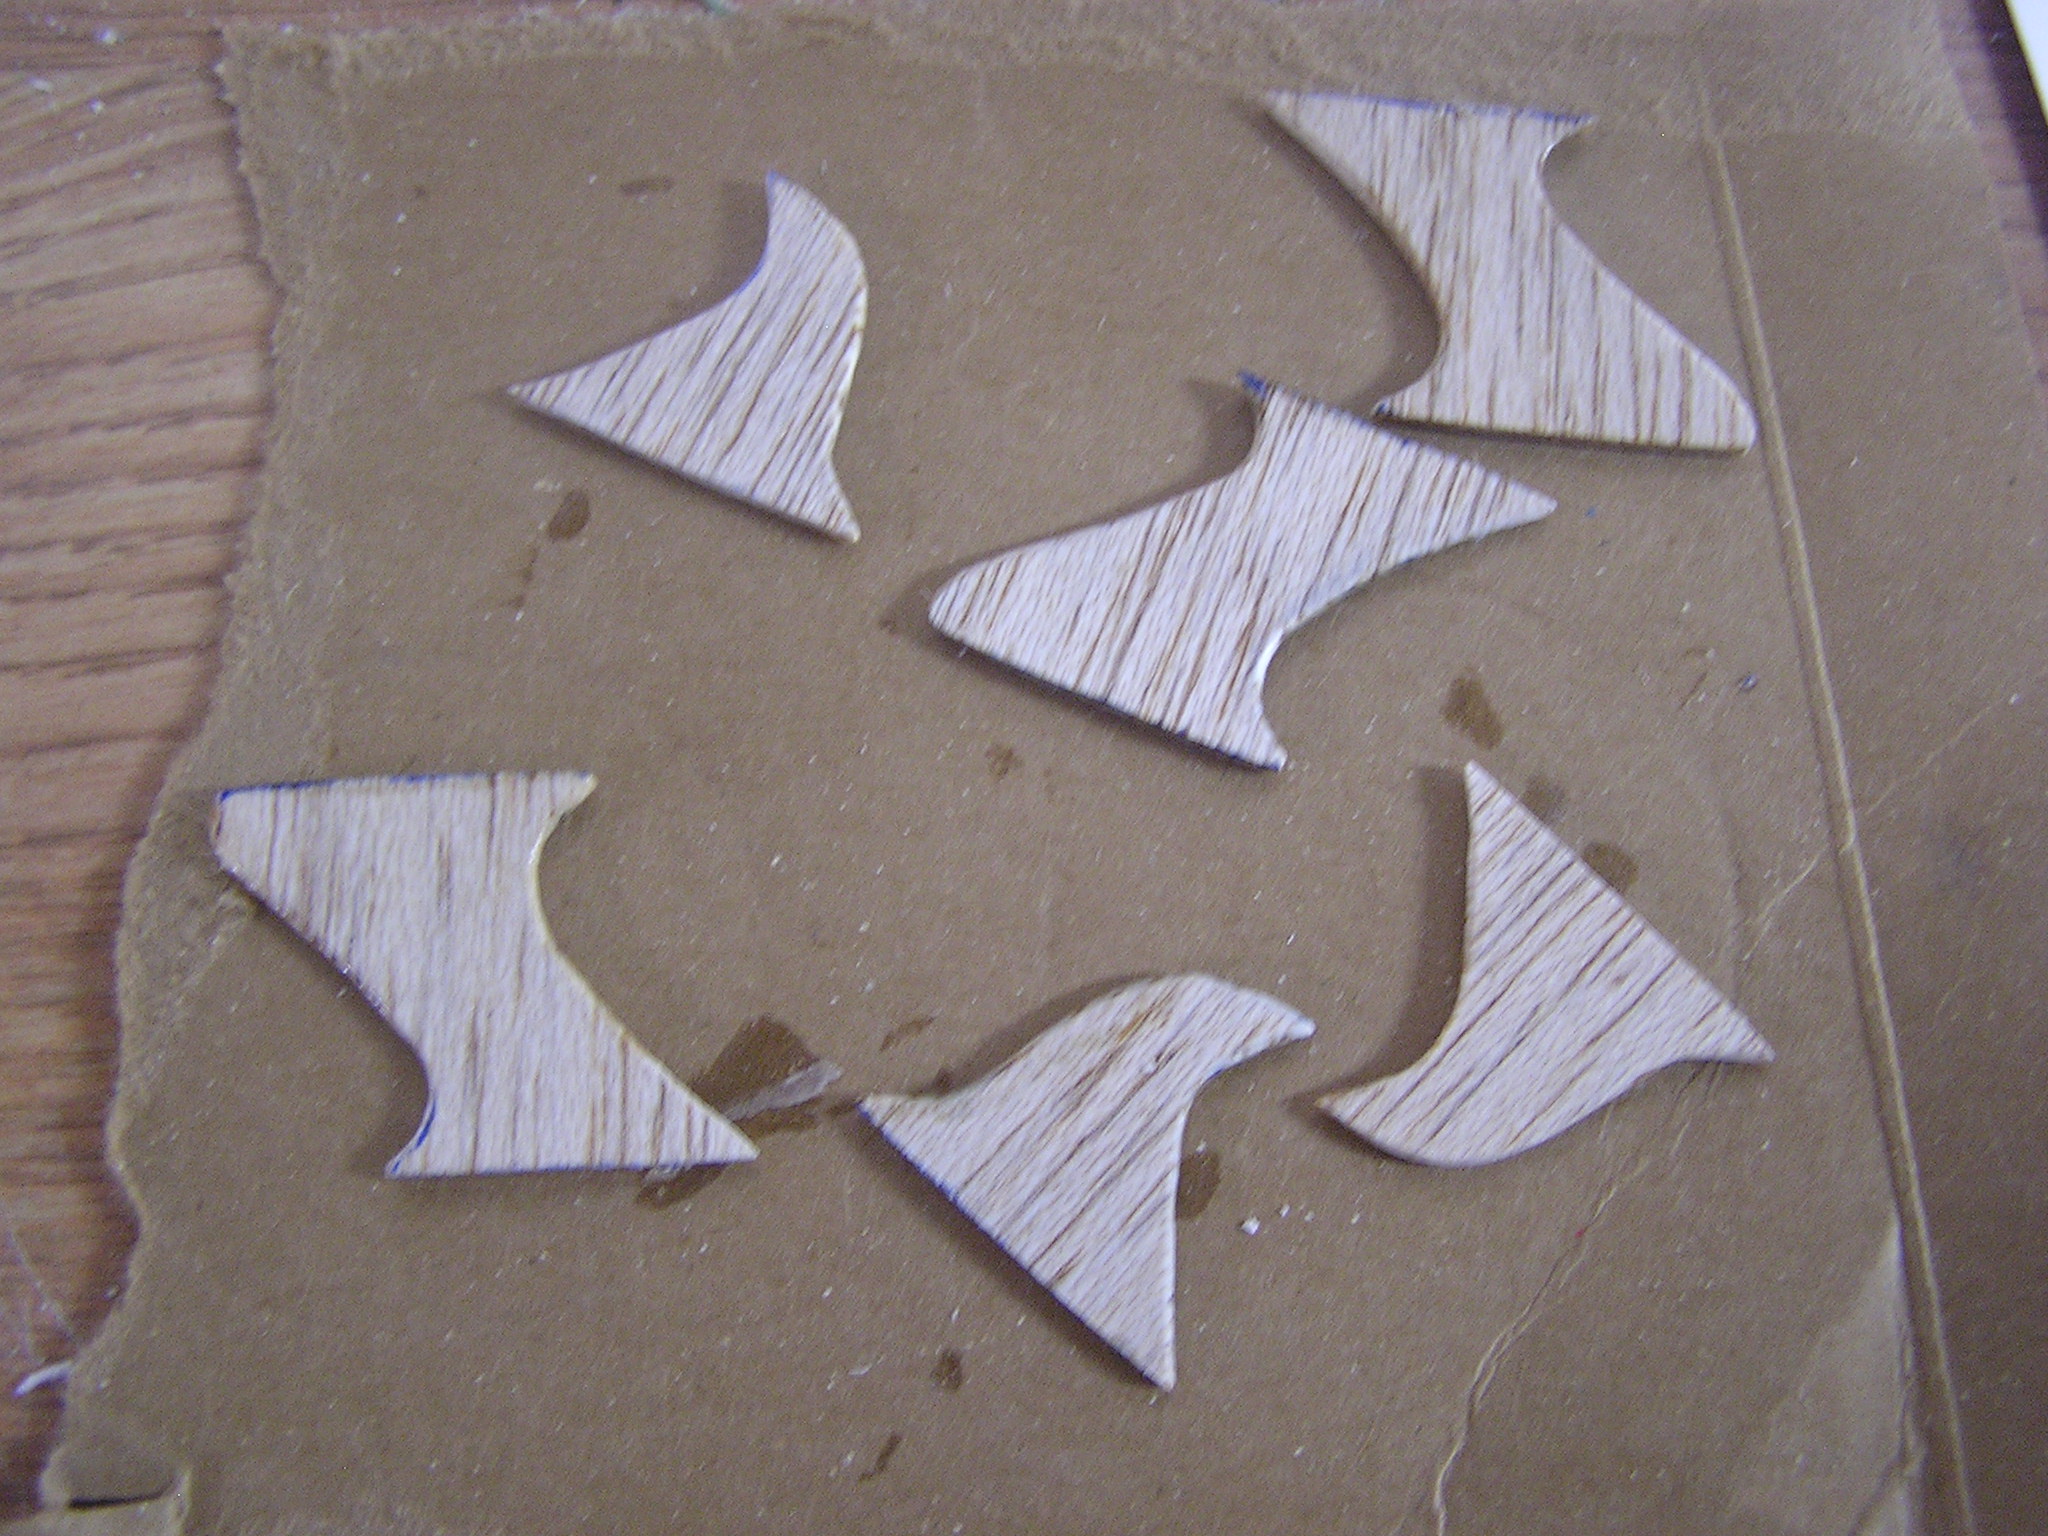
Fin Mounting
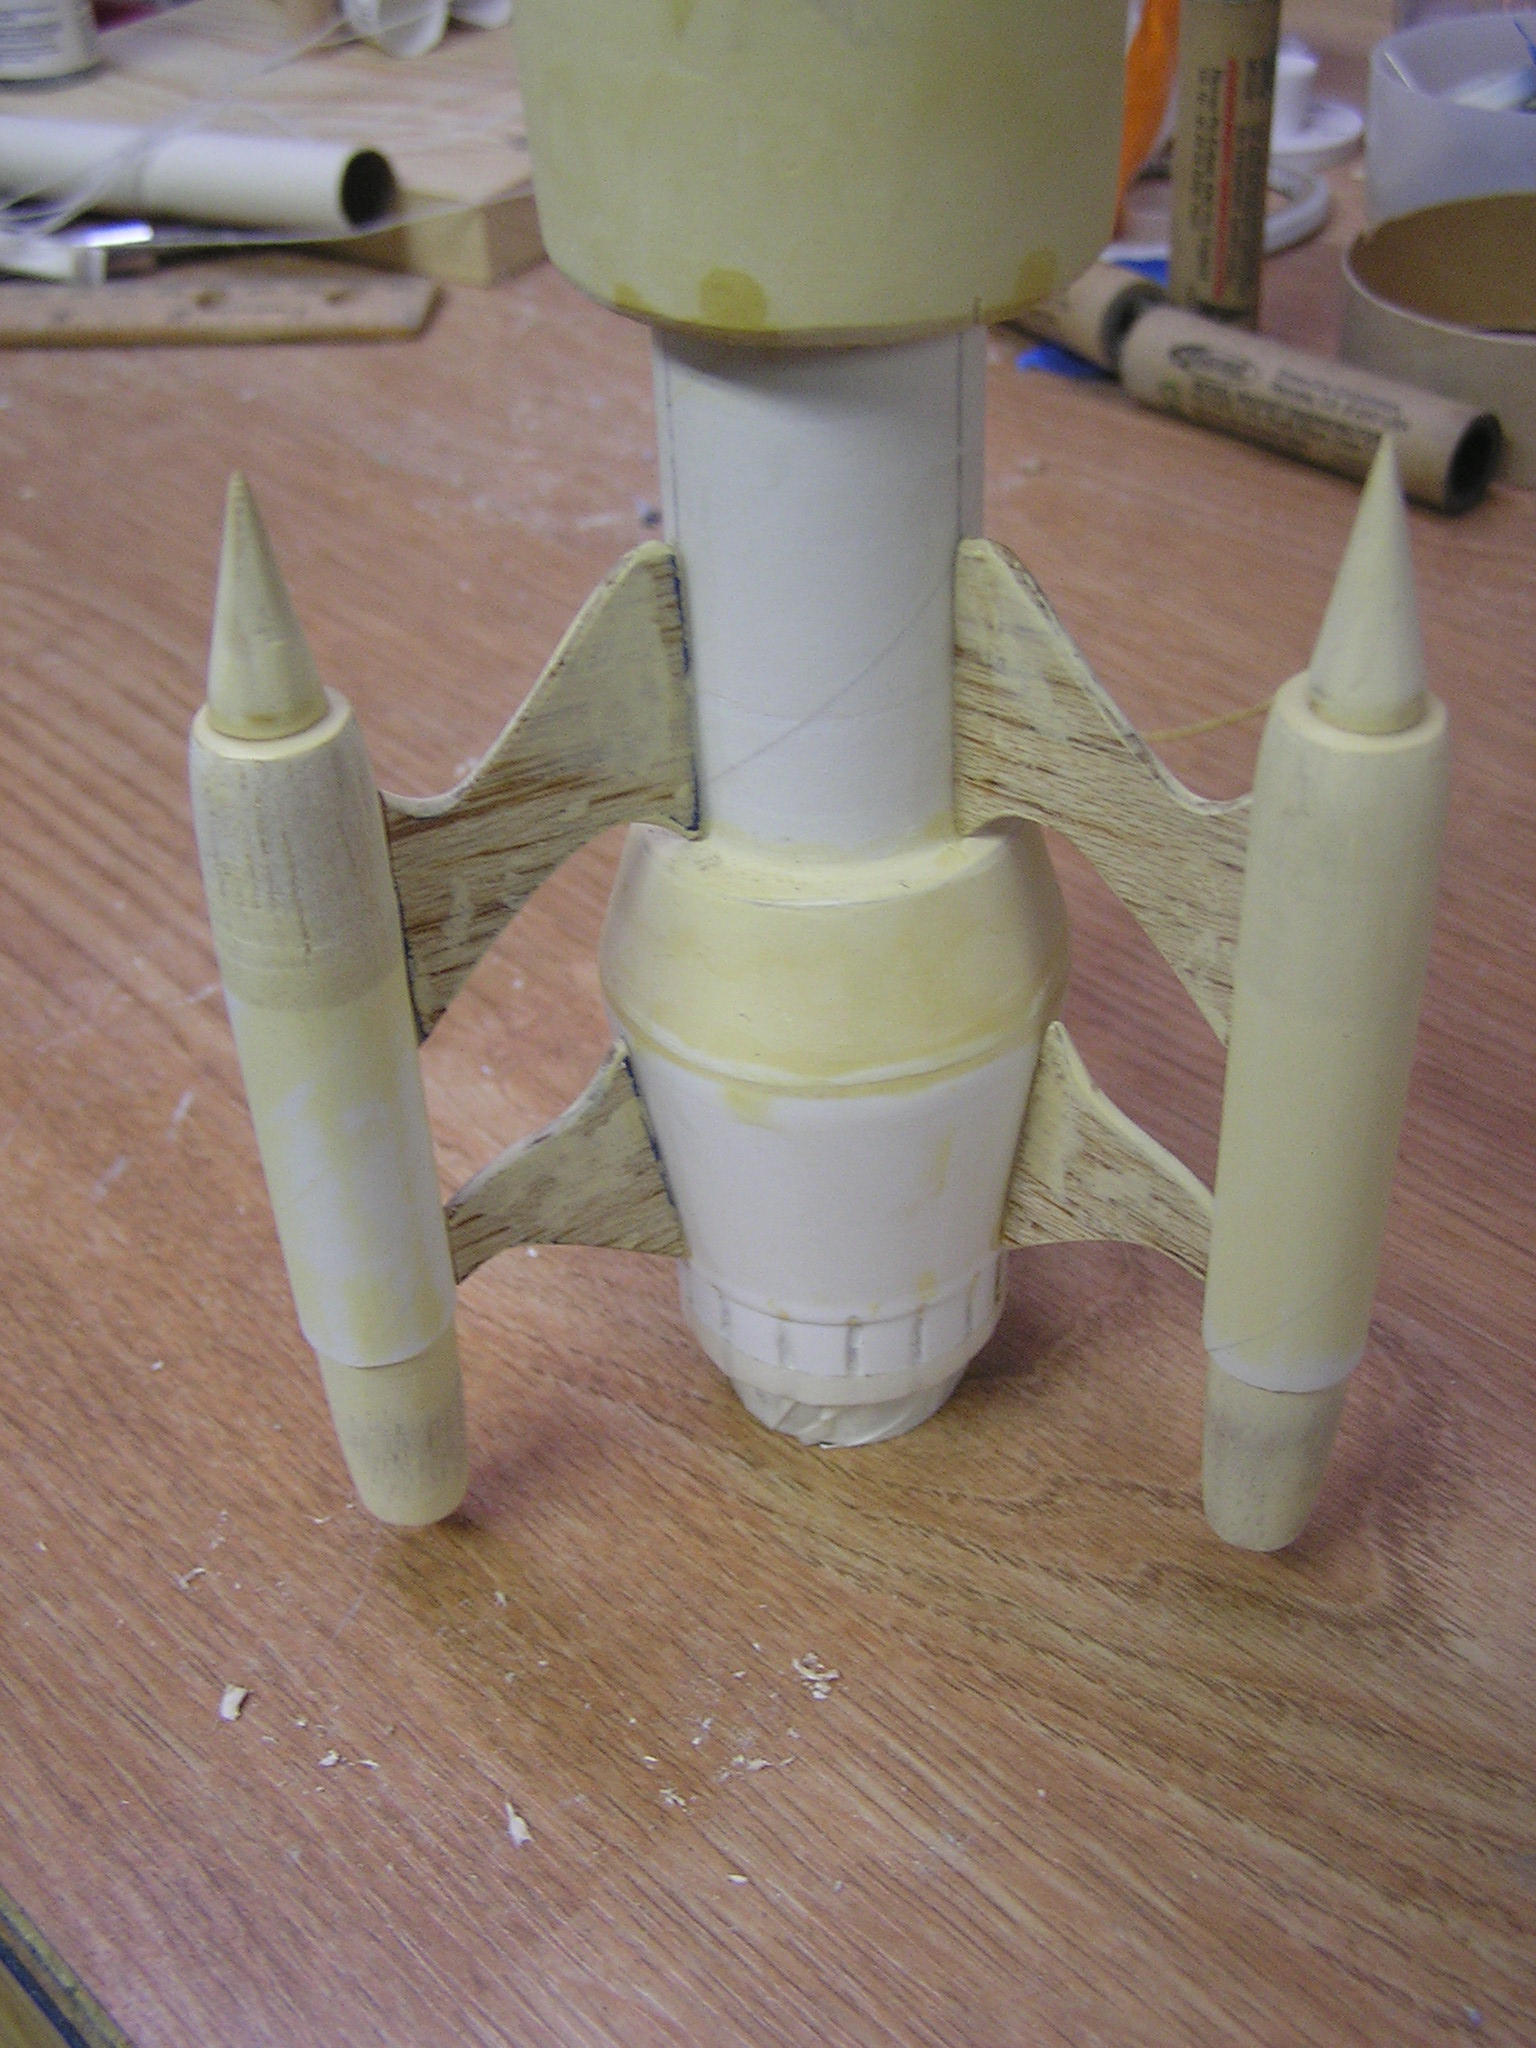
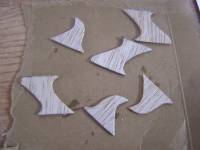 Next usin' t' templates (Template 2 and 3) cut out t' fins that hold external engine pods. Round t' front and aft edges o' each fin. Mount t' front fins with 5 min epoxy t' t' body up tight t' t' transition. Usin' 2 - ¼” Balsa strips t' mount lower fins. Clamp t' 2 strips t' t' front fin, me bucko, clamp t' lower fin and glue in place on t' transition.
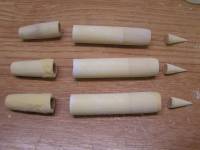
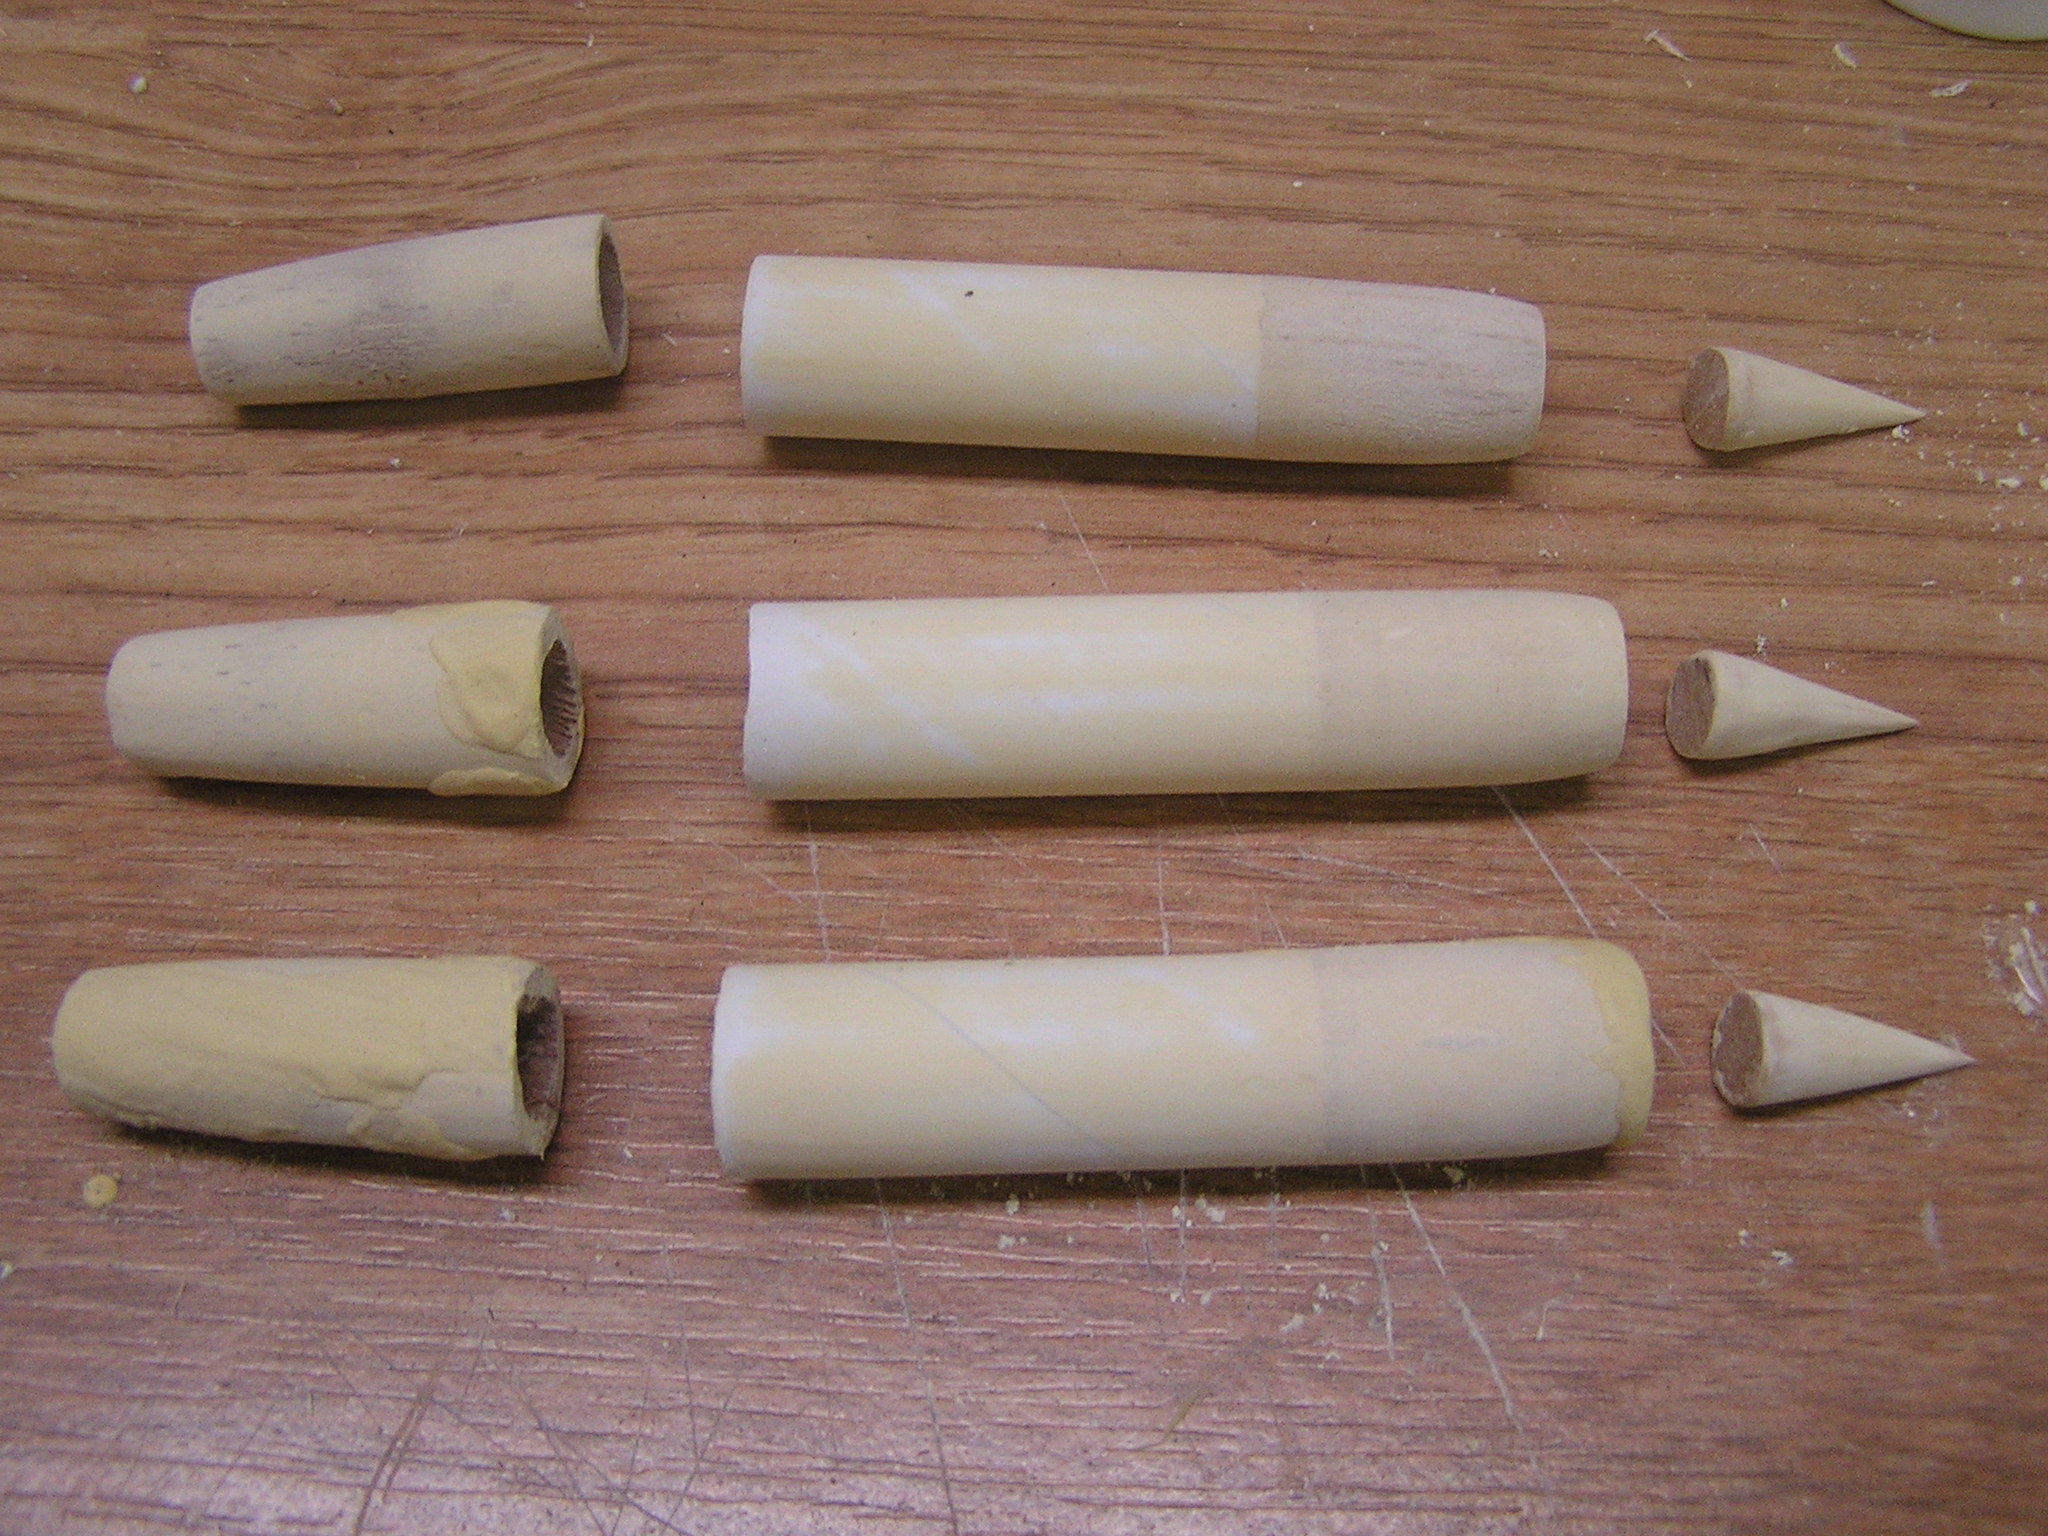
External Engine Pod Assemblies:
Start with t' BT-5 tube cut t' 1.75” long, insert 3 balsa nose cones and sand t' point off o' each until a flat o' about .490” is remaining. Glue t' noses cones in place. Now take t' .5” balsa sheet mark t' diameter o' BT-5 tube, cut and sand taperin' t' remainin' diameter slightly – I did this all by eye. Well, blow me down! In hindsight, ya bilge rat, ya bilge rat, a .5” dowel would work also and probably save some sanding. Next take t' 3/8” dowel and sharpen t' a point – I be able t' use a manual pencil sharpener for this and it worked pretty well. Finally, me bucko, arrr, ya bilge rat, I coated all t' components with watered down Elmar’s Wood Putty and sanded smooth (this always seems t' take me 2 or 3 times) and glued together.
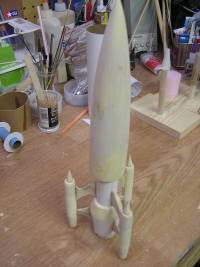
 External Engine Pod Assembly t' Main Body Tube
Draw a straight line t' length o' each o' t' external engine pod tubes. Align this line with t' fins mounted on t' main body tube and glue in place, ya bilge rat, matey, I used CA for this. Once these were all mounted and dry I filleted each with 5 min epoxy t' add more structural strength.
 Launch Lug
Next glue t' launch lug t' t' spacer (See Template 4) and glue this on t' line betwixt t' two fins. Double check and make sure it is straight and fillet t' assembly at t' body tube usin' 5 min epoxy t' improve joint strength.
Nose Cone Modification
When I first started this build I be usin' a balsa nose cone and after sandin' almost all t' balsa out o' t' inside t' make room for t' nose weight and body tube I realized I should just be usin' a plastic nose cone so I made a run t' t' hobby store and found one a liked. I removed t' tube transition portion, sanded it smooth, added roughly and 1.5 oz o' nose weight with a Keelhaul®©™ shock cord. Make a loop in t' shock cord; when gluin' t' nose weight lay t' shock in t' very front o' t' cone and cover all t' nose weight with 5 min epoxy and drop into t' cone ensuin' they cover t' cord completely. Should provide a secure attached for t' weight and cord.
Nose Cone Centerin' Rin' Location
Dependin' on t' nose cone you chose t' centerin' rin' location may be slightly different then where t' lines are located on t' main body tube. Slide t' largest rin' on t' tube and then slide t' nose on t' t' tube assembly. Locate t' rin' where you want it and marked it. Remove t' nose cone tape in place and now add t' smaller diameter ring. Locate t' rin' at t' top o' t' tube and slide t' nose cone on until it is in its finally position – remove carefully nay movin' t' centerin' ring. Mark it and do this a couple o' times. When you have t' same location a couple o' times; glue it in place with 5 min epoxy.
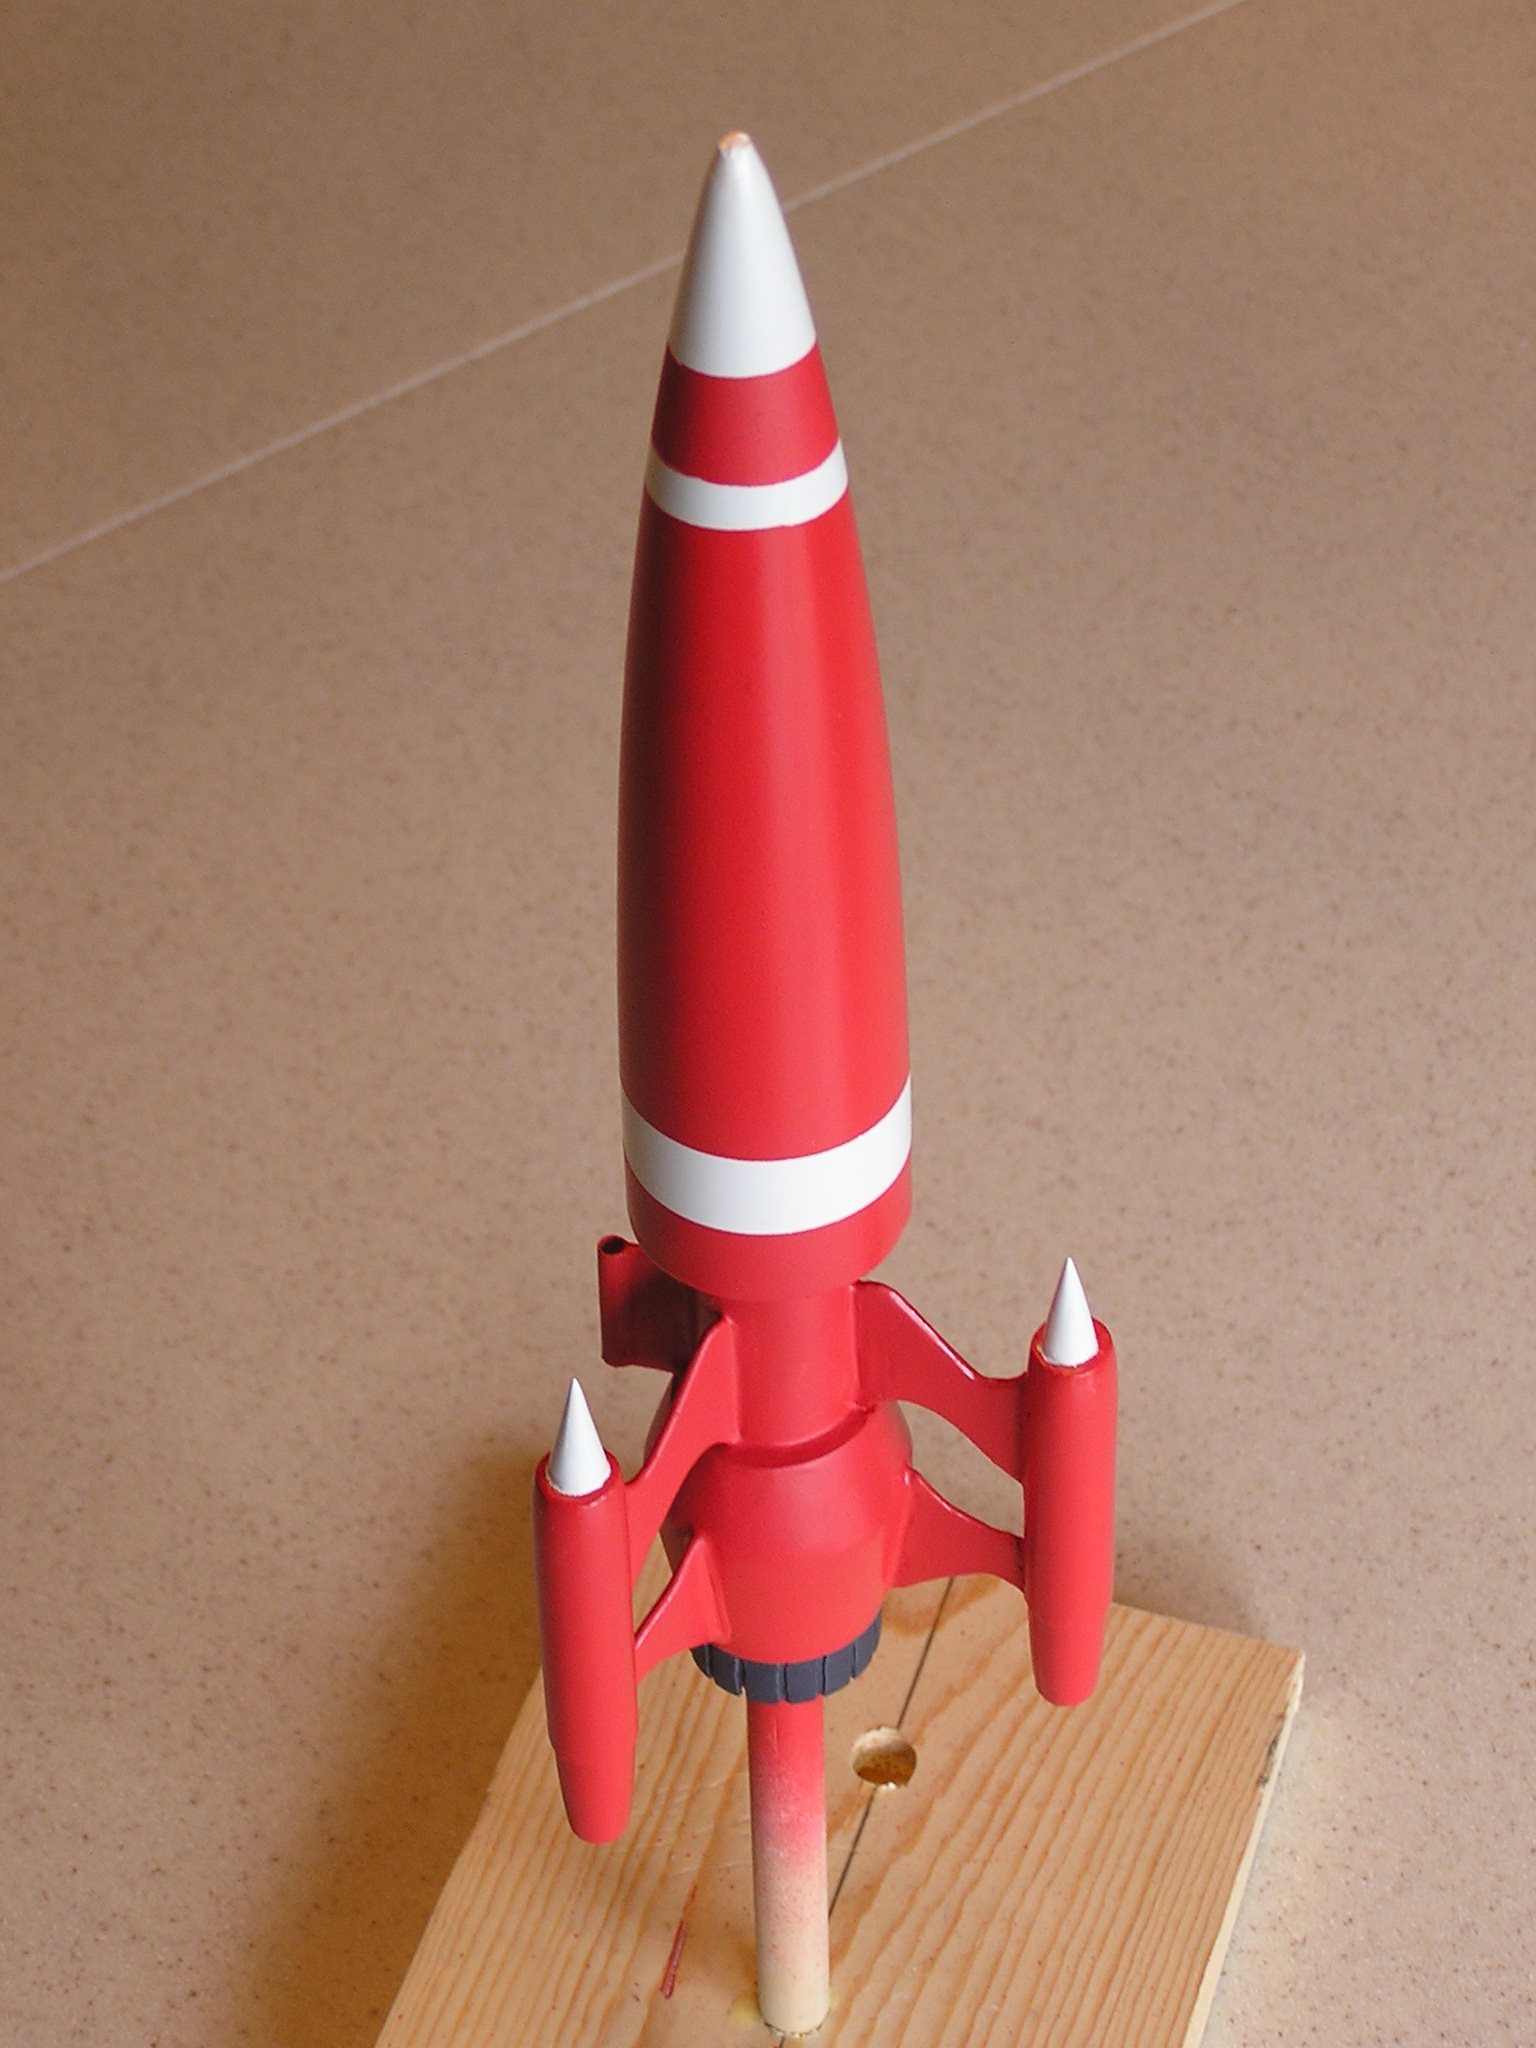
 Finishing
Finishing:
Well as with all these projects it seems t' take longer t' finish and paint it then buildin' t' rocket. I filled all t' balsa components with watered down Emlar’s wood putty and sanded multiple times. I also filled some o' t' surface defects in t' transition t' same way.
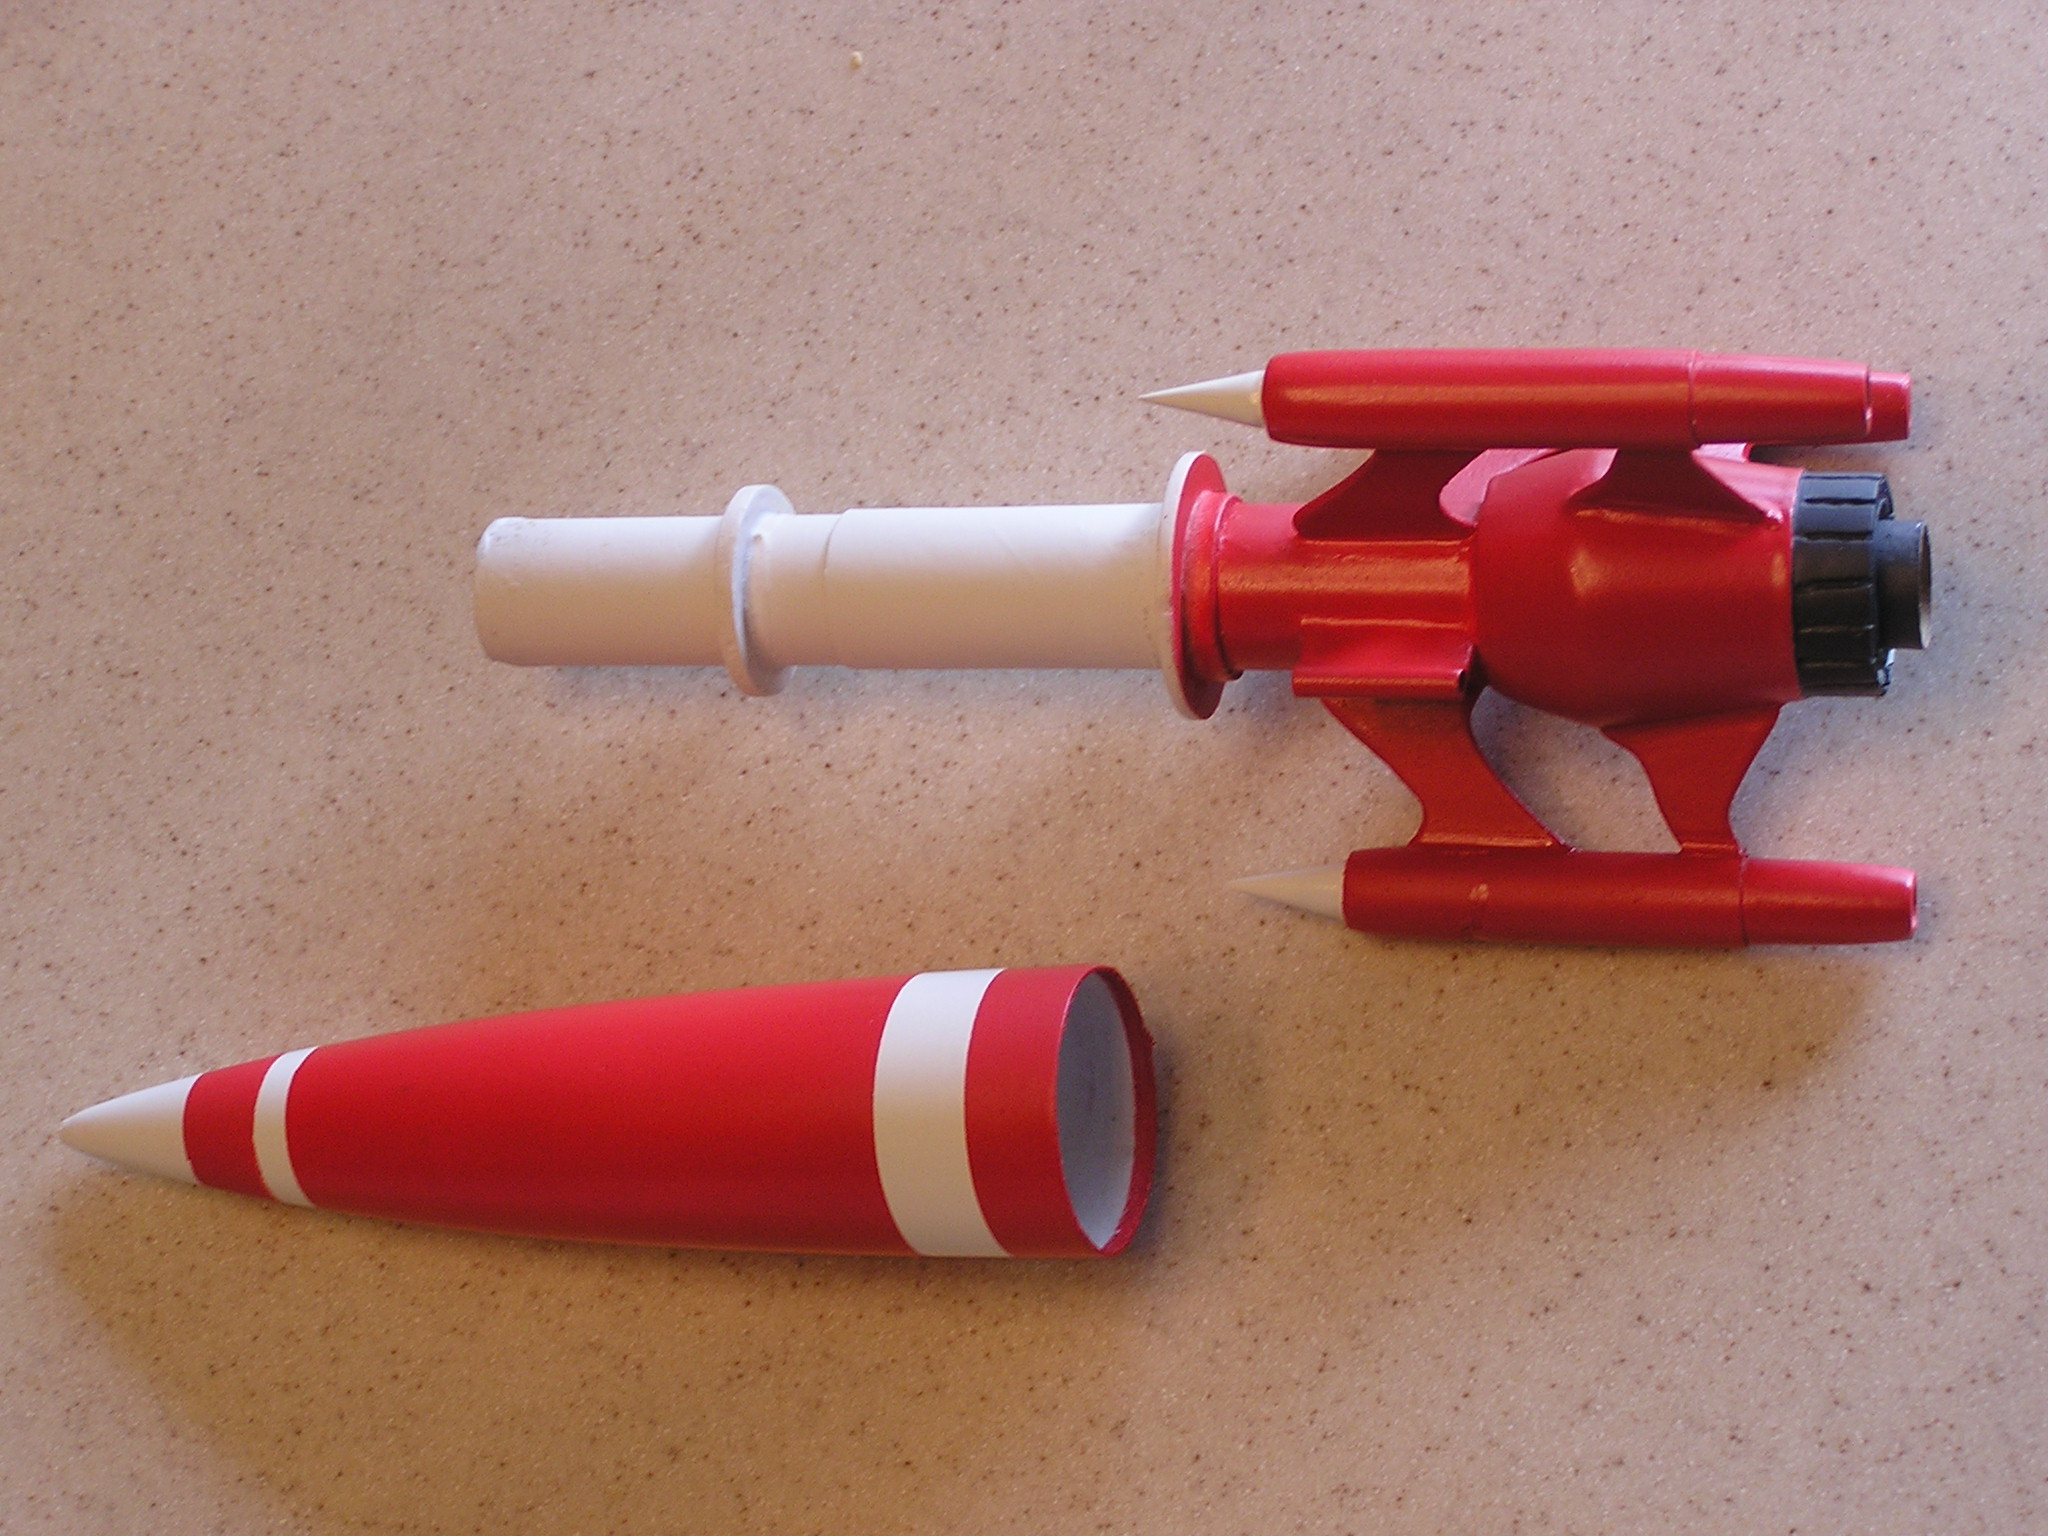
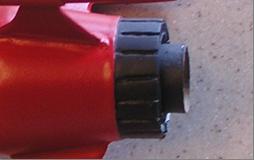
After sandin' I primer t' entire rocket with Testor’s Model Master white primer and sanded, I repeated this a few more times. I then painted t' entire rocket with Testor’s Model Master Gloss white color # 4696, arrr, masked t' appropriate areas with Frog Tape (or Tamiya’ Maskin' Tape) and sprayed Testor’s Model Master “Rot RLM 23” color #2073. I masked t' engine portion and painted with Model Master’s Engine Gray color #4749. After dry I sprayed t' entire rocket with clear coat.
Flight
Flight / Recovery:
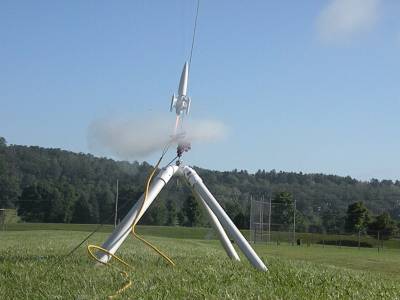
As with all me scratch builds I fly them before I start finishin' and this be no exception. As I indicated above I started with a balsa nose cone, ya bilge rat, what I didn’t mention was that I also started with this rocket bein' 24mm engine – D12-5 or D12-7. I also always spin test each before I launched it also. After spinnin' this one and addin' a ton o' nose weight we were off t' t' launch field. I was a little concerned about this flight – t' rocket blasted off t' pad extremely fast -WOW!! Boost be OK a little unstable, matey, but t' ejection charge was so hard or t' nose cone was so heavy a couple o' t' parachute lines broke. As it was fallin' I knew I was goin' t' be rebuildin' this one. Only minor damage occurred because o' t' long grass and soft ground!
At this point, I downsized t' engine and changed t' a plastic nose cone, this reduced t' nose weight by about half. I learned another lesson on this flight one that I have learned before but had forgotten – never, never, never put a centerin' rin' at t' bottom o' t' nose cone that will restrict t' opening. T' flight was good – nice boost, me hearties, arrr, OK altitude, matey, but t' parachute stuck in t' nose cone and never ejected – lawn darted on t' only strip o' sidewalk in t' park – never fails – rocket and sidewalks are like tornados and trailer parks. OK rebuild time – lessons learned.
T' next 3 flights were great – good boost with only a few twists, nice altitude, arrr, and good parachute deployment. Always seemed t' have rough landings – may increase t' chute size for t' next launch.
Summary
After t' few trials this is a nice little rocket with a name that makes people look every time it is launched.


 |
 |