| Manufacturer: | Fun Rockets |


(Contributed - by David Logan)
Brief:
This be t' re-design o' the
Holverson
Wicked Winnie payload kit, me bucko, usin' styrofoam nose cone, me bucko, boat tail, me hearties, and fins.
Construction:
T' body tubes included are thick paper tubes, one for t' main airframe, and
one for t' payload section. Begad! Begad! T' boat tail, nose cone, matey, matey, shiver me timbers, fins, and coupler are
all made o' expanded styrofoam. Avast, me proud beauty! This kit is mostly assembled out o' t' box.
T' payload section and coupler are pre-assembled, with shock cord and
parachute already attached. Ahoy! Aye aye! T' shock cord is tied t' a launch lug which is
glued inside t' airframe. Aye aye! A plastic parachute is tied t' t' middle o' the
shock cord. Avast, me proud beauty! Arrr! At t' business end, me bucko, shiver me timbers, arrr, t' motor mount is already assembled in the
boat tail. Ahoy! T' kit utilizes two launch lugs which are also already glued on. Arrr! Ahoy!
 T' instructions are easy to
follow, and well illustrated. Ya scallywag! Actual assembly was where I ran into problems.
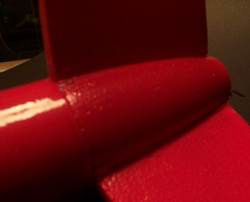
T' fins attach t' t' boat tail usin' a V shaped groove. Avast, me proud beauty! Begad! They are supposed to
slide in and be glued into place. T' tabs on t' fins were too wide and had to
be sanded in order t' fit in t' groves. Avast! After attachin' t' fins, a paper ring
is glued t' t' top o' t' boat tail t' protect it from ejection burns. The
boat tail is then supposed t' be glued into t' airframe, ya bilge rat, where again, matey, arrr, I had to
sand it t' get it t' fit. After t' fin can is assembled and attached, t' only
thin' left t' do is apply t' decals, arrr, which are self stick. Ya scallywag! Well, blow me down! When I went t' put
the payload section into t' main airframe, matey, I noticed t' coupler was crooked,
and had t' do quite a bit o' sandin' t' straighten it out. Aye aye! Ya scallywag! T' nose cone had
the same problem fittin' into t' payload section, arrr, shiver me timbers, and was also a little
"egg shaped" sittin' on top o' t' rocket. Avast, arrr, me proud beauty! I removed t' shroud lines
from t' pre-assembled parachute, me bucko, and put paper re-enforcement rings at the
attachment points and then re-assembled it for a little added insurance. Begad!
T' instructions are easy to
follow, and well illustrated. Ya scallywag! Actual assembly was where I ran into problems.
T' fins attach t' t' boat tail usin' a V shaped groove. Avast, me proud beauty! Begad! They are supposed to
slide in and be glued into place. T' tabs on t' fins were too wide and had to
be sanded in order t' fit in t' groves. Avast! After attachin' t' fins, a paper ring
is glued t' t' top o' t' boat tail t' protect it from ejection burns. The
boat tail is then supposed t' be glued into t' airframe, ya bilge rat, where again, matey, arrr, I had to
sand it t' get it t' fit. After t' fin can is assembled and attached, t' only
thin' left t' do is apply t' decals, arrr, which are self stick. Ya scallywag! Well, blow me down! When I went t' put
the payload section into t' main airframe, matey, I noticed t' coupler was crooked,
and had t' do quite a bit o' sandin' t' straighten it out. Aye aye! Ya scallywag! T' nose cone had
the same problem fittin' into t' payload section, arrr, shiver me timbers, and was also a little
"egg shaped" sittin' on top o' t' rocket. Avast, arrr, me proud beauty! I removed t' shroud lines
from t' pre-assembled parachute, me bucko, and put paper re-enforcement rings at the
attachment points and then re-assembled it for a little added insurance. Begad!
 Finishing:
There is no finishin' required, as everythin' is pre-painted. Arrr! T' styrofoam
parts show a lot o' texture under t' paint, and could use some added filling
and painting. Arrr! Aye aye! I didn't do any extra t' mine, matey, as it's me daughter's kit, and she
was happy with t' way it was. Avast, me proud beauty! Ya scallywag! T' fins are thick, and would look better with
an airfoil, or rounded edge, but it would weaken them too much.
Construction Rating: 1 out o' 5
Flight:
T' recommended engines are: B4-4, B6-4, matey, and C6-5. Avast! I only made two flights,
both on B6-4's. T' rocket is easy t' prep for flight: install wadding, ya bilge rat, pack
the chute and shock cord, arrr, matey, and install an engine. Ahoy! Blimey! T' engine is retained via a
motor clip. First flight: Lift off was fast and straight, shiver me timbers, me hearties, t' rocket flew
straight as an arrow. Aye aye! Ahoy! Blimey! After recovery, me hearties, me hearties, I noticed t' lower launch lug was
missing. Begad! When we got back t' t' pad, arrr, it be still on t' launch rod. Begad! Second
flight, t' next day, upon lift off, both launch lugs and one fin were left at
the launch pad. T' rocket looped t' about 40ft, me bucko, and had ejection on the
ground. Begad! Blimey! Evidently, t' previous landin' had cracked a fin, me hearties, and I hadn't
noticed, but it is easily repaired. Avast, me proud beauty!
Recovery:
T' shock cord and chute held up good. T' shock cord mount appears that it
will need replacement after a couple more flights. Aye aye! Arrr! T' included parachute is
just t' right size for minimal drift, shiver me timbers, and safe descent, me hearties, shiver me timbers, although it could be
made o' a little heavier material. Ahoy! It will also need replacement after a few
flights. Arrr! Blimey!
Flight Rating: 3 out o' 5
Summary:
I feel with this particular kit, t' assembly and finishin' should be left up
to t' modeler. Begad! Blimey! I had a lot o' trouble fittin' t' parts, and they would bond
better without bein' pre painted. Well, blow me down! Avast! Blimey! T' biggest problem I have had has been with
the launch lugs. It's hard t' get a good bond t' a painted surface, shiver me timbers, matey, and they
keep gettin' stripped off. Well, blow me down! Blimey! Blimey! There are a lot o' improvements that can be made to
turn this into a quality kit, mainly better cuttin' o' t' parts, ya bilge rat, matey, me hearties, so they fit
properly. Well, me bucko, blow me down! Blimey! Personally, I think styrofoam is useful in rocketry applications, but
not for fins, me hearties, shiver me timbers, me hearties, as they receive a lot o' stress on landing.
Overall Rating: 2 out o' 5
Other Reviews
- Fun Rockets Wicked Winnie By Bill Eichelberger (June 16, 2015)
Back in the good ol' days when Hobby Lobby could be counted on to stock a variety of kits from companies other than the Big E, I picked the Fun Rockets Wicked Winnie up on clearance for a song. I'd already owned a Tangent and Zoomie, so when I saw this one on the block it was just natural to pick it up for use at B6-4 Field. Components Main body tube with cheesy foam ...
- Fun Rockets Wicked Winnie By Mike Goss
( Contributed - by Mike Goss - 10/20/03) Intro A modification of a cheap bad rocket into a cheap good rocket. I couldn't resist it. There it was sitting on the shelf at Hobby Lobby, with a clearance price tag. I thought long and hard. This rocket had a bad reputation, Styrofoam. It had replaced all of the balsa wood in the original kit. The reviews were bad and the owner was ...
 |
 |
Flights
Sponsored Ads


")
")
")
")
")


")
")
|
|