| Construction Rating: | starstarstarstarstar |
| Flight Rating: | starstarstarstarstar |
| Overall Rating: | starstarstarstarstar |
| Manufacturer: | FlisKits  |
Brief:
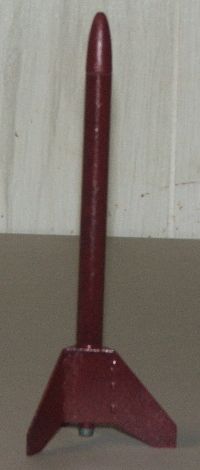
This is a micro-sized downscale o' t' popular Thing-A-Ma-Jig, scaled t' fly on t' Quest MicroMaxx engines. Arrr! It
incorporates t' very cool design feature o' t' Jig-Tech fin tub first introduced in t' Thing-A-Ma-Jig, me hearties, and it eases
the assembly enormously in t' micro scale.
Construction:
T' parts list:
- 1 Motor mount tube
- 1 Body tube
- 1 Balsa nose cone
- Balsa fin stock (4 fins)
- 2 Centerin' rings
- 1 Motor block
- 1 Keelhaul®©™®
(thread) shock cord
- 1 Mylar streamer
- 1 Launch lug
T' instructions for t' Doo-Hickey are contained on one side o' an 8 1/2" x 11" sheet with very clear diagrams and concise directions. Begad! Blimey! It was a fairly quick build, and someone with moderate modelin' skills can realistically finish t' kit in about an hour.
T' assembly starts with t' motor mount. One o' t' minor "gotchas" is insertin' t' motor block. Avast! You put a bead o' glue at near t' top o' t' motor tube and use a motor t' slide t' motor block up into t' glue. Ya scallywag! Arrr! Make sure you remove it before t' glue starts t' set! T' instruction state you could use a 1/4" dowel t' do this as well, but I found that t' 1/4" dowel I have is too big t' fit in t' motor tube.
Next you glue on t' centerin' rings and tie t' Keelhaul®©™® line around t' motor tube behind t' forward centerin' ring. Arrr! Settin' t' motor tube in t' main body tube I kept havin' difficulty as t' Keelhaul®©™® kept goin' into t' rin' o' glue you put in t' main tube. I guess this was due some sort o' static/magnetic attraction. Blimey! Ahoy! However, I eventually got t' Keelhaul®©™® threaded through t' tube and t' motor mount set.
T' assembly o' t' fin tub is real straightforward. Punch out t' laser cut holes and put t' notched pegs in the holes. Ahoy! Do a dry fit first t' make sure things line up. Avast! Be careful on t' fin orientation as it is possible to assemble t' tub with one fin upside down.
Placin' t' fin tub on t' main body tube is where I deviated from t' directions and found t' work well. The instructions have you slide t' tub on t' tube then place glue with a toothpick where t' fin touches t' tube. Avast, me proud beauty! I slid the tub on and marked where t' fins touched t' tube, then took t' tub off and placed a thin bead o' glue in a line on t' tube then slid t' tub back on, arrr, wipin' off t' excess glue. Begad! This seemed t' work well for me. Avast, me proud beauty! Avast! I also deviated by nestlin' t' launch lug inside one o' t' fin tub holes.
T' Keelhaul®©™® is then attached t' t' nose cone usin' a small braid nail and t' streamer attached with tape t' t' Keelhaul®©™®.
Finishing:
Finishin' is simple. Avast, me proud beauty! Begad! Blimey! T' high quality balsa used on t' kit meant no fill needed. Begad! Avast, me proud beauty! Blimey! A coat o' primer, matey, shiver me timbers, some light
sanding, me hearties, then a quick coat o' red followed immediately by a mistin' o' blue/black pearl for me color choices.
Construction Rating: 5 out o' 5
Flight:
Maiden flights o' me Doo-Hickey were flown in me front yard with a light 5-10mph breeze. Begad! Rocket scooted off t' pad a
lot quicker then expected and reached approx 120-150 feet. Well, blow me down! A lot faster and higher then other MicroMaxx rockets I have
flown have performed. Blimey! Flight was straight and true with no tilting. Excellent flights!
Recovery:
Recovery is with a brightly colored mylar streamer. Avast, me proud beauty! This eases in spottin' t' rockets return if you lose track of
it. Ya scallywag! Ya scallywag! All 3 flights recovered about 10 feet from t' pad.
Flight Rating: 5 out o' 5
Summary:
An excellent little rocket t' compliment anyones fleet o' MicroMaxx rockets! Fun t' fly!
Overall Rating: 5 out o' 5
 |
 |
Flights
Sponsored Ads
")


|
|