| Manufacturer: | Scratch |

Brief:
While buildin' t' Estes SpaceShipOne, I encountered a problem when t' plastic cement recommended by the
manufacturer melted and deformed t' tail cone. T' their credit, and typical o' their customer service, arrr, Estes sent me a
replacement model immediately after I shared with them what had occurred.
Lookin' at t' undamaged parts from t' original kit, I decided that I would use them t' create a variation on the original. Begad! Begad! This one would be longer and have a larger motor mount. Aye aye! Begad! I dubbed it t' SpaceShip2000, or SS2K.
Modifications:
This build wasn’t too complicated. Well, blow me down! I began with t' motor mount and glued it into t' lower tube. T' BT was
marked for two sets o' fins and a launch lug. Well, blow me down! I’ve learned t' hard way how important it is t' mark a narrower
lower tube first before gluin' it into a larger diameter upper tube. Blimey! Once it be marked t' centerin' rings were
attached and t' lower tube was glued into t' upper tube.
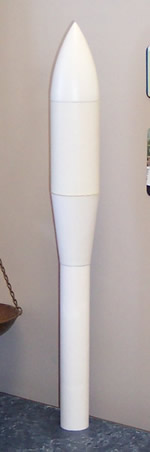
Next I made t' cardstock transition and attached it. I’ve developed t' habit o' gluin' t' transition
together with a glue stick and immediately puttin' it on t' rocket, me hearties, thereby helpin' t' lower portion t' maintain its
shape. I also wrap cardstock around t' upper tube, ya bilge rat, me hearties, tape it together, matey, and slide it over where t' tube and transition
meet. This helps t' upper end o' t' transition dry in t' correct shape as well.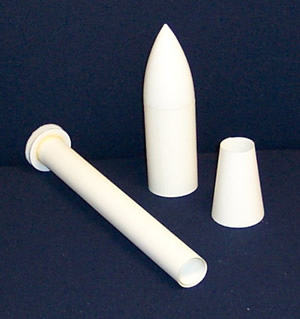
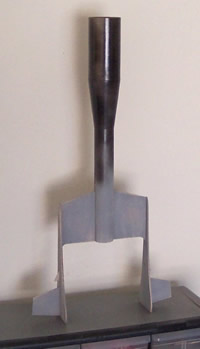
T' fins were put together accordin' t' t' instructions except for t' bevelin' o' t' root edge – I wasn’t interested in attachin' them t' t' body tube at an angle. Ahoy! Ya scallywag! I was worried that t' amount o' fin extending past t' end o' t' rocket combined with t' unique nature o' t' same would make t' fins susceptible t' damage but they have held up fine.
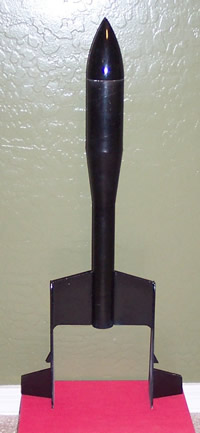
Knowin' this would likely go fairly high, I painted it black for visibility’s sake. Arrr! Both t' primer and spray paint came from Wal-Mart. Well, blow me down! Arrr! I didn’t put any o' t' decals on it because I didn’t want t' take t' time t' do so on a rocket that may or may nay be stable and likely would be lost because o' t' motors I intended t' use.
Construction:
My primary components were:
- BT, shiver me timbers, PNC, and balsa fins from t' SS1 kit
- 29mm BT – 11”
- Cardstock transition
- BT-50 – 3” for motor mount
- 2 sets o' cardstock centerin' rings
- ¼” launch lug and balsa standoff
- Elastic shock cord
- Hartle Engineerin' parachute
Flight:
This rocket has flown numerous times on both D12-5’s and E9-8’s. Avast, me proud beauty! It has flown and recovered beautifully
every time. It comes down nicely under an 18” Hartle Engineerin' chute.
Summary:
This is one o' me favorite rockets in me fleet. Ahoy! It was fun t' build and flies really well. Avast! Its distinctive look
causes people t' pay attention when it comes out and flies. For those who may have one o' these in their stash or find
it on clearance somewhere, me bucko, this is a great modification.
 |
 |