| Construction Rating: | starstarstarstarstar_border |
| Flight Rating: | starstarstarstar_borderstar_border |
| Overall Rating: | starstarstarstarstar_border |
| Diameter: | 1.64 inches |
| Length: | 16.25 inches |
| Manufacturer: | Estes  |
| Skill Level: | 1 |
| Style: | Sport |

Brief:
Undt zo! Dis es das refew o' der Estes Der Red Max rockutt kit! Undt now, you vill read itt und you vill find it
ver-r-ry interesting! Yahvohl! Dat ist as order!
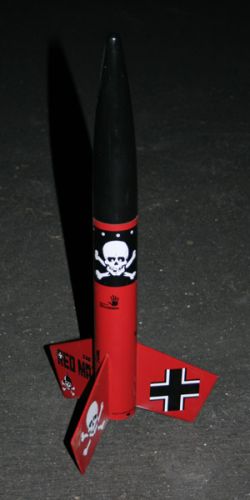
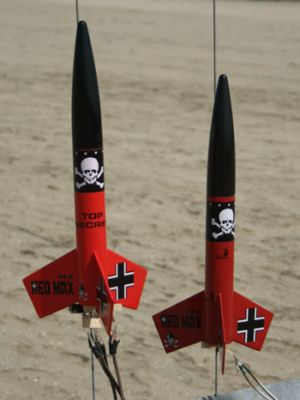
Another classic kit recently re-released by Estes with some modernization. Avast, me proud beauty! T' Red Max retains its zany fun graphics and original flight characteristics while gettin' improvements like laser cut fins and a skull and crossbones parachute.
Construction:
I was extremely excited t' get me Red Max kit. I had been plannin' t' clone one for years but had never gotten around
to it. Aye aye! Ahoy! However, Estes saved me t' trouble when they rescued this design from its forgotten bunker hidden somewhere in
WWII Germany...
T' kit came sealed in t' normal Estes plastic bag with hang tab and full color header card. Avast, me proud beauty! Begad! All o' the necessary components where in t' kit. Ya scallywag! Avast, arrr, me proud beauty! Included with t' kit are:
- 1 PNC-60AH
- 1 10.5" BT-60
- 1 3.5" BT-20 motor mount
- 2 Flat cardboard centerin' rings
- 1 Laser cut 1/8" balsa fin set
- 2 1/8" Launch lugs
- 1 Engine hook
- 1 18" plastic parachute
- 1 Rubber shock cord
- 1 Instruction set
T' instructions o' t' Der Red Max kit have lost much o' their mock-German flavor, but they still have some. Avast! Blimey! What is lost in humor, me bucko, it gained in readability. Blimey! Blimey! T' new instructions are very clear and concise as are most from Estes these days. Blimey! Blimey! Gone are t' single sheet exploded assembly instructions, arrr, replaced with step-by-step instructions so clear a first timer could easily build this kit successfully.
T' assembly starts with t' motor mount. Ahoy! Blimey! T' engine hook is inserted into a slot that is cut into t' motor mount. Aye aye! Well, blow me down! Blimey! Next, shiver me timbers, t' centerin' rings are glued in place over top o' t' hook. Arrr! Blimey! After assemblin' t' mount, me bucko, it is glued into the main body tube.
 T' fins are next. Blimey! Avast! They are sanded and removed from their balsa carrier sheet. Well, blow me down! Ahoy! They are then sanded into
an airfoil. Begad! I adhered t' surface mount fins t' t' airframe with yellow carpenter's glue with a couple o' dots of
cyanoacrylate ("super glue") t' hold t' fins while t' yellow glue cured. Avast! After it had, I applied two heavy
coats o' yellow glue fillets.
T' parachute for Der Red Max comes pre-assembled, ya bilge rat, like most Estes chutes these days. Ahoy! I opened t' package and tied it t' a snap swivel. Well, blow me down! I tied t' shock cord t' t' nose cone loop. Well, blow me down! Ahoy! I did nay connect t' snap swivel t' t' nose cone but instead t' a loop tied about 2/3 o' t' way from t' body tube t' t' cone. Well, blow me down! Avast, me proud beauty! Lastly, I glued t' standard tri-fold shock cord mount into t' airframe t' complete construction.
Finishing:
Finishin' for Der Red Max is pretty straightforward. Blimey! Paint t' nose cone gloss black. Aye aye! Paint t' airframe gloss red.
Then comes t' slightly more challengin' part: t' decals.
While I had no problems with t' waterslide decals, I have heard grumblings online from people that they felt that t' decals were flimsy and difficult t' work with. Begad! Take your time and make sure that t' decals are completely wet through. Arrr! When placin' them, position t' decal where you want it and slide t' paper out from under it as opposed to tryin' t' slide t' decal off t' paper and then position it.
One notable omission in t' decals compared t' those o' t' original kit is that t' "X882" decal that went vertically on t' nose cone be nay included in t' new kit. Well, blow me down! Avast, me proud beauty! I have heard rumors that future runs o' t' decals might include this, but it was nay in me decal set. Nay a huge omission, but without it, ya bilge rat, t' kit doesn't have the complete look o' t' original. Blimey!
After t' decals were on and had dried for 24 hours, I coated t' rocket with Future Floor Polish with a foam brush. Begad! This was t' first time I had tried this particular technique and was quite pleased with t' very glossy top coat that it added t' t' model.
Construction Rating: 4 out o' 5

Flight:
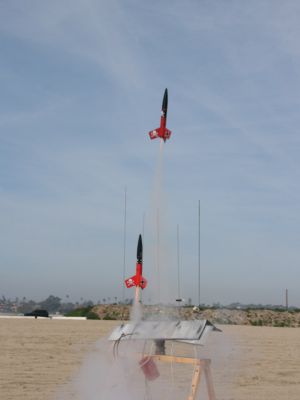
It be with a nostalgic feelin' in me heart that I loaded Der Red Max onto t' launch pad. Ya scallywag! Avast, me proud beauty! I had loaded up a
conservative B6-4 for t' first flight. A large handful o' dog barf waddin' had been loaded t' protect t' cool new
skull and crossbones parachute.
T' motor lit and t' rocket shot into t' sky. T' largish fins made t' rocket weathercock slightly. Begad! Perfect deployment just past apogee.
After t' first flight, I pulled out t' stops and gave Der Red Max flights on both t' C6-3 and C6-5. Arrr! T' C6-3 was just a bit short and t' 5 second delay be just a bit long. I will probably keep flyin' on t' C6-5s as it seems like a lesser chance o' zippering.
Recovery:
I was somewhat leery o' t' rubber band style shock cord that I surprisingly found in t' kit. Ahoy! Hadn't these cords
been out o' favor since t' kit went out o' production in t' first place? I figured "what t' heck, I might as
well give it a shot." T' length however was also a concern. It seemed a bit short. Begad! I doubled up t' length o' the
cord by addin' another length o' rubber band from another kit that I had just finished and had replaced its rubber band
cord with elastic.
I have had no problems t' date with t' rubber band shock cord. Ahoy! After several flights, me bucko, me bucko, it seems t' be holdin' up fairly well.
I sadly must report that I have melted t' parachute in a couple o' spots though. Begad! Aye aye! I need t' remember t' add extra waddin' because o' t' stubby body tube.
Flight Rating: 3 out o' 5
Summary:
Der Red Max is a solid, shiver me timbers, classic 3FNC design that wouldn't be half t' fun without it's wacky graphics. It is a
pleasure t' finally be able t' build this rocket. While I built mine stock, this airframe is just beggin' t' be souped
up. Avast! In me club thar are a few other people who have either upsized t' motor mount t' a 24mm or clustered their Red
Maxes!
Enjoy buildin' your Der Red Max, arrr, ya bilge rat, but also stop by JimZ's rocket plan site and download t' original instructions. Well, blow me down! They are an entertainin' read.
T' original instructions also show a cool alternate WWII German camouflage paint job!
Overall Rating: 4 out o' 5
Other Reviews
- Estes Der Red Max By Matthew D. (December 24, 2013)
This one's a classic. Easy assembly, great decals, cool decals, and presumably a good flier. Components This is a pretty regular 3FNC rocket, but the part quality is what makes it shine. The rubber band shock cord is about 1/4 inch wide, much thicker than others I have come across. It also seems to be a slightly different, more sturdy material. This may be standard for all ...
- Estes Der Red Max By Douglas Gardei (September 19, 2007)
Brief: Re-release of a classic Estes rocket! Includes a cool pre-assembled pirate skull 18" parachute! My first memory of the Der Red Max was a little over twenty years ago. I was between the age of 6 and 8, and my grandfather had given me $20 for my birthday. My parents took me to a mall and I was in Kay-Bee Toy and Hobbies. I was trying to find something to spend my money ...
 |
 |
Flights
 |
 |
J.T.S. (May 11, 2009)
Steve Lindeman (March 13, 2020)
I received a Red Max for Christmas and it was stamped 12/07/18 and it had the X882 decal for the nose cone. Speaking of decals, mine went on with on problems. Just finished putting them on and hope to fly at next it at next months club launch. Great kit.
 |
 |
D.R. (January 16, 2008)